We're starting on enclosure #1 for our daughter's dragon. We've had her about a month and she's gone from 6.5" to 9" so we definitely need to get this built. She's currently in a 20L but her new enclosure will be 4x2x2 with a 3' UV and two spotlights - one for basking and one for ceramic heat in the winter.
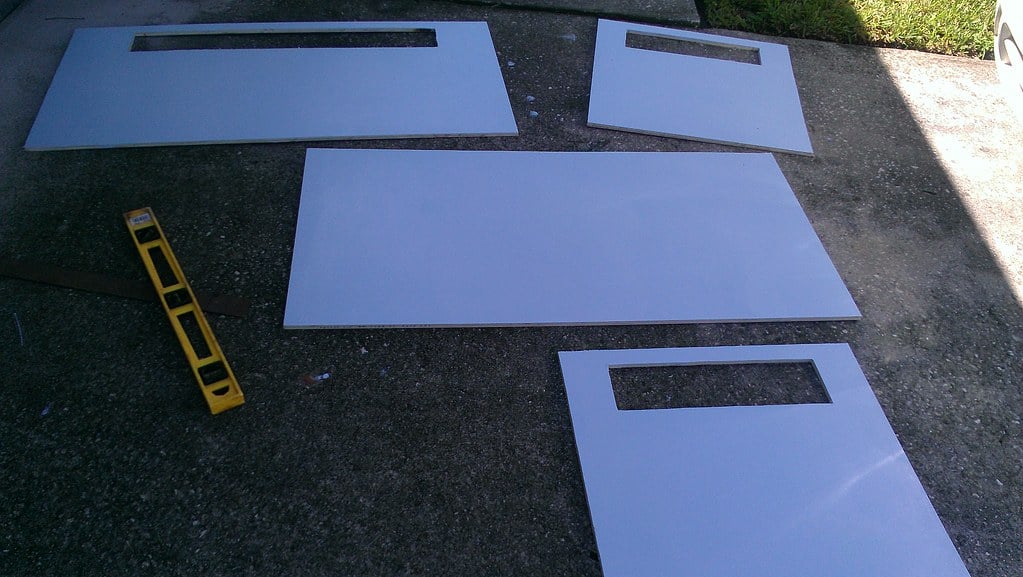
We got a sheet of Blondewood from Lowe's for $32 and cut out all the pieces. It's nice how it works out to use exactly a full sheet. We've also used a jigsaw to cut the vents out. We're actually using pvc gutter vents because we couldn't find circle vents and the gutter vents were really cheap.
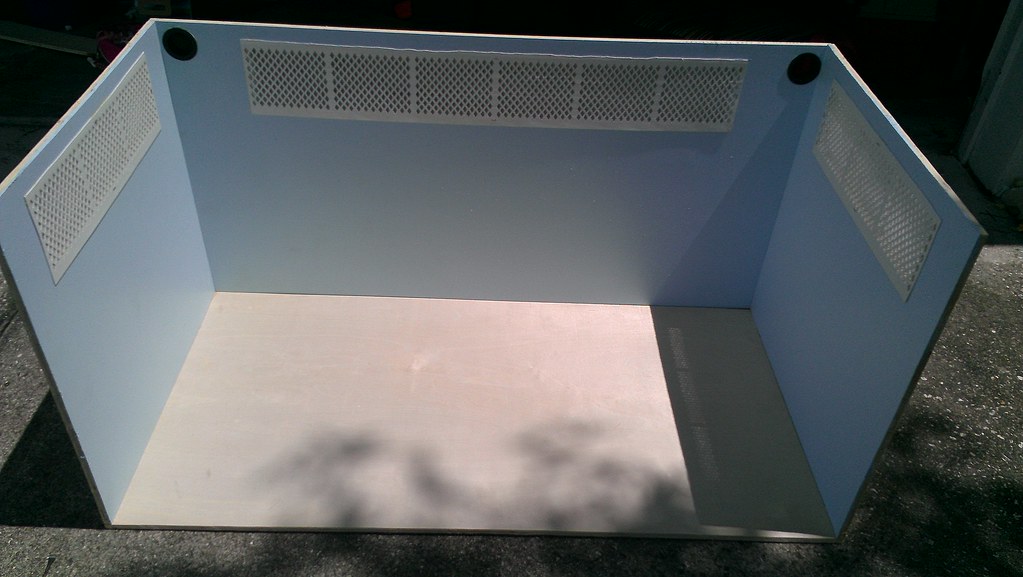
I painted all the interior pieces except the bottom with two coats of sky blue latex. The bottom isn't shown in the picture.
Here we have the back and sides attached to the bottom, the vents on, and the grommets in.
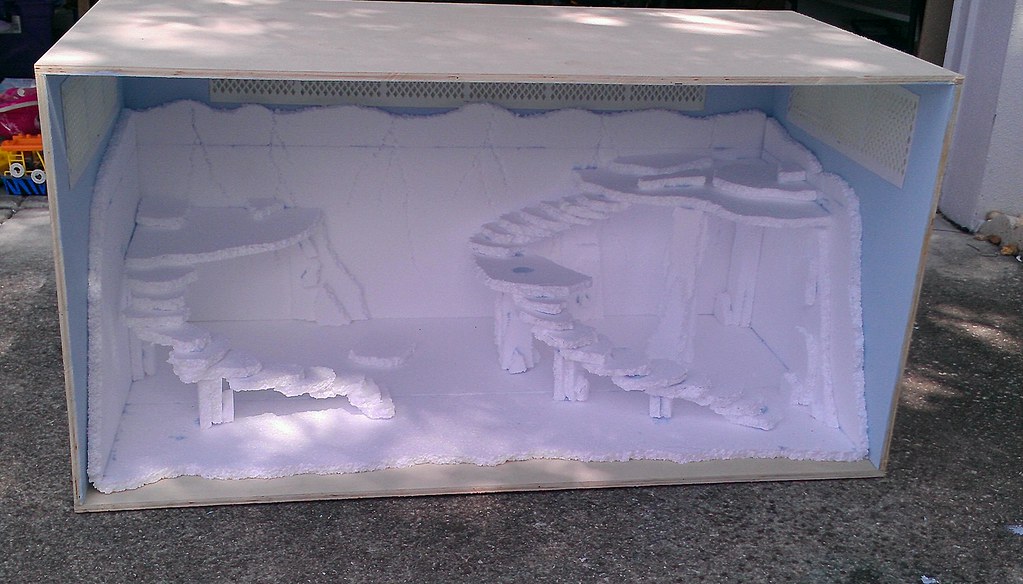
Starting on the rock wall. We're using expanded poly sheets from Lowe's - $7.50 for 6 sheets, 13.5" by 48".
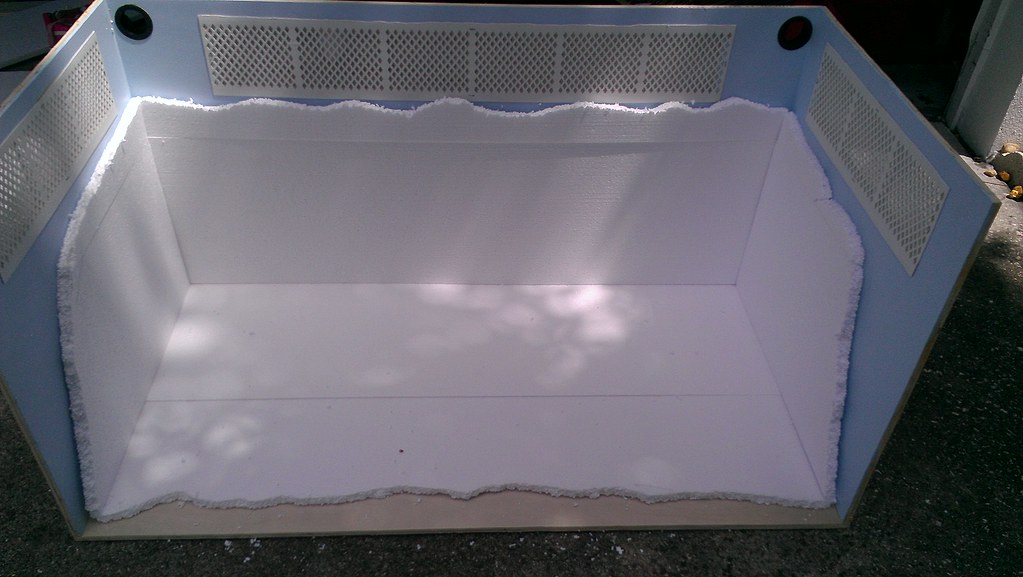
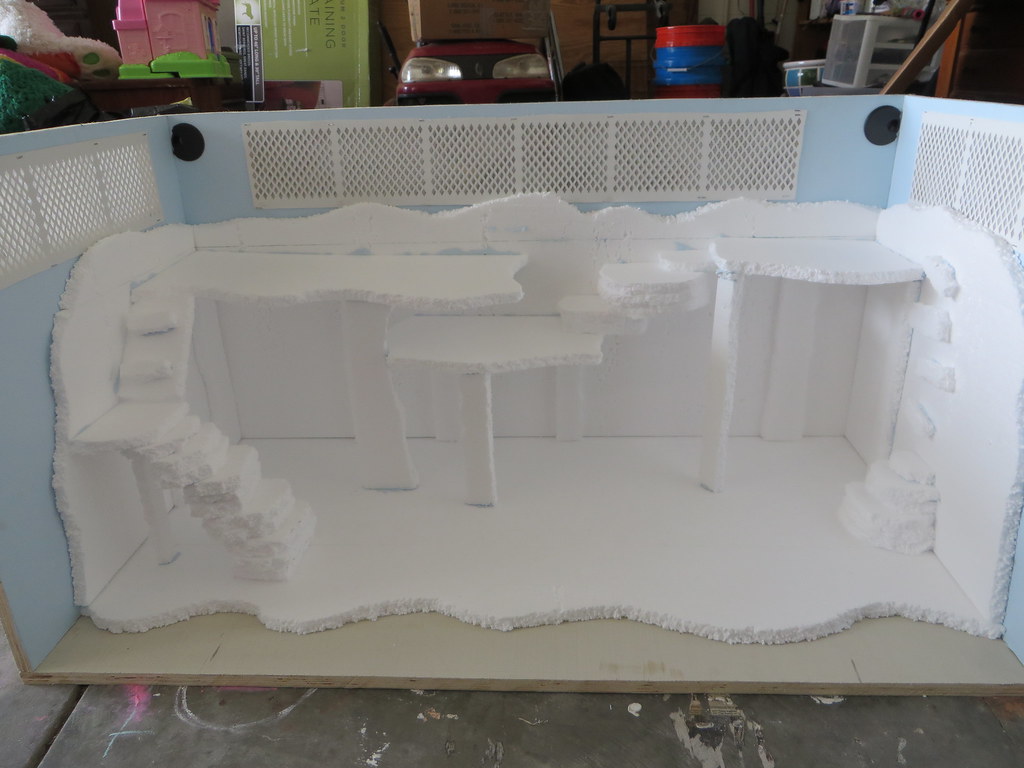
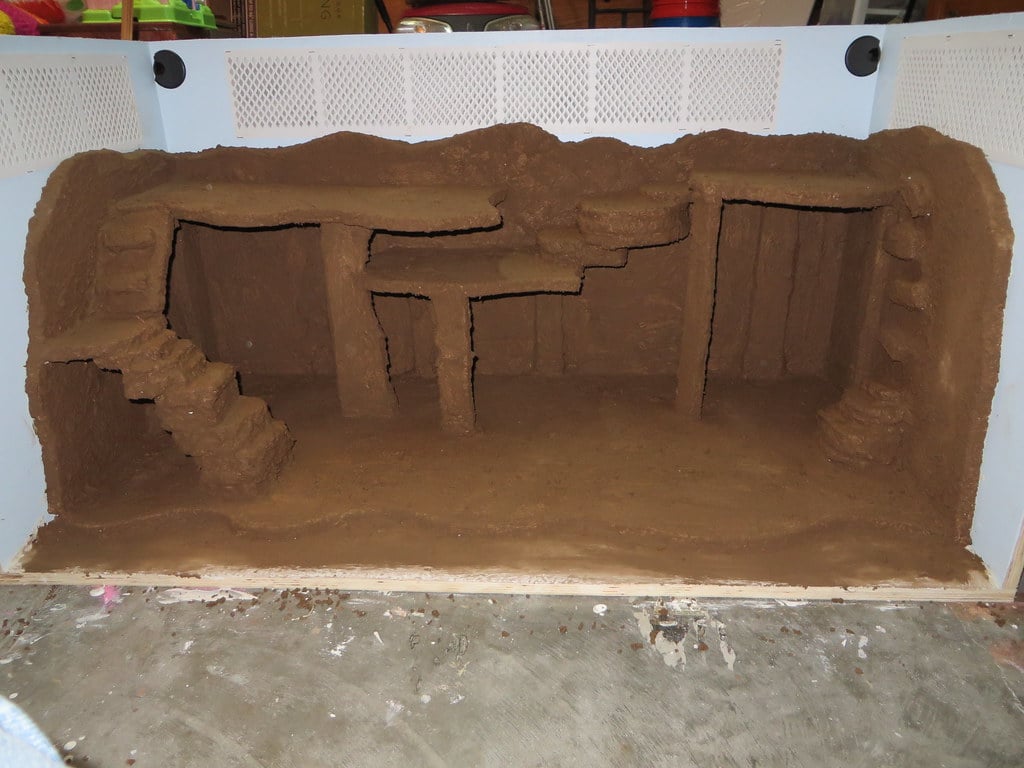
All the foam work is finished and drying.

We laid the top on to get the full effect.
We're calling it a day now. The glue will dry overnight and tomorrow I start grouting.
---------
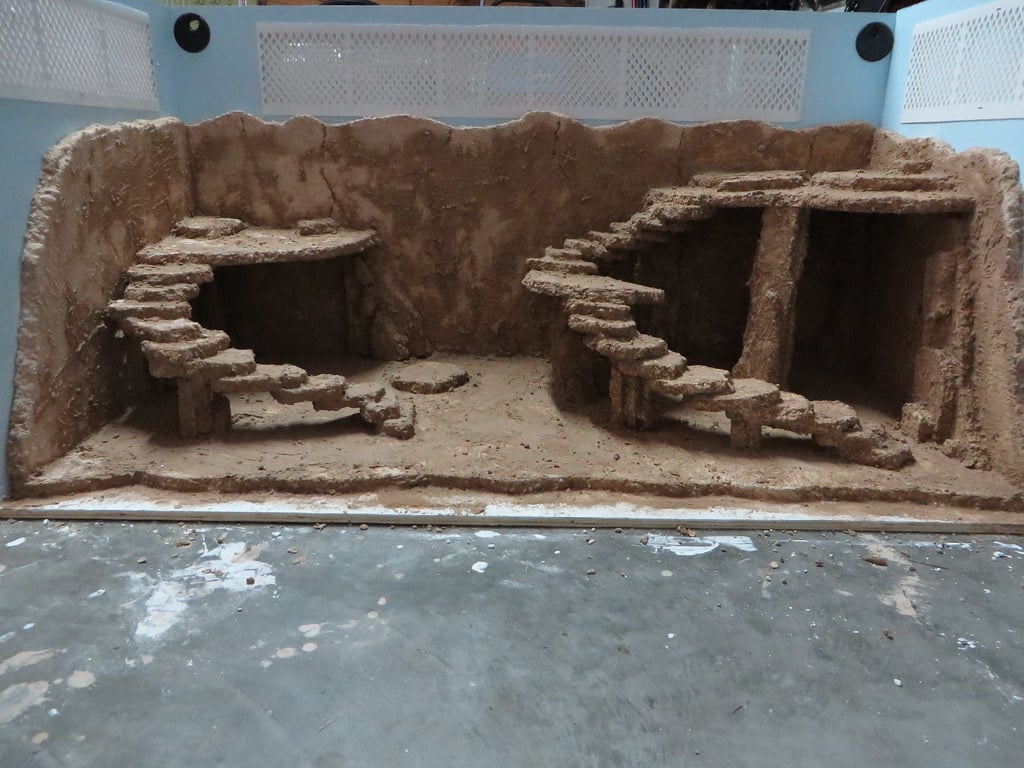
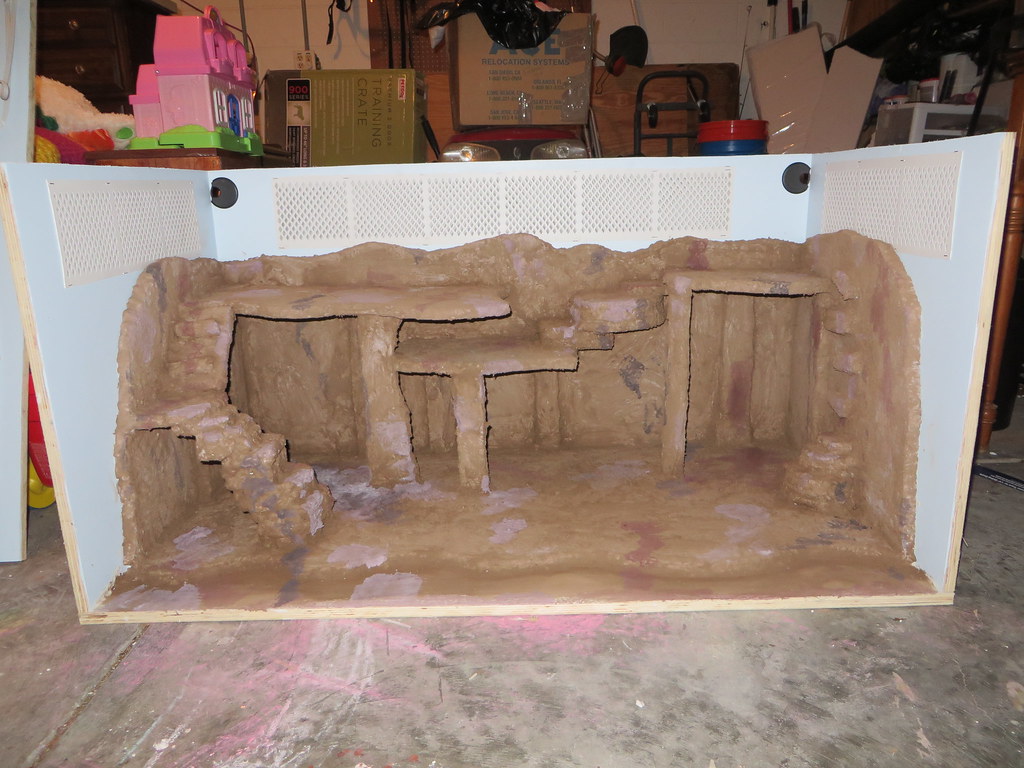
Today I grouted. I did two coats of non sanded white, then a thick coat of light brown. The brown coat is drying now.
-----------
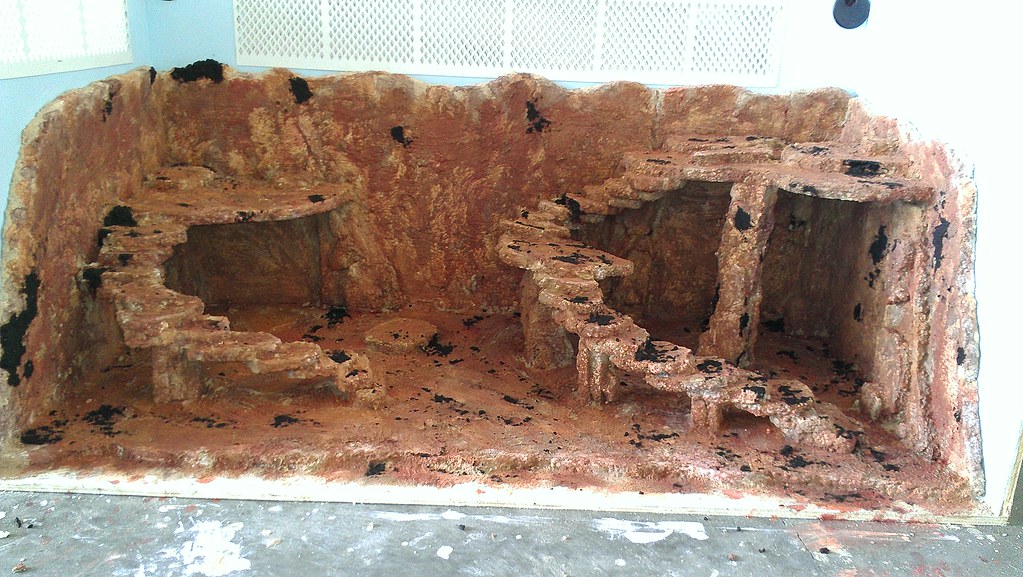
Yesterday I painted:
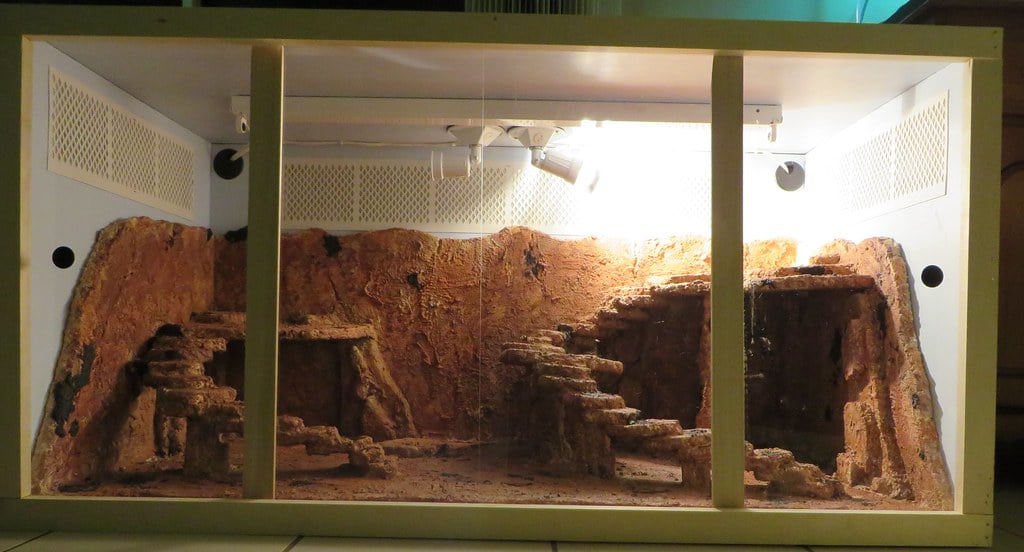
Today I sealed it. I was worried I sealed it would smooth that nice texture to wear down her nails, but it still really has some nice texture. Then we put on the lights, doors, knobs, and trim. Done!! Waiting for UV bulb and hotter basking light, and it has to air out a bit.
-------------------------------------------------
We ended up changing the doors because the wood glue didn't hold after a while. So I got thicker plexi from Lowe's and we put that in instead.
-----------------------
We are now building enclosure #2 for our dragon. Yesterday we assembled the back, bottom, and sides and today we did the foam. Tomorrow I grout this one.
--------------------
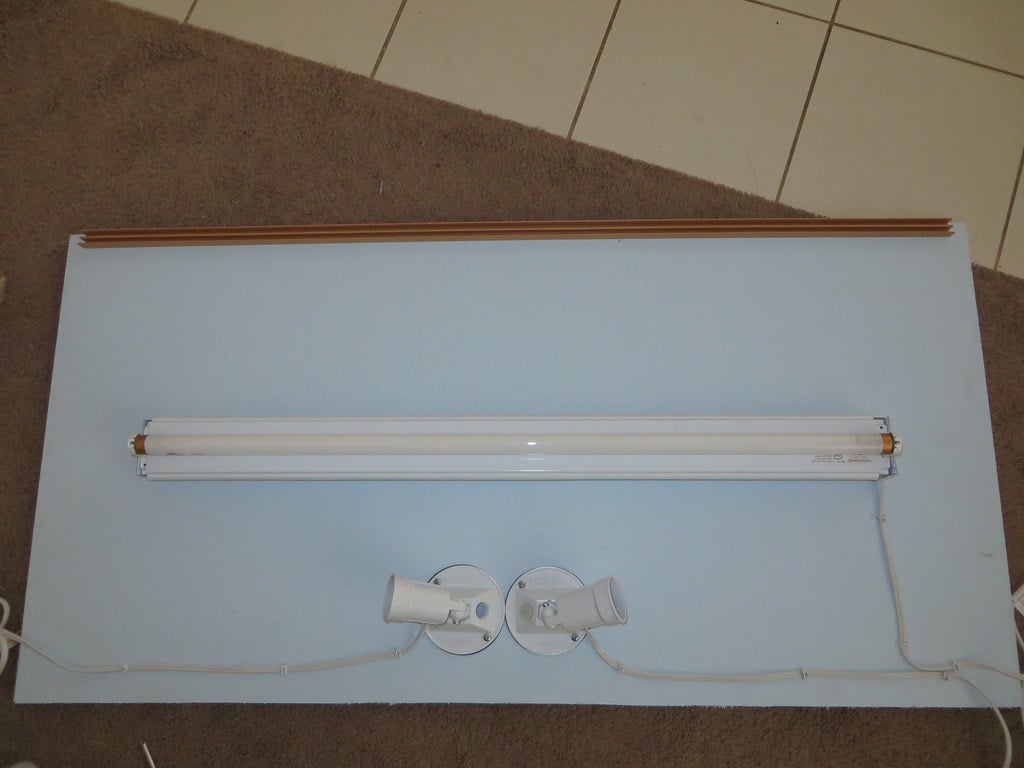
I thought I'd share a picture showing the light placement.
Grouted:
--------------------------------------
Painted:
I sealed it today too.
We got a sheet of Blondewood from Lowe's for $32 and cut out all the pieces. It's nice how it works out to use exactly a full sheet. We've also used a jigsaw to cut the vents out. We're actually using pvc gutter vents because we couldn't find circle vents and the gutter vents were really cheap.
I painted all the interior pieces except the bottom with two coats of sky blue latex. The bottom isn't shown in the picture.
Here we have the back and sides attached to the bottom, the vents on, and the grommets in.
Starting on the rock wall. We're using expanded poly sheets from Lowe's - $7.50 for 6 sheets, 13.5" by 48".
All the foam work is finished and drying.
We laid the top on to get the full effect.
We're calling it a day now. The glue will dry overnight and tomorrow I start grouting.
---------
Today I grouted. I did two coats of non sanded white, then a thick coat of light brown. The brown coat is drying now.
-----------
Yesterday I painted:
Today I sealed it. I was worried I sealed it would smooth that nice texture to wear down her nails, but it still really has some nice texture. Then we put on the lights, doors, knobs, and trim. Done!! Waiting for UV bulb and hotter basking light, and it has to air out a bit.
-------------------------------------------------
We ended up changing the doors because the wood glue didn't hold after a while. So I got thicker plexi from Lowe's and we put that in instead.
-----------------------
We are now building enclosure #2 for our dragon. Yesterday we assembled the back, bottom, and sides and today we did the foam. Tomorrow I grout this one.
--------------------
I thought I'd share a picture showing the light placement.
Grouted:
--------------------------------------
Painted:
I sealed it today too.
") What are your plans for the front?
What are your plans for the front?
