Egyptian themed viv progress

Status
Not open for further replies.
Hello everyone,

I’m currently working on a new setup for a new, yet to buy, beardie :)
Here is the old setup: viewtopic.php?f=75&t=183891

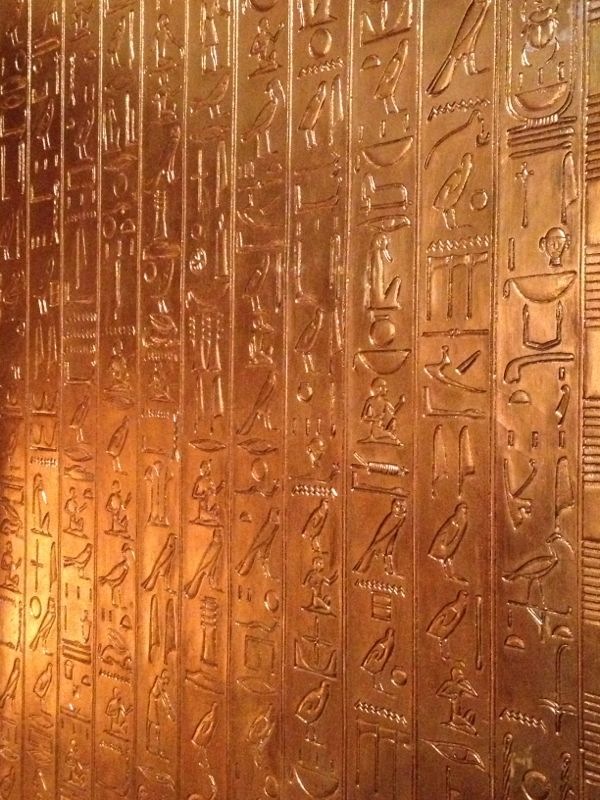
I like a theme-viv, so I started thinking about what to do, I ended up with an Egyptian theme.
This is the progress so far.

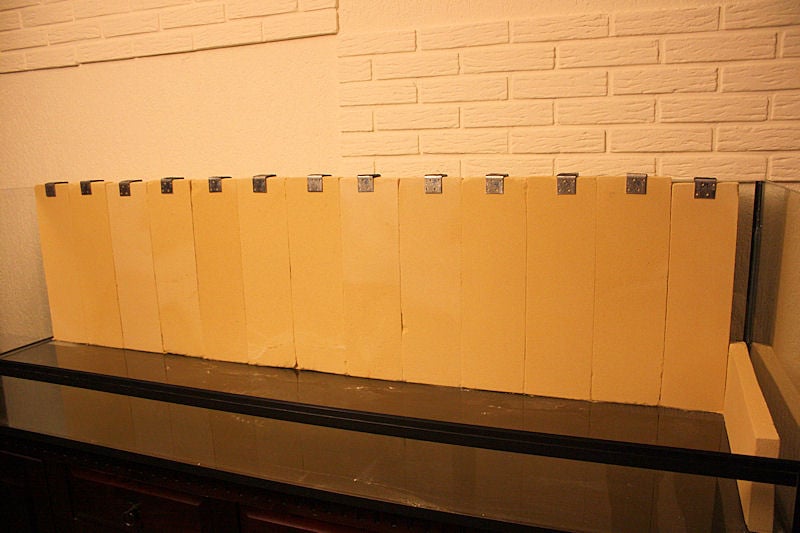
The viv is 200x60x50cm and is build out of 8 mm glass all around, with 4 slidingglasses of 4mm thick.
I've drilled about 500 holes in the wooden lid, for ventilation.

Pictures!

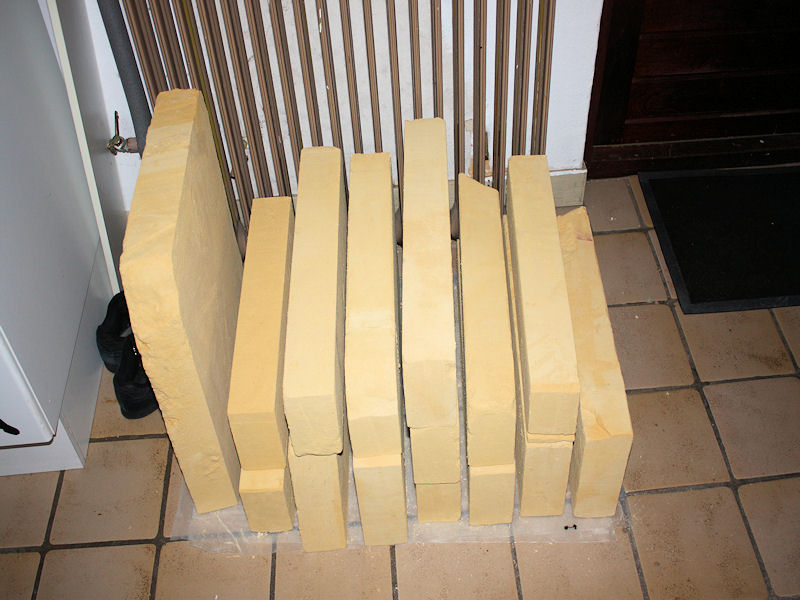
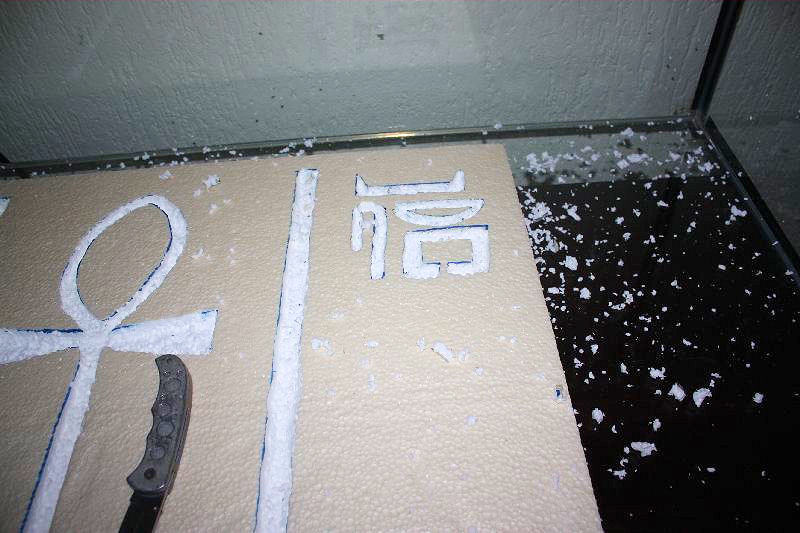
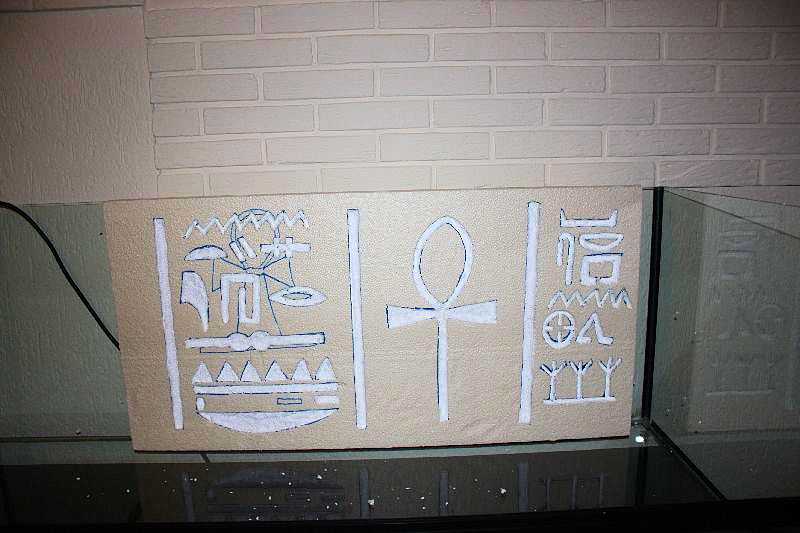
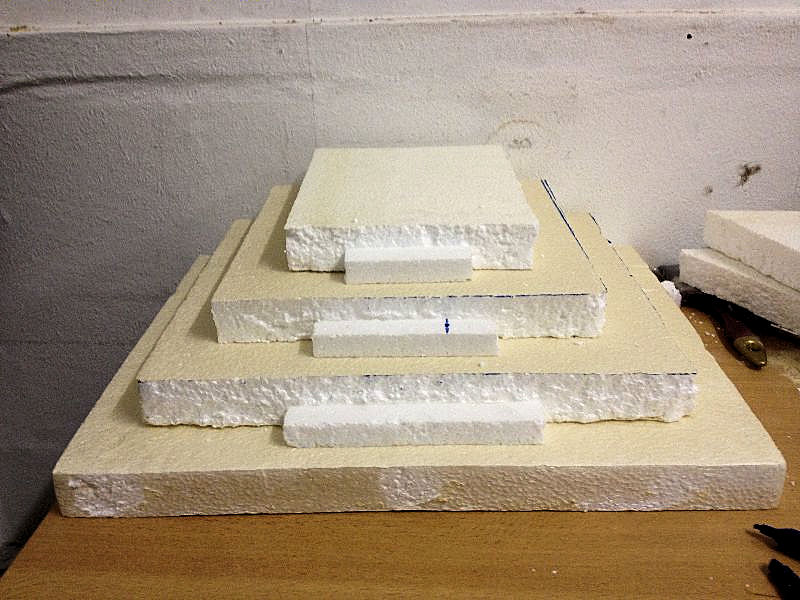
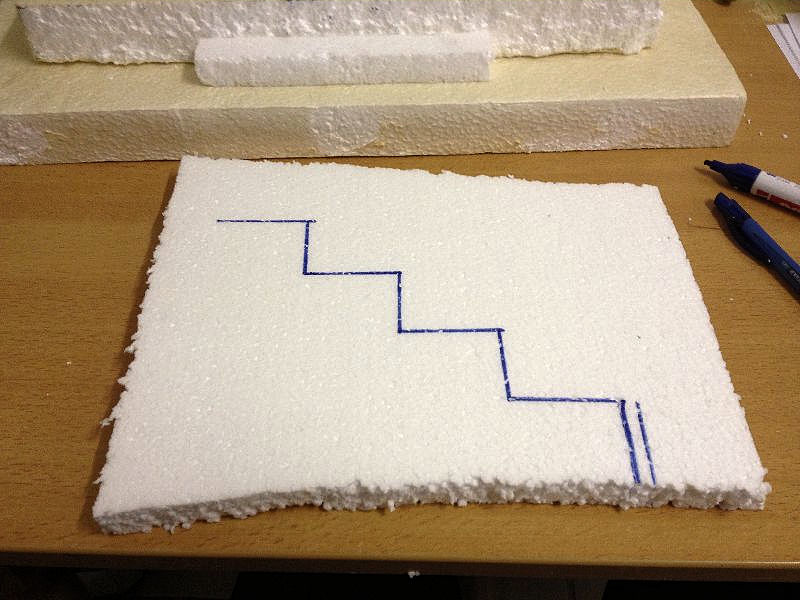
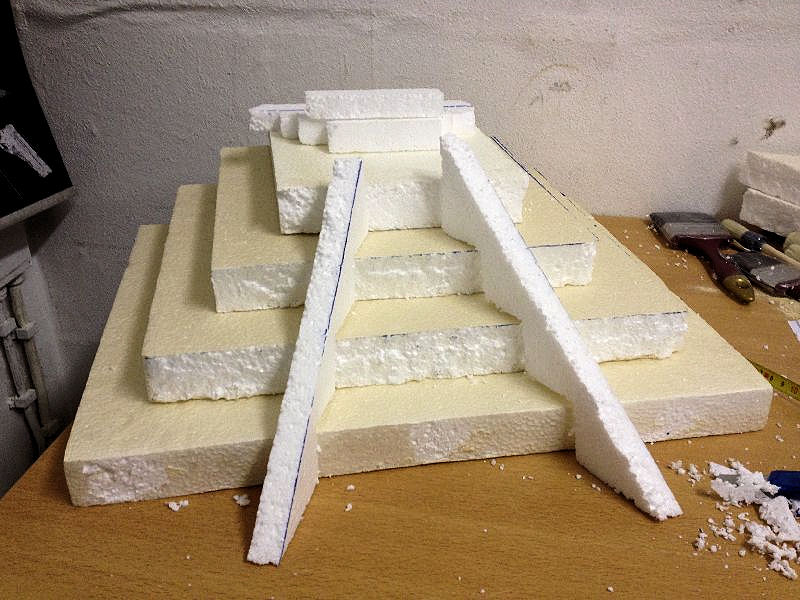
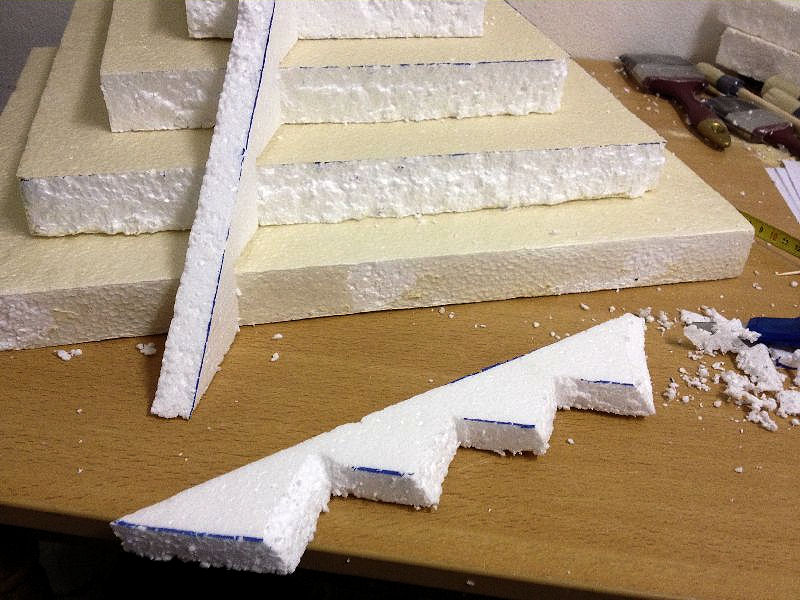
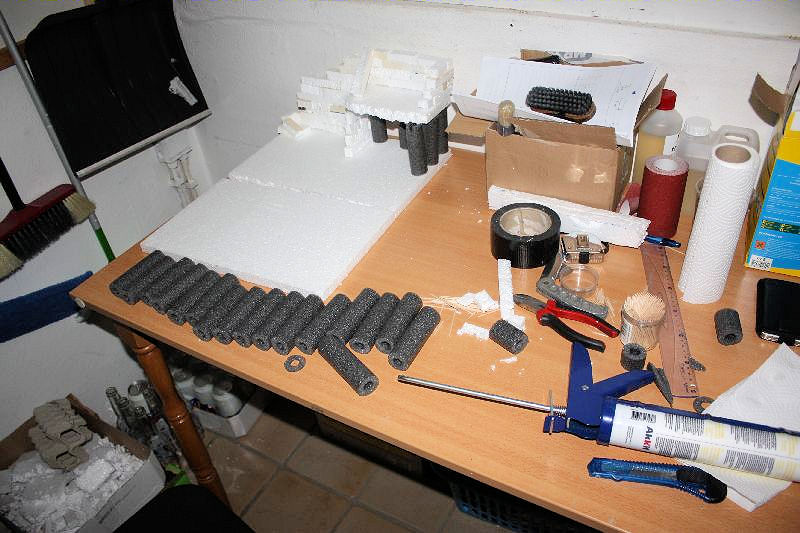
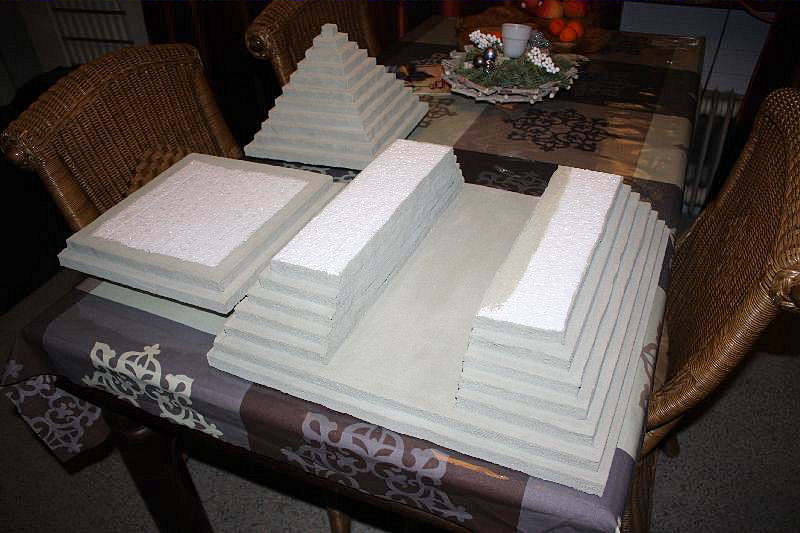
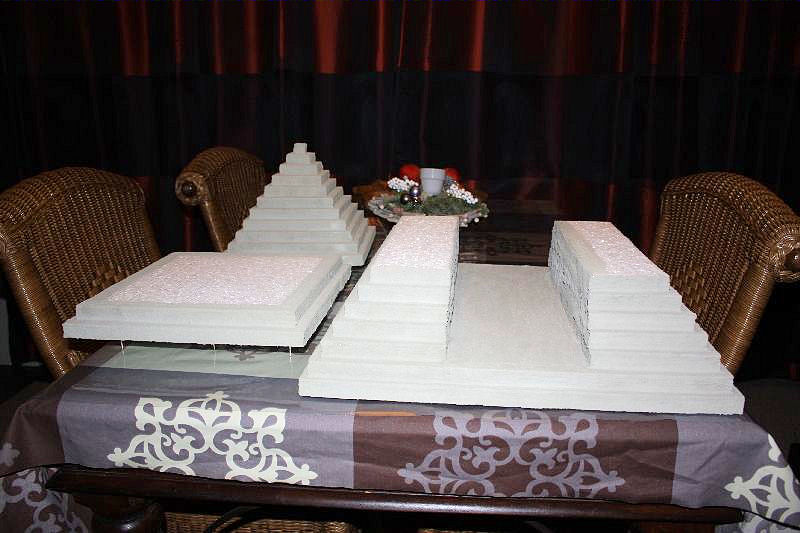
Fase 1: Working on the styrofoam.
First I used a knife, later I borrowed a soldering gun, that is 10 times easier!

1.JPG


2.JPG


3.JPG


4.JPG


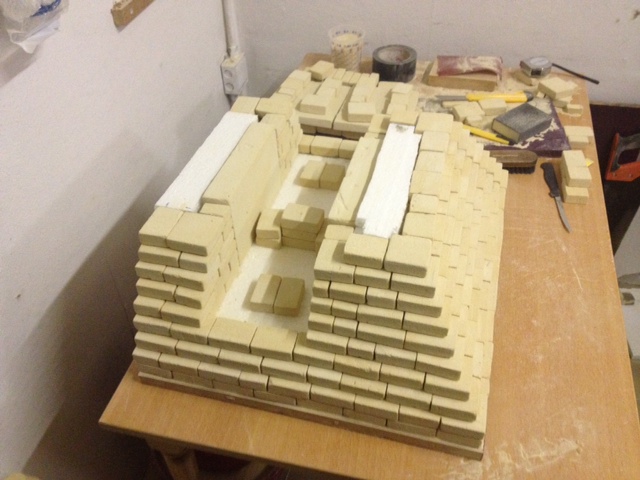
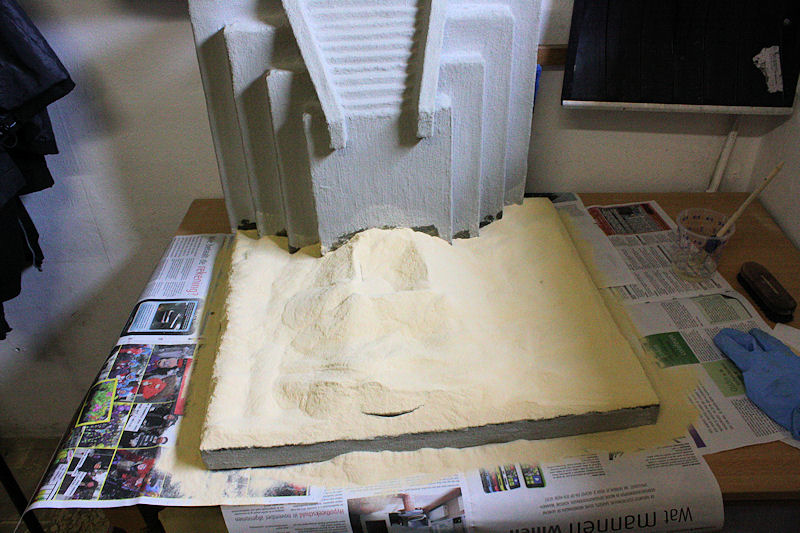
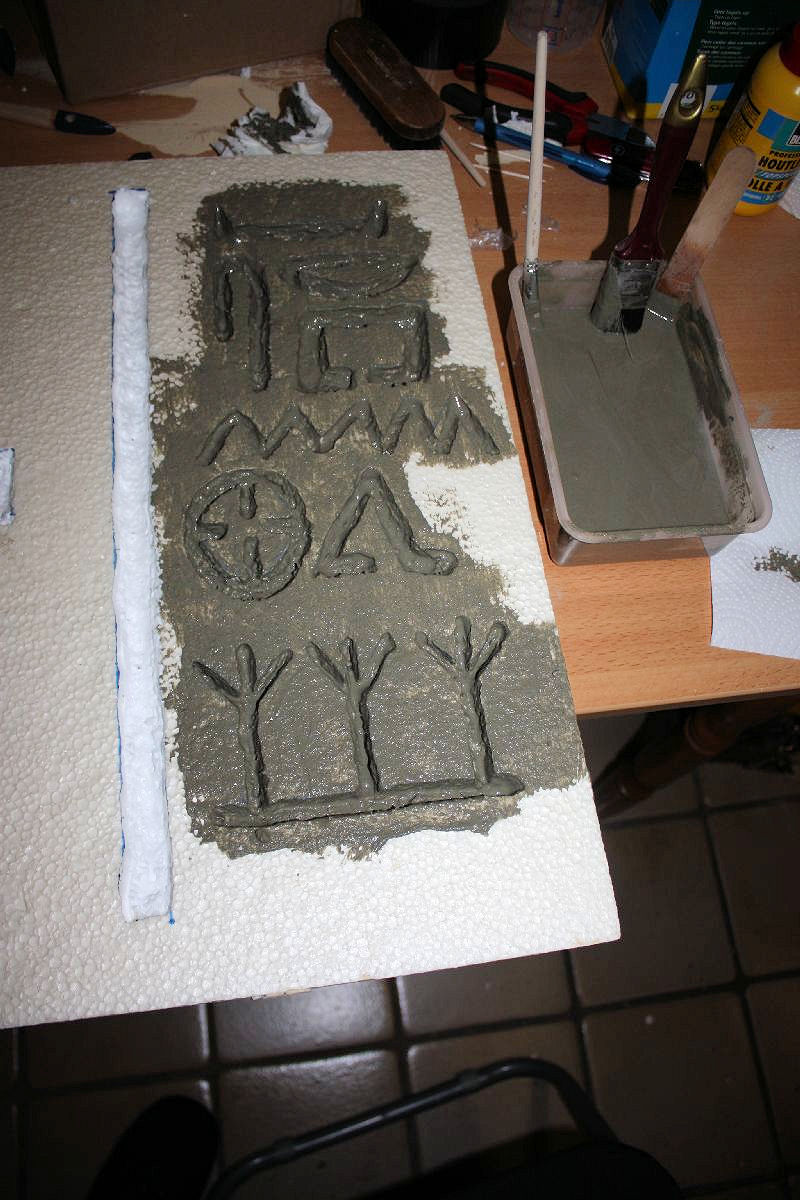
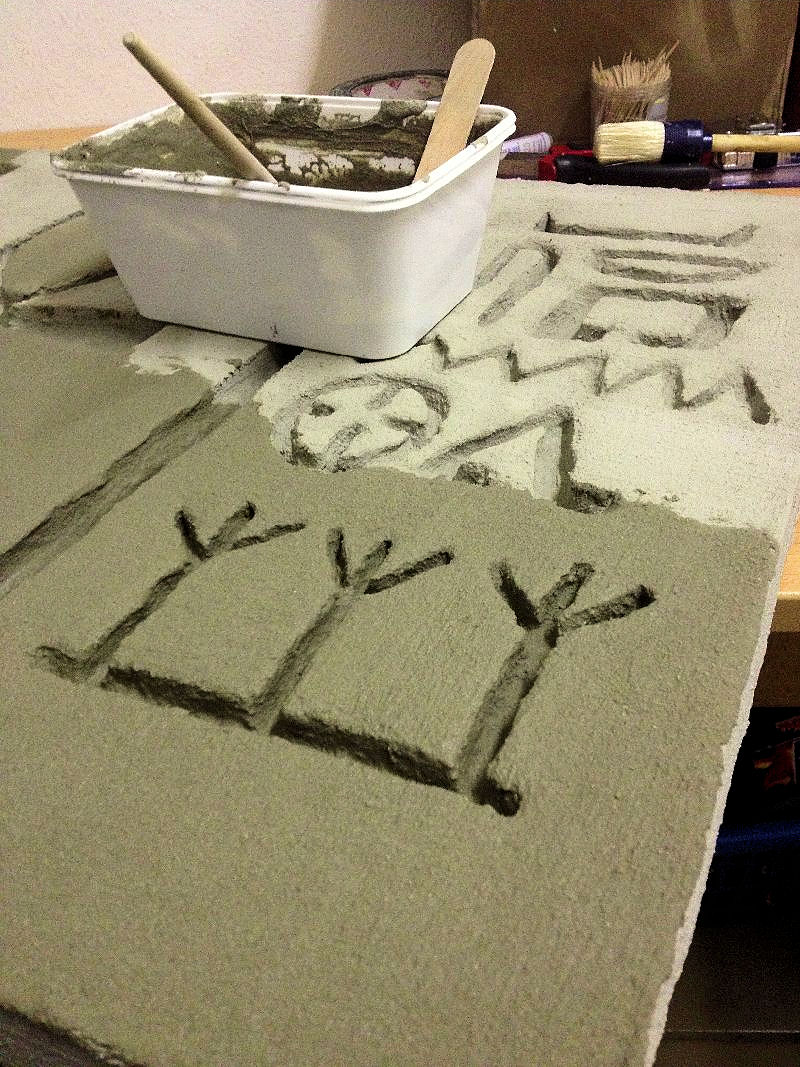
Fase 2: The tile adhesive ( grout ). The first layer is always the hardest…

5.JPG


6.JPG


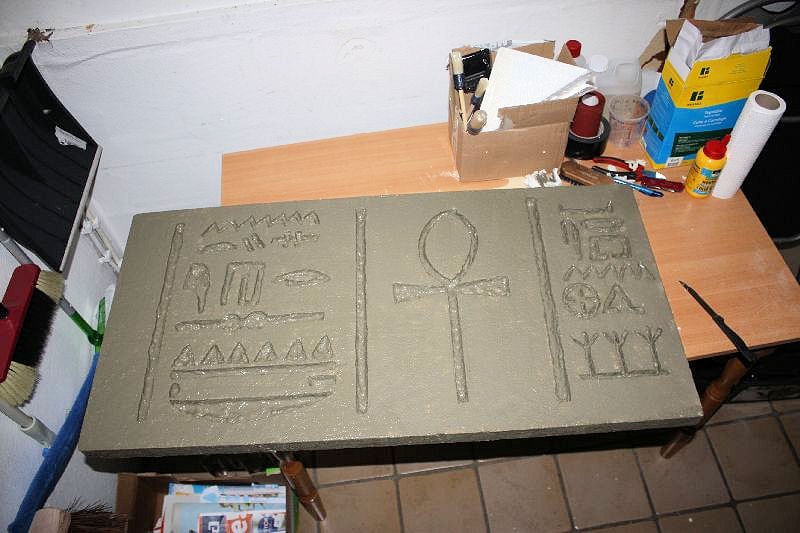
3rd layer here, all the nooks take a lot of time, but it’s still fun.

7.JPG


One layer left before finished.

8.JPG


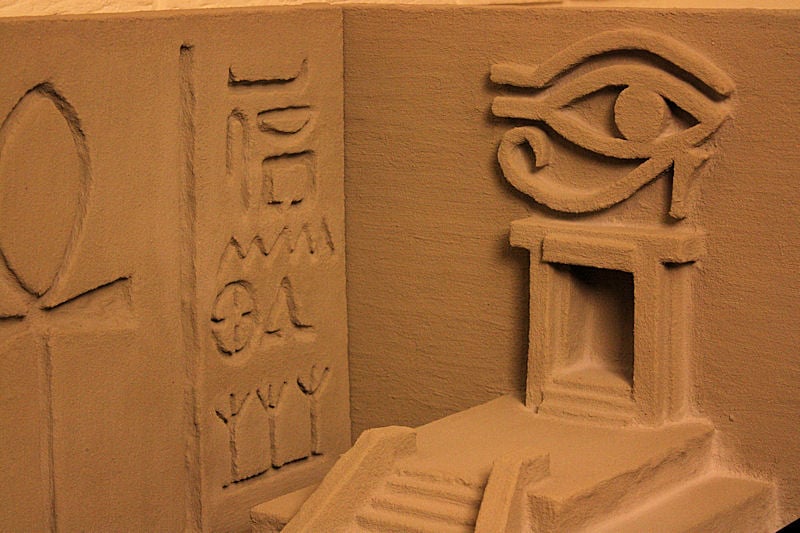
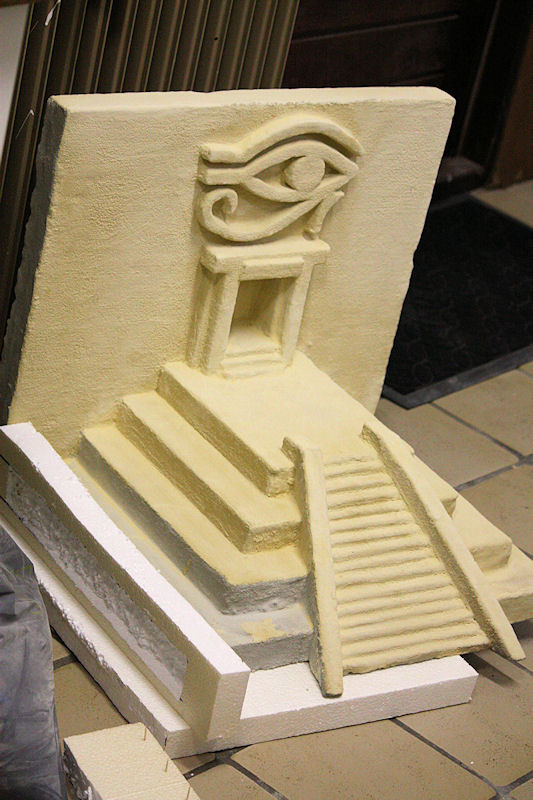
Altar:I decided to add a sacrificial altar, wich will function as a sunspot.

9.JPG


Trial and error will do the trick.

10.JPG


11.JPG


12.JPG


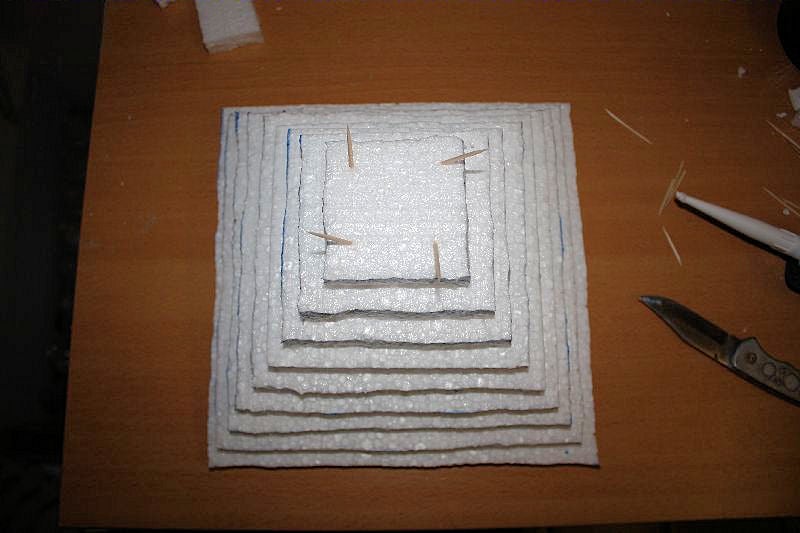
Luckily I bought about 1000 toothpicks recently, they come in handy now!
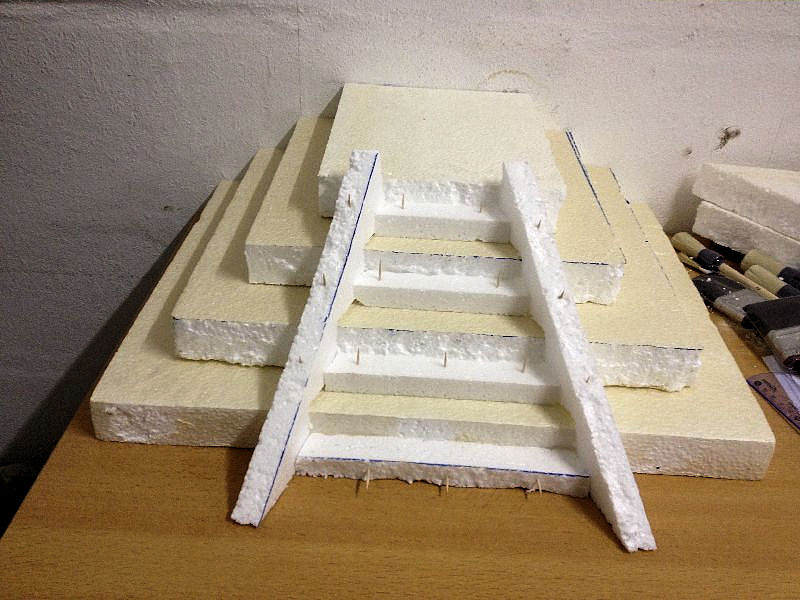
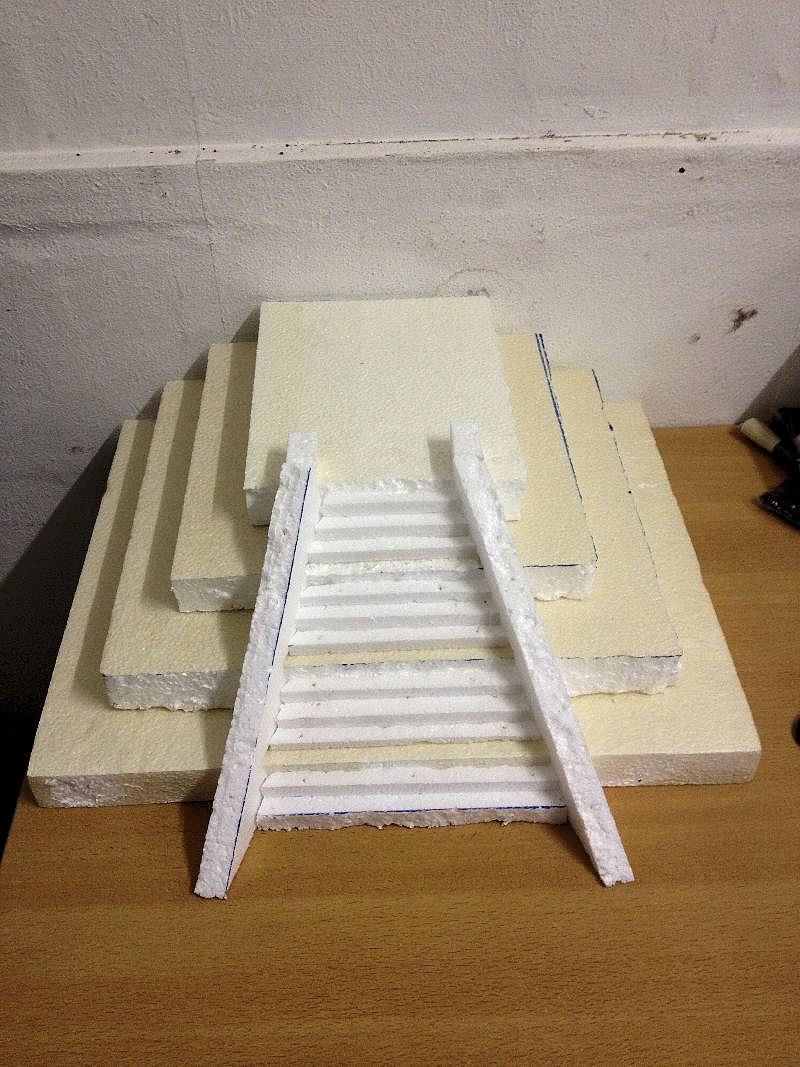
13.JPG


And the stairs:

14.JPG


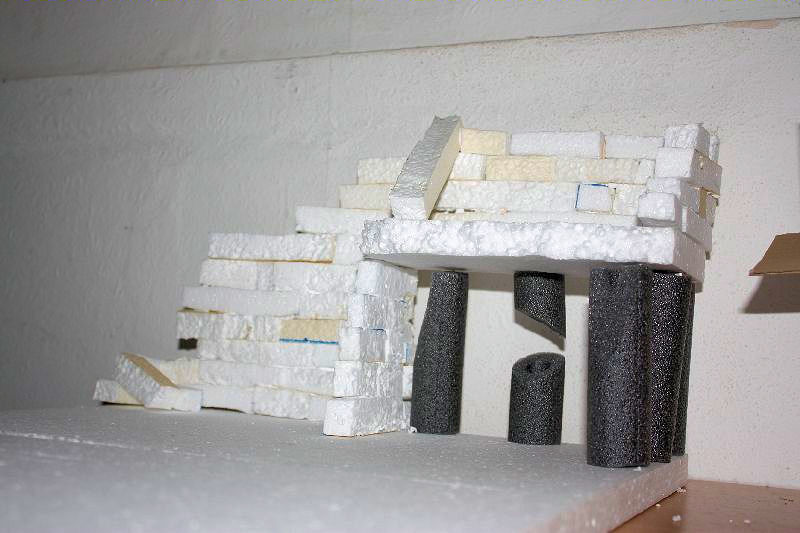
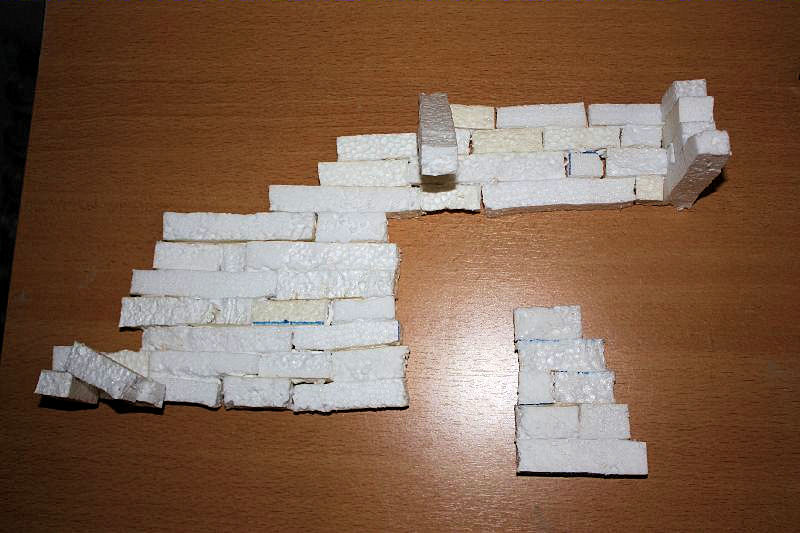
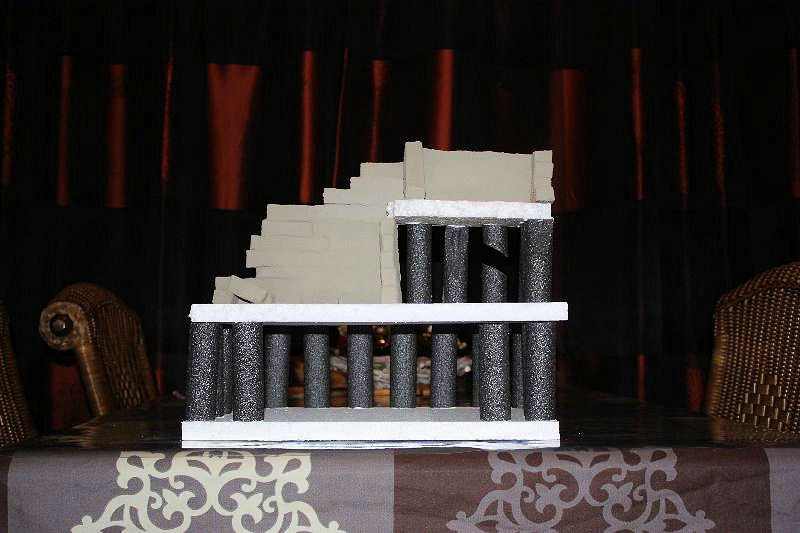
Hidingplace ruin: I’m not sure wether I’m gonna use this, because it didn’t turn out the way I thought it would, but it’s supposed to be a hiding place ruin.

15.JPG


16.JPG


17.JPG


18.JPG


A lot of grout… I almost already used 2 bags of 5 KG each.

19.JPG


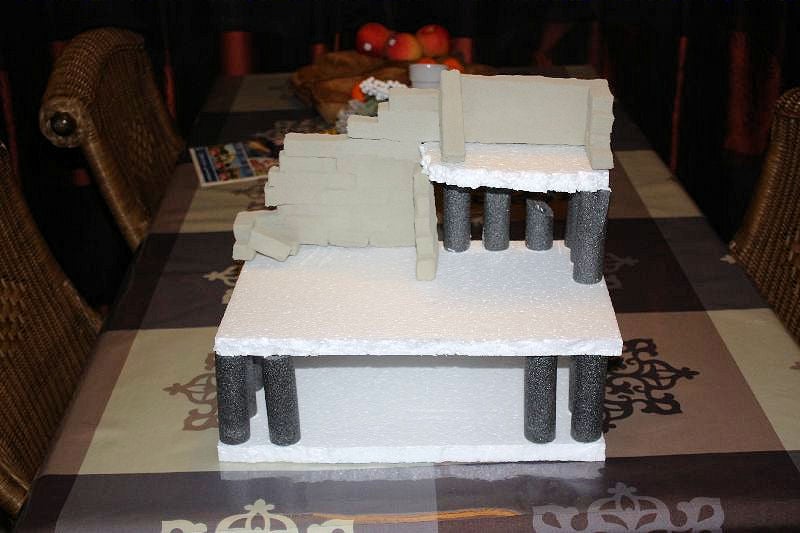
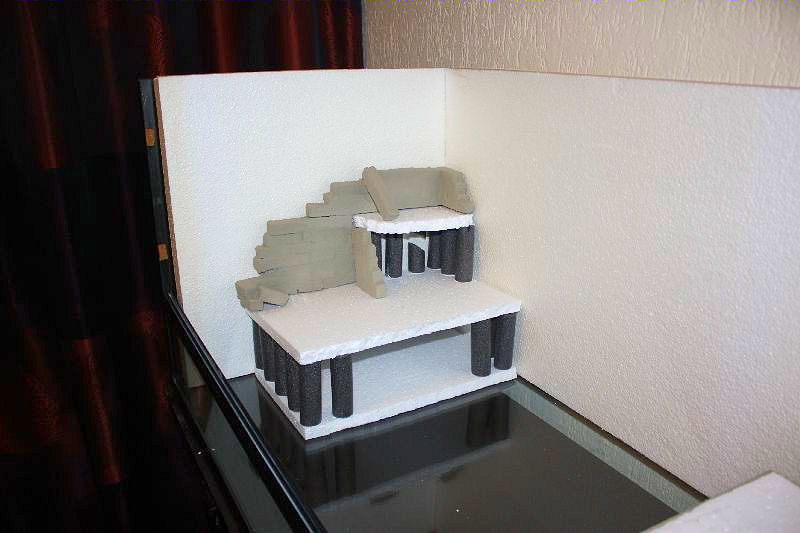
Everything together, still not sure… The stairs/ramp is still missing, not yet clear on what to do here.

20.JPG


21.JPG


22.JPG


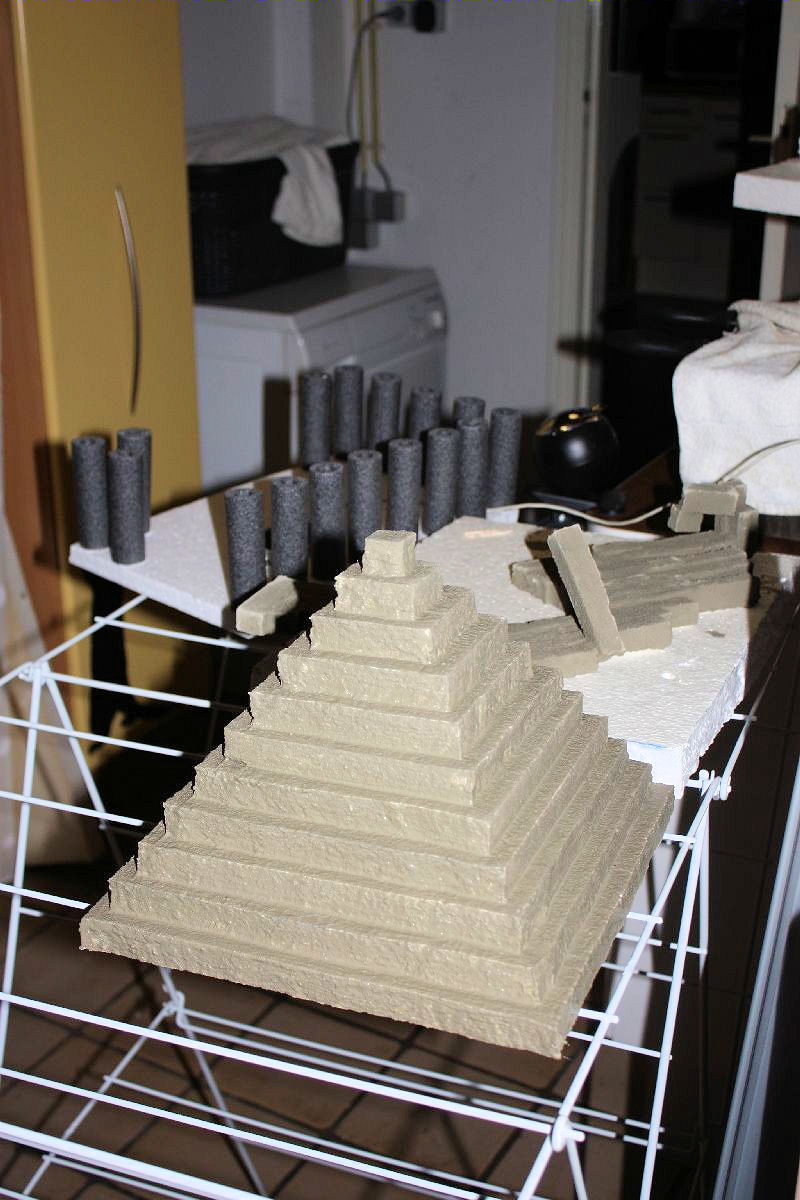
All this will be painted offcourse. Or if I should be able to succesfully glue sand on there I am going to do that.

23.JPG


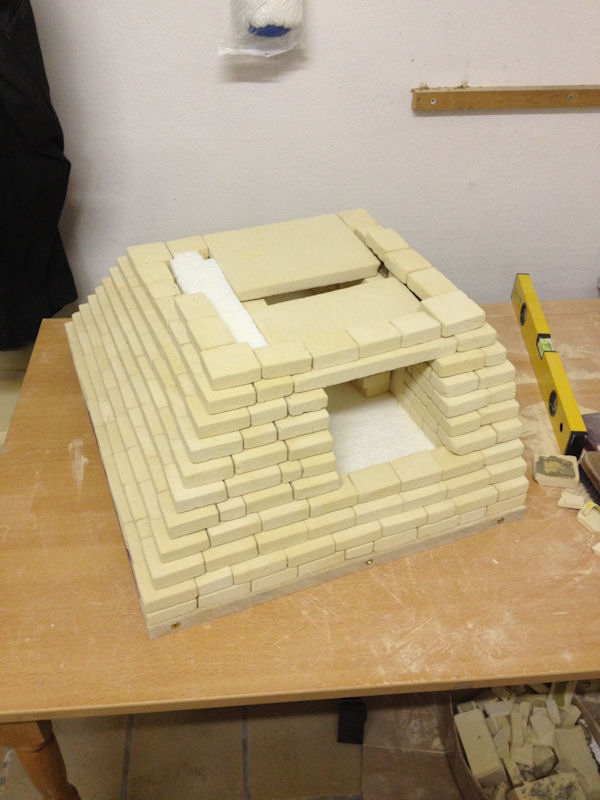
PyramidHandy tip: Whenever you want to secure 2 pieces of styrofoam together, use 4 toothpicks and place them each in a different angle, together with some glue it won’t come loose anymore.

24.JPG


Don’t tell the wife why you need the washing-rack ;)

25.JPG


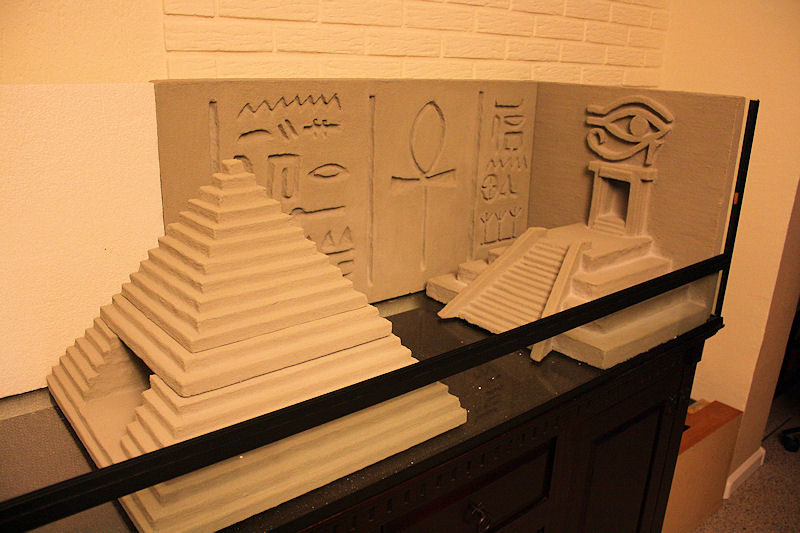
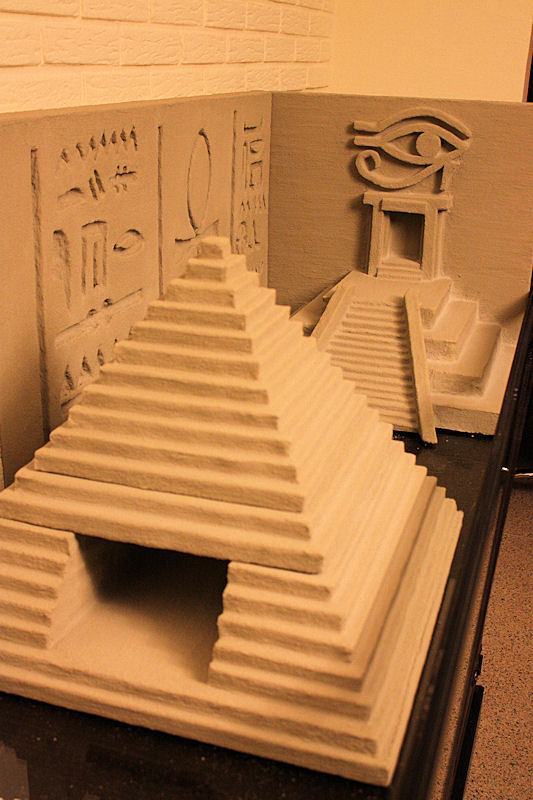
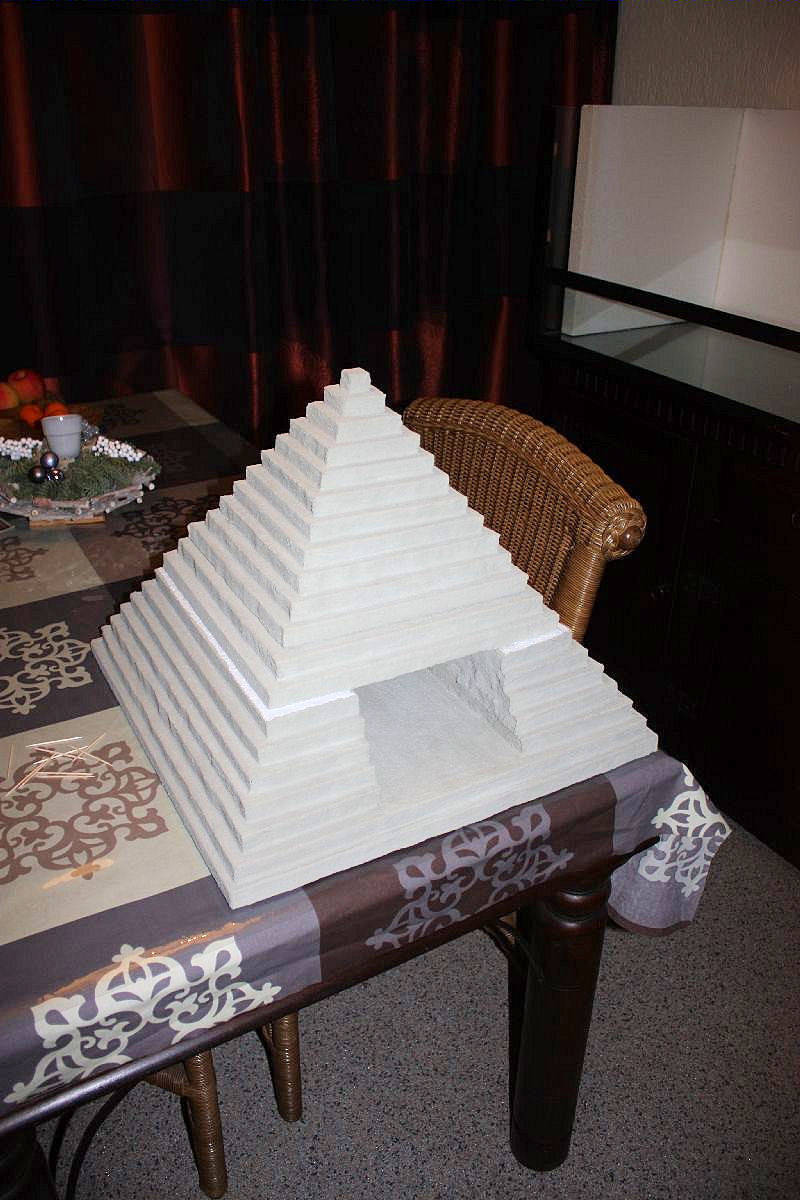
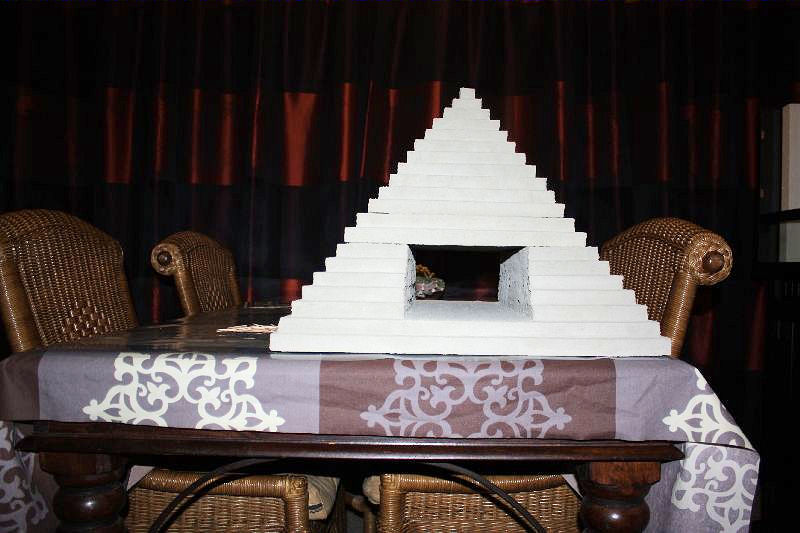
Everything together. The top part will be removable so I can access the cave easier and it’s easier to clean.

26.JPG


27.JPG


28.JPG


29.JPG


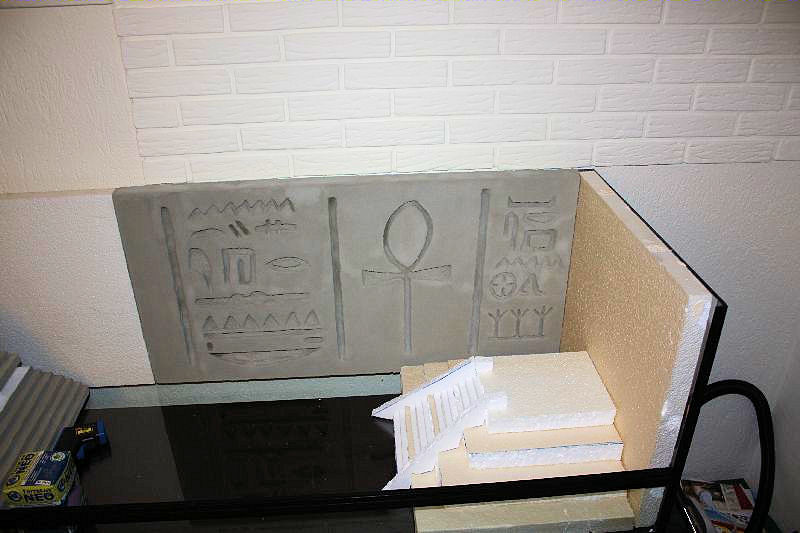
Later I modified the sacrificial-altar a bit, added the back wall and made an entrance and added the Eye of Ra.

30.JPG


I will add updates as I progress!

Tips/tricks/comments/questions are always welcome :)

Grtz Tim
 

RuselBro

Juvie Member
I LOVE the Pyramid and Eye of Ra, you should also add something to do with Anubis "My Fav" and Horuseus "My other fav". Lol. But I seriously love it! Look's freaking Tight! Can't wait to see it when it's done!
Ohhhhh also add something to do with Orion and the Star's, as Egyptians were big on Orion.

All the other Symbol's you used, do you know the meaning of them??
 

MetallicatTim

Member
Original Poster
Thx :) I used Ra because he was the sungod and the platform will be a sunspot for my beardie :)
Anubis is the god of death and Horus god of the underworld, although very cool, I didn't know how to incorporate them into the theme haha, any idea's? :D The feedingbowl is about death, maybe use some Anubis stuff there haha

I know the meaning of the symbols, however in hindsight I wish I'd actually wrote an message/word ( like the name of the beardie, wich offcourse will be egyptian, but no idea yet ) instead of just using some misc. glyphs.
I'm really thinking about starting over! And losing 4 days of work haha.
Also because some of them are crooked. I drew them freehanded, maybe if I start over, I'm gonna print out the glyphs and cut them out as templates.

Using the Orion belt would be awesome indeed! I know they used the Orion belt as guideline for constructing the pyramids of Gizeh and build the corridors inside of the pyramids according to the stars alignment.
Don't know yet how to incorporate this, so let's put on the thinking hat and get to it :D
 

MetallicatTim

Member
Original Poster
Also, a friend of mine suggested putting in a Stargate! I can't seem to get that out of my mind haha, so now I really need a Stargate with a DHD!
Building one myself is close to impossible... But there are scalemodels, I'm tracking some on Ebay, but they are pretty expensive.
It ain't a neccessairy piece before I can complete the viv and get a beardie, so I'll look out for one and whenever I find one I will put it in.

I found this on google :D I won't be the first!
images
 

MetallicatTim

Member
Original Poster
Thx :)

I'm a bit clueless where to go from here. I've completed the altar and the pyramid, but I haven't come up with something to replace the ruin with, because I don't like how it turned out...
And still thinking about how to incorporate the Orion belt idea from RuselBro ( creative and physically ).

Because I have no new progress to show, I'll post some pics of what I've completed so far :)

31.JPG


32.JPG


33.JPG
 

RuselBro

Juvie Member
DUDE! that look's Amazing! I love the color of the finished product, It look's very realistic. Instead of the Ruin's thing, have you thought about a Sphinx, or making 2 small Half Pyramid's and using them as food dishes? From looking at the pic's it seem's like something big would take away to much floor space, from the big piece's you have already made?
 

MetallicatTim

Member
Original Poster
This is just the dried grout color, it has yet to be painted and sealed :) I did some tests yesterday with mixing sand with the grout, I will find out after work how that turned out.

The pieces are indeed pretty big! Both are about 50x50cm ( 20x20 inch )
I've left a space measuring about 80x55cm ( 32x22" ) on the left side of the viv to work with.

I thought about a sphinx, i found them in two sizes 18x12cm ( 7x5" ) and 40x23cm ( 16x9" ). I think the bigger one is to big for the space I have left, but would be a nice sunspot, just had to be a bit smaller ( around 12x7" would be best ).
The smaller one would be nice deco :)

Still need/want to add an obelisk, I found a really nice one, but it's too big :( http://www.ebay.de/itm/Obelisk-Pyramide-Agyptisch-Agypten-Dekosaule-1655-Fa70-/220651328556
I found a smaller one, but it's not as nice: http://www.ebay.de/itm/Goldener-Agyptischer-Obelisk-/290850061237
 

RuselBro

Juvie Member
Just did some quick research and found this out, I knew the Eye of ra looked exactly like the eye of Horus and this is why.

"Copy and paste"

Horus was the ancient Egyptian sky god who was usually depicted as a falcon, most likely a lanner or peregrine falcon.[10] His right eye was associated with the sun Ra. The eye symbol represents the marking around the eye of the falcon, including the "teardrop" marking sometimes found below the eye. The mirror image, or left eye, sometimes represented the moon and the god Djehuti (Thoth).[11]

wedjet – Eye of Horus
in hieroglyphs
In one myth, when Set and Horus were fighting for the throne after Osiris's death, Set gouged out Horus's left eye. The majority of the eye was restored by either Hathor or Thoth (with the last portion possibly being supplied magically). When Horus's eye was recovered, he offered it to his father, Osiris, in hopes of restoring his life. Hence, the eye of Horus was often used to symbolise sacrifice, healing, restoration, and protection
 

MetallicatTim

Member
Original Poster
Thanks :)

But I've started over completely.... :p I think I mentioned it before, I was gonna use Marl ( soft stone ) but I coulcn't find the right sealant, so after some failed tests I decided to drop that idea and start with the styrofoam...
BUT, now I finally found the right sealant wich does the trick ( parquet-sealant )! So I decided to start over and got me some Marl: ( this is about 200kg, 440 lbs :p )

34.JPG


First I cut the pieces in half and sanded them down so they are all even flat.

42.JPG


Next step is to carve the hyroglyph wall, just like this one: ( except for the gold and a sort of panorama cut-out ;) )

IMG_1623.JPG


But I will continue with the wall later, now I'm working on the piramide wich I made from 100's of small blocks, cemented together. This is what I've got so far.
Just as with the styrofoam one, the top half will be seperatable from the bottom, for better cleaning and in case of "emergencies" to get to my beardie quicker.
I'm gonna use a plywood inner-layer next for stability and safety. I also used 2 solid blocks for the inner-wall of the hide, for safety. I could even carve some hyroglygh here, but that's something for later ;)

47.JPG


Progress so far:
44.JPG


I'm gonna place it against the back wall, that will leave me with some room in the front ( and it saves me from having to cut about 50-100 extra blocks haha ).

I'm also in the process of glueing the Marl sand to the altar:
I used Epoxy resin and covered it with the Marl sand.

45.JPG


If you don't emerge it completely, it will soak up the sand and darken it substantially, but if you do emerge it completely, the top layer will contain "dry" sand and It will look like this as result:
46.JPG


I'm not completely sure I'm gonna use this piece, because I'd rather rebuild it again out of Marl.
Not only because I think it will look beter with the rest of the Marl, but I'd like to make it only 3 steps high with a bigger top layer for my beardie to lay on.
 

RuselBro

Juvie Member
Dude! That is pretty Sweet! And Very time consuming from the look's of it!
I would just be worried about the Weight!!! Have you like reinforced the inside of stand under the Enclosure floor to prevent any cave in's or break's from all the weight on it?
 
Status
Not open for further replies.

Members online

No members online now.

Still Needs Help

Latest resources

Latest posts

Latest profile posts

is tape safe for fixing something in my leopard geckos hide?
Day 3 of brumation. It's a struggle. I really miss my little guy. 😔
Mirage entered brumation yesterday, I'm gonna miss hanging out with my little guy.
Getting ready for another day. Feeling sleepy. 😴
I just walked into my room and instead of looking at me, Swordtail's eyes darted directly to the ice cream drumstick I'm holding

Forum statistics

Threads
156,161
Messages
1,258,389
Members
76,112
Latest member
tlpowell718
Top Bottom