Viv is finally complete!

Status
Not open for further replies.

gregorydragon

Juvie Member
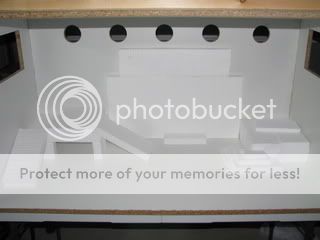
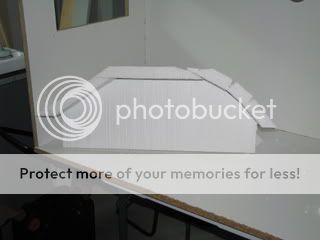
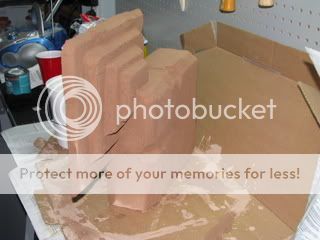
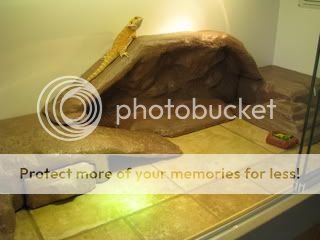
I finally finished the last touch of Mango's viv this weekend, which was the middle section of the rock wall. He hung out on it all day so I know he loves it. The viv itself took me a few weeks because I could only work on it a few hours at a time every couple of days. As you can see, I started on the fake rock idea before the viv was complete. And I grouted the tile in. This bad boy is HEAVY!!! I have to fixtures installed to provide two basking spots, but the main basking spot (under the MVB) gets up to the 115-117 range with both of them on. It also makes the cool side stay in the 90-95 range so I only have one light on at a time. I want to add more, but I just can't figure out what to do yet. N-E-Way, here are the pics:

Shell
Mango220.jpg


Drafting for fake rock
Mango222.jpg

Mango228.jpg

Mango231.jpg

Mango229.jpg

Mango226.jpg

Mango243.jpg


Lights
Mango233Copy.jpg

Mango232.jpg


Tile
Mango238.jpg


I finished this piece of the fake rock first and used some old furnishings from his smaller tank. I needed to test the temps and elevation under the MVB before I started making the fake rock on the left side.
Mango245.jpg


Finally Complete!!!
I only have both basking lights on for the pic.
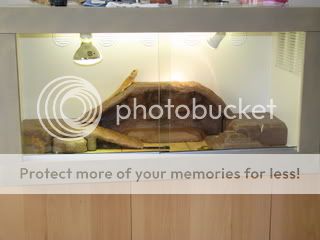
Mango252.jpg

Mango255.jpg


Loving it!
Mango253.jpg


Oh! I just remembered something. The very last piece that I completed was actually the little rectangular piece on the left of the viv between the ramp and the stairs. This is a cave. I put the ramp/stair piece in there for two days before I completed the back bridge. He didn't want to come out of there. I kept taking him back out and was considering making a whole new piece for that side. My brilliant wife asked why wouldn't I just make something to cover it up during the day. So I made a "door" to block it during the day. I ended up taking the big piece out until the door was done. When he is out, he is active and walks around a lot. Some day, if he starts to brumate, I'll just let him stay in there.
 

Goonie

BD.org Sicko
Retired Moderator
WOW! What a viv! Shoot, looking at that makes me want to be a beardie :wink:
Mango looked like he really liked his new home. Lucky duck!
 

gregorydragon

Juvie Member
Original Poster
haleygirl272":d6ae8 said:
BRILLIANT!

on a scale of 1-10, how hard was building a custom viv?
Hmm...I have a few different thoughts on this. In the beginning (when I was researching and just getting started), I would say an 8. I think that has more to do with nerves and anxiety about doing something wrong. Once I got into it and started to enjoy it (all the way up to now), I would say a 4 or a 5. As I was recently told, I do everything at 150%. I added to the complexity with grouted tile and fake rock. All things considered on this viv, I would say a 6. The biggest part for me was time. I could only work on it for a few hours at a time. It was really fun though. I enjoyed it. I want to make another one, which means I need another beardie. I have been told that we are getting a dog first though.

I have been turned into a minor handyman though. The concept of building and tiling has made me want to do other stuff. It's almost like the viv was "practice". Now I want to build a stand for the viv (and another viv), a toy box for my kids, and I am considering putting in some tile in a hallway in my house. Did I already mention that I had fun? :D
 

gregorydragon

Juvie Member
Original Poster
I almost forgot. The most complicated part for me was fitting the tile into the viv just right. I did not have access to a tile cutter, so I had to measure and re-measure and make several trips to Home Depot to get just the right combination of tile sizes to fit in the bottom. You can see all of the different tile sizes I used (and the pattern) in the one pic with the white spacers in between the tiles.
 

gregorydragon

Juvie Member
Original Poster
haleygirl272":fca2b said:
Well, the tile cutting must have been fun! :roll:
No no! I did NOT cut any tile. This made it harder because I had to find tile that was just the right size.
 

haleygirl272

Sub-Adult Member
gregorydragon":33d8c said:
haleygirl272":33d8c said:
Well, the tile cutting must have been fun! :roll:
No no! I did NOT cut any tile. This made it harder because I had to find tile that was just the right size.

oh, I misunderstood, I thought you meant you had to cut by hand. :oops:
 

haleygirl272

Sub-Adult Member
gregorydragon":e4cfa said:
Haley,
I've noticed your dragons in the sig line for a while now. What are those?
Those are for a site called Dragcave.net where you can adopt dragons and breed them 8)
 

Barrettxx

Member
I LOVE THAT !!
Thats really nice, congrats I hope you like it most importantly I hope your beardy enjoys it :)
Question, how did you make that fake rockk? It looks beautiful.
 

gregorydragon

Juvie Member
Original Poster
Barrettxx":7c0fb said:
I LOVE THAT !!
Thats really nice, congrats I hope you like it most importantly I hope your beardy enjoys it :)
Question, how did you make that fake rockk? It looks beautiful.
Very quickly:
styrofoam (left over from other things that I bought recently)
Hot glue gun (low temp gun or it will melt the styrofoam)
Great Stuff gap filler
knife for cutting and shaping
Sanded grout (powder mis without the mold guard stuff in it)
Paint brushes
non-toxic polycrylic sealer (satin)
acrylic paint

think about what you want it to look like. Glue your pieces together in a general shape of what you want. fill in extra gaps with "Great Stuff" gap filler. Use the knife to trim it and cut grooves, etc. mix some grout with water so that it is "soupy". Paint on a layer and make sure you get some in all of the cracks and crevices. Each time I applied a layer, I made the consistency thicker. Each coat sits overnight to dry.The last coat is just a little bit of grout mix, but this is where I mix in the paint (burnt umber is the color I used). I apply a coat. After it dried, I started applying sealer. The sealer can be applied in one day because you can put on a layer every 2 hours, but you need to let it sit to dry and air out some fumes for a few days before putting it in the viv. Also, on the first layer of sealer, I sprinkled some playsand while it was still wet to add texture. Then I applied three to four more coats of sealer after that. Here is a link that tells you how to do this. I followed these instructions as far as supplies and how to, but I used my own idea for the design:
http://www.beardeddragon.org/forums/viewtopic.php?f=75&t=90519&st=0&sk=t&sd=a
 

Barrettxx

Member
Thanks a bunch, you made me REALLY want to re-design my whole encloser.. to bad I cant swap my front for the slidey doors :p Im gunna make a new post so i dont bug on this topic.
 
Status
Not open for further replies.

Members online

Still Needs Help

Latest resources

Latest posts

Latest profile posts

Kubet77 là nhà cái đánh giá uy tín hoạt động từ năm 2005, có giấy phép bảo hộ từ PAGCOR, thu hút nhiều người chơi tại Việt Nam và Châu Á nhờ dịch vụ đáng tin cậy. Website: Kubet77 🎖️ Nhà Cái Cá Cược Trực Tuyến Đáng Chơi Nhất 2024 Địa chỉ: Số 27 Đường số 7, Cityland Park Hills,
Go88 là một trong những nhà cái cá cược trực tuyến hàng đầu với danh tiếng vững chắc trong cộng đồng người chơi.
Website: https://https://appgo88.link/
Tag: #appgo88link #go88link #Game_Go88 #Game_bài_Go88 #Cổng_game_Go88 #Tài_xỉu_Go88 #Nạp_tiền_Go88 #Rút_tiền_Go88 #play_Go88
Website:
https://smartcity.bandung.go.id/member/bsc3090527795d
Mirage came out of brumation on April 26. He was doing great. On May 2 he started acting funny. We just redid his tank, and he keeps going into one of his hides. He just lays there. He shows no intrest in food. HELP!
is tape safe for fixing something in my leopard geckos hide?
Day 3 of brumation. It's a struggle. I really miss my little guy. 😔

Forum statistics

Threads
156,234
Messages
1,259,245
Members
76,146
Latest member
Kubet77chinhthuc
Top Bottom