Ok confession time. You can see where I was at with my last update. Well I spent the last week tearing out all the fake rock structure.
It really was just way too big of an undertaking to do 2 full size enclosures with completely custom an handmade rock structures built in. It was taking me too long, and it got to the point where the amount of work I put into it, and the amount of work I still had to go on the rock structures was really killing my motivation to work on it.
So, I realized this is what's been making me not progress on the project, so I spent then next 4 days or so ripping it all out. It wouldn't have taken so long if I just used foam sheets, but since I used spray in foam also it acted as a glue of sorts and bonded to the wood. So, lots of demo and sanding later, and I'm back to a blank canvas.
I spray another coat of poly over the interior just to beef up anything I might have lost while sanding, and now I feel that this project is manageable again. And boy was it!
Spent a good 3 hours working on it last night. Accomplished more than I did in the last 3 months lol!
So I had decided awhile back that the tracks for my glass would be cut into the wood just like my previous designs, as opposed to buying a track for them to slide in. In my previous designs I just had 1 track, so the glass would butt together. And on the outside edge of the tank, the glass could pass all the way by. Sorry if that's hard to explain if you're not picturing it.
 That's the design I've always used. It's the simplest in my opinion. Allows the glass to be completely removed. And I figured it looked cleaner as the glass was all on the same plane. That wasn't really going to work for this design though.
So I took a chance and cut two groves into the ply. Hopefully this holds up over time and doesn't end up pinching together. But time will tell. And experience is a good speaker.. lol.
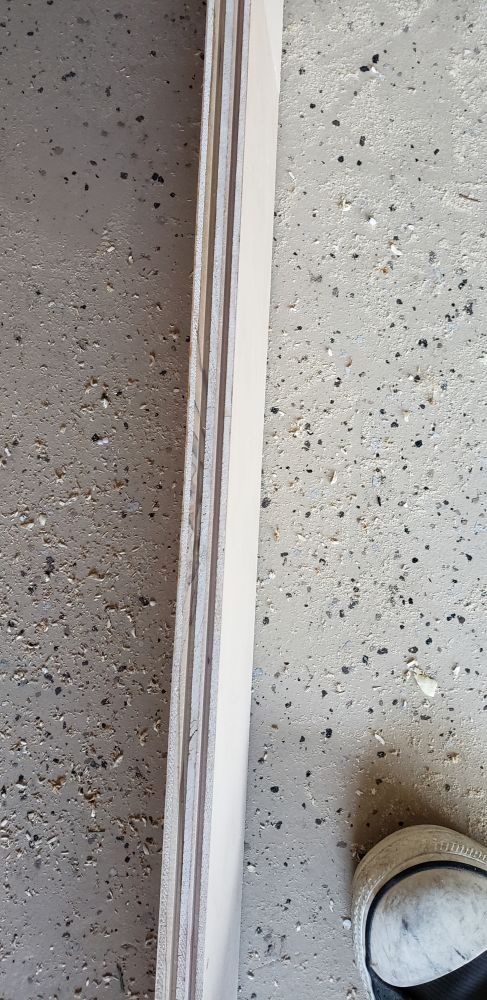
The bottom tracks were cut maybe 3/8ths or so deep ( I didn't measure I just eyeballed something that looked decent) and the top tracks were cut about an inch and a quarter deep. The spacing allows enough room for the glass to be removed by lifting the glass higher into the top track, which exposes the bottom glass. Much like screens for your windows work at home.
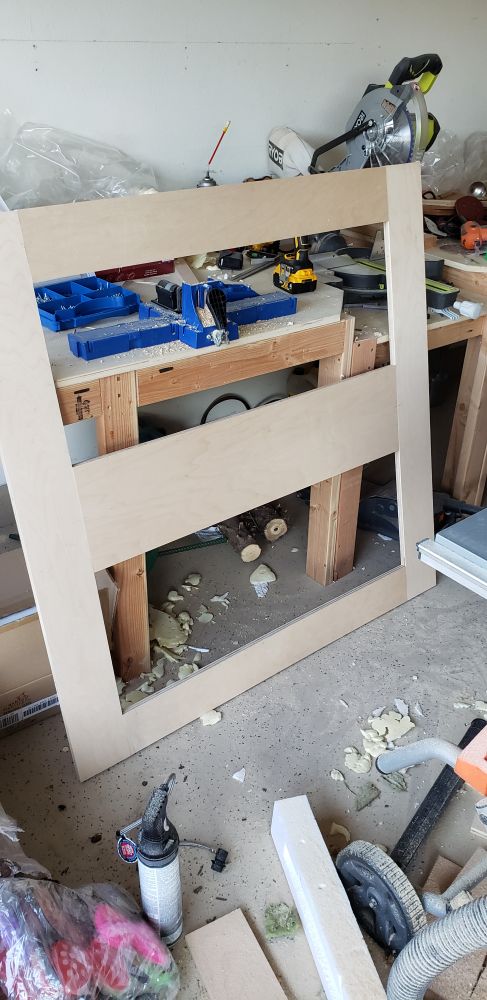
Here is the face frame all completed. Don't judge me. It's a workshop, I need to clean it! LOL And there is still bits of foam hanging around from this project lol
Anyways, I needed a good way to connecting that above picture, to this:
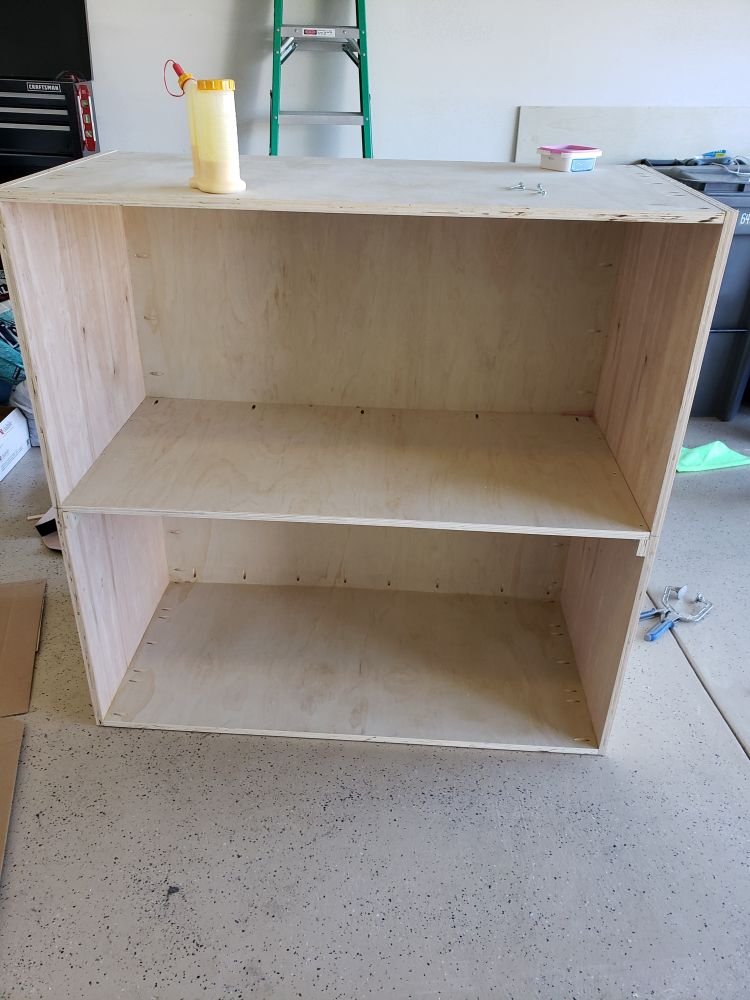
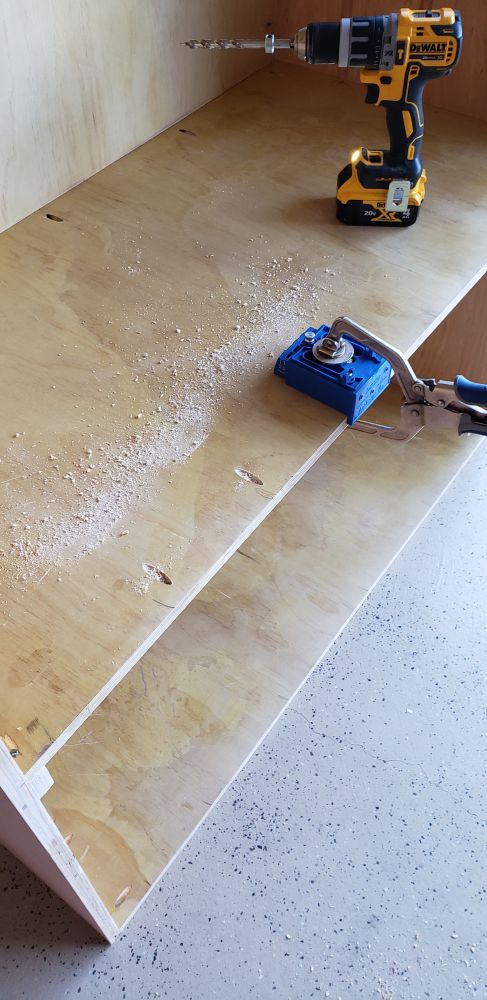
So out comes the kreg jig. I've never used the... uh... "mobile?" version of it. I always have used the main unit to cut my pocket holes. But, hard to do that in this case now. If I would have planned ahead for this, I could have. But, thats part of the beauty of this particular kreg jig. I can remove it from the base and use it with a clamp on boards I wouldn't normally be able to use on the jig.

The pocket holes will allow me to secure the face frame to the rest of the structure. I would typically use glue also, but I have a slight concern over the tracks failing (especially the top ones since I cut them so deep to allow for the removal of the glass) so this gives me the option in the future to remove the face frame and redo it. It still won't be easy, but if I glued it and it failed, the whole enclosure pretty much would be ruined. Sure.. everything is fixable, but this is just a safe guard and the pocket screws actually hold up very well without glue.
Once all the pocket holes were drilled, the face could be attached.
I present to you, actual progress!
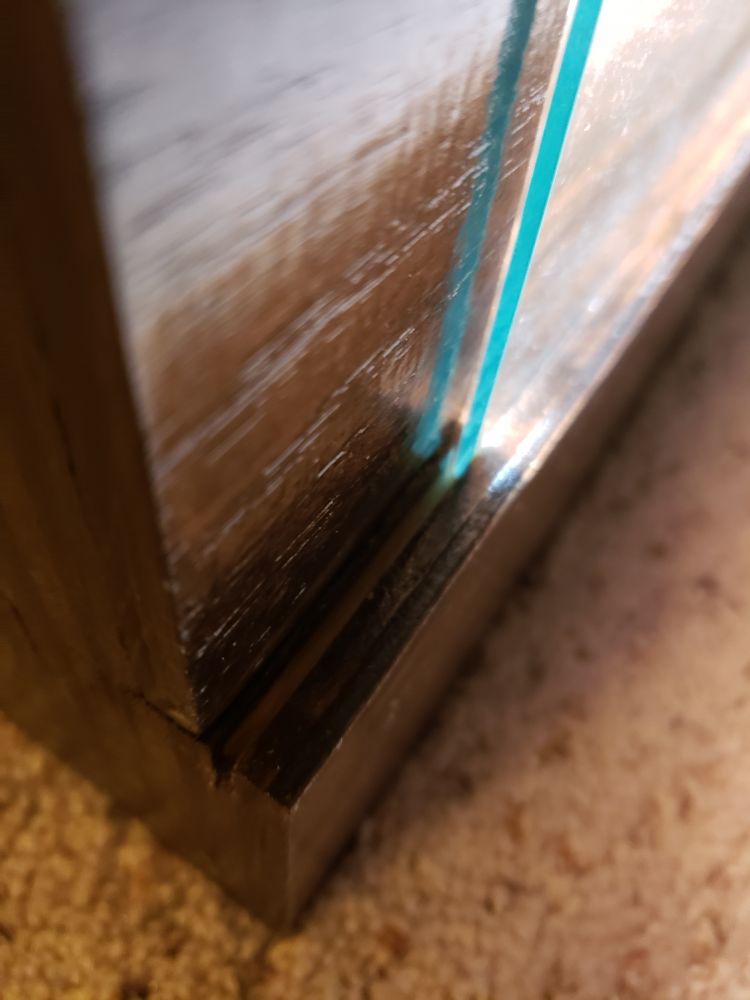
Fitting in the glass to make sure it all works and my cuts were parallel...
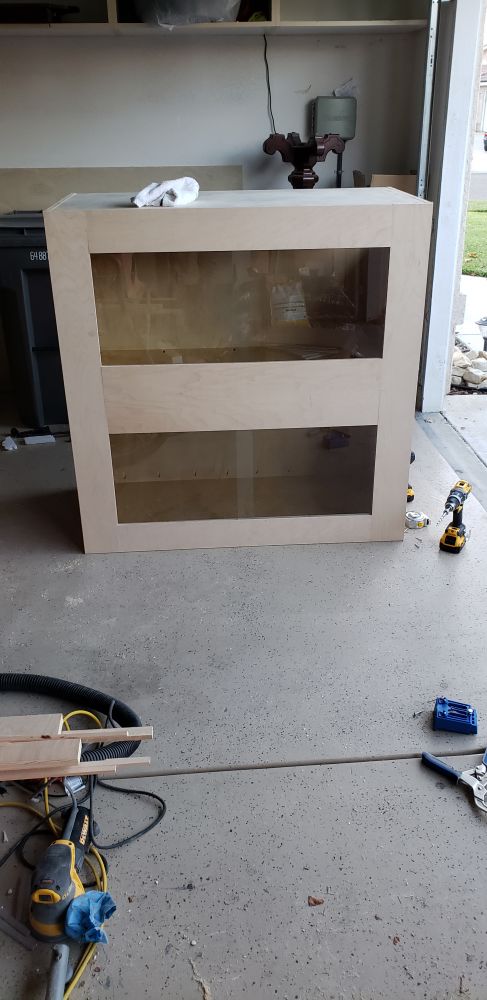 Hard to see but the glass is in. You can just see the reflection it makes.
The glass also overlaps a bit more than I wanted. I MIGHT try to cut the glass and make them close to flush, or at least a smaller overhang, but we will see.
Pictures of the glass in the tracks
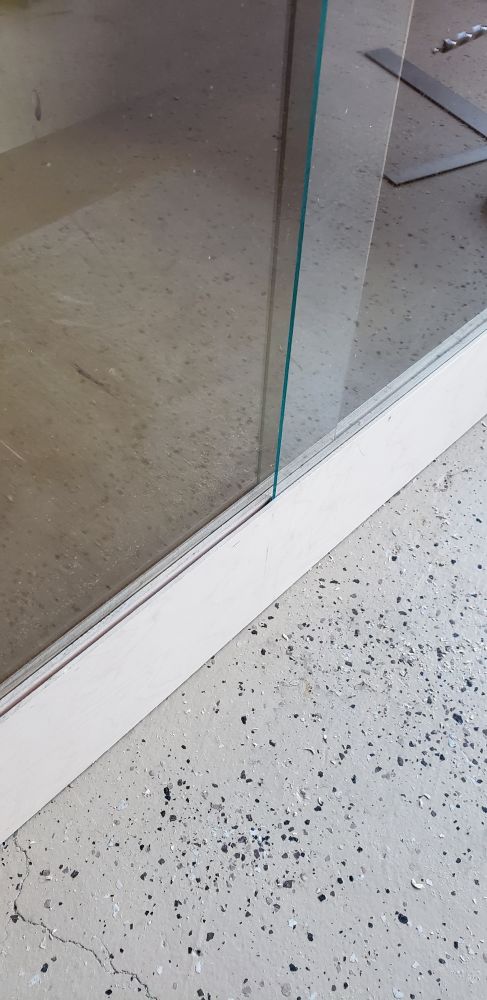
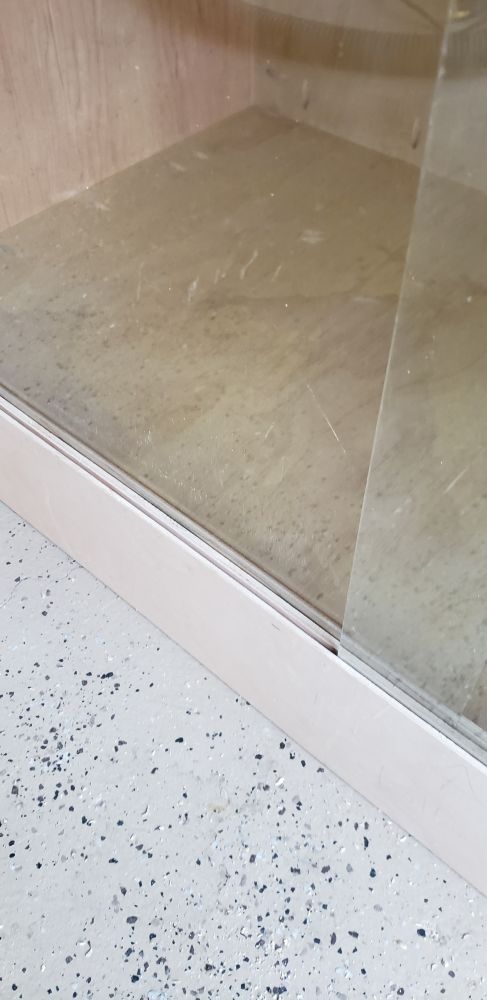 Note how scratched up the floor is now. That spray foam is as good as glue LOL. Luckily that won't be visible due to substrate.
Now what needs to be done is lighting needs to be mounted. I'm probably going to wire everything into an electric box that I mount on the side of the back of the enclosure (or underneath now that I think about it... I'm going to be building a stand too for it.) that way everything can go to one point, and be controlled by timers and what not at one central location. Also so I can run it all off of one plug lol. The dragon room is running out of plug real estate.
I need to spray a bit more sealer on the interior, mainly the interior face of the face frame I built last night.
I need to fill the pocket holes on the inside of the tank.
And lastly I need to finish oil the exterior maple and mount the vents over the holes I've cut.
Then it will be done! I'm thinking this week or next week I'll have it finished!
And lastly, I'm contemplating painting the inside... any thoughts or opinions?
-Brandon
It really was just way too big of an undertaking to do 2 full size enclosures with completely custom an handmade rock structures built in. It was taking me too long, and it got to the point where the amount of work I put into it, and the amount of work I still had to go on the rock structures was really killing my motivation to work on it.
So, I realized this is what's been making me not progress on the project, so I spent then next 4 days or so ripping it all out. It wouldn't have taken so long if I just used foam sheets, but since I used spray in foam also it acted as a glue of sorts and bonded to the wood. So, lots of demo and sanding later, and I'm back to a blank canvas.
I spray another coat of poly over the interior just to beef up anything I might have lost while sanding, and now I feel that this project is manageable again. And boy was it!
Spent a good 3 hours working on it last night. Accomplished more than I did in the last 3 months lol!
So I had decided awhile back that the tracks for my glass would be cut into the wood just like my previous designs, as opposed to buying a track for them to slide in. In my previous designs I just had 1 track, so the glass would butt together. And on the outside edge of the tank, the glass could pass all the way by. Sorry if that's hard to explain if you're not picturing it.
So I took a chance and cut two groves into the ply. Hopefully this holds up over time and doesn't end up pinching together. But time will tell. And experience is a good speaker.. lol.
The bottom tracks were cut maybe 3/8ths or so deep ( I didn't measure I just eyeballed something that looked decent) and the top tracks were cut about an inch and a quarter deep. The spacing allows enough room for the glass to be removed by lifting the glass higher into the top track, which exposes the bottom glass. Much like screens for your windows work at home.
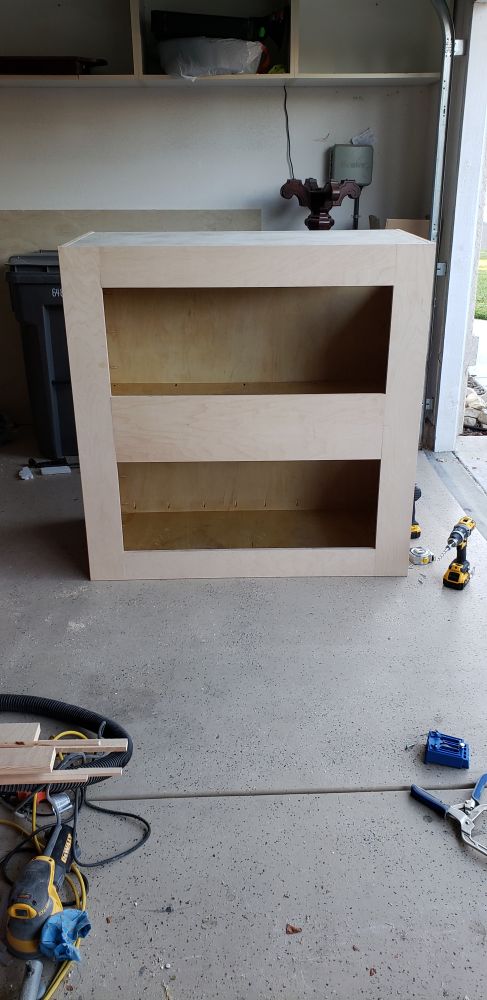
Here is the face frame all completed. Don't judge me. It's a workshop, I need to clean it! LOL And there is still bits of foam hanging around from this project lol
Anyways, I needed a good way to connecting that above picture, to this:
So out comes the kreg jig. I've never used the... uh... "mobile?" version of it. I always have used the main unit to cut my pocket holes. But, hard to do that in this case now. If I would have planned ahead for this, I could have. But, thats part of the beauty of this particular kreg jig. I can remove it from the base and use it with a clamp on boards I wouldn't normally be able to use on the jig.
The pocket holes will allow me to secure the face frame to the rest of the structure. I would typically use glue also, but I have a slight concern over the tracks failing (especially the top ones since I cut them so deep to allow for the removal of the glass) so this gives me the option in the future to remove the face frame and redo it. It still won't be easy, but if I glued it and it failed, the whole enclosure pretty much would be ruined. Sure.. everything is fixable, but this is just a safe guard and the pocket screws actually hold up very well without glue.
Once all the pocket holes were drilled, the face could be attached.
I present to you, actual progress!
Fitting in the glass to make sure it all works and my cuts were parallel...
The glass also overlaps a bit more than I wanted. I MIGHT try to cut the glass and make them close to flush, or at least a smaller overhang, but we will see.
Pictures of the glass in the tracks
Now what needs to be done is lighting needs to be mounted. I'm probably going to wire everything into an electric box that I mount on the side of the back of the enclosure (or underneath now that I think about it... I'm going to be building a stand too for it.) that way everything can go to one point, and be controlled by timers and what not at one central location. Also so I can run it all off of one plug lol. The dragon room is running out of plug real estate.
I need to spray a bit more sealer on the interior, mainly the interior face of the face frame I built last night.
I need to fill the pocket holes on the inside of the tank.
And lastly I need to finish oil the exterior maple and mount the vents over the holes I've cut.
Then it will be done! I'm thinking this week or next week I'll have it finished!
And lastly, I'm contemplating painting the inside... any thoughts or opinions?
-Brandon
