Hello all,
Thought I would go ahead and start a thread. My family is very new to Bearded Dragons. My son has been asking for a “pet” of his own for quite some time. His sister has a hamster and he decided that he should have something that was his. So, for the past 9 months we have been trying to figure out what he wanted. He went from hamster to fish to a turtle to...well you get the idea. Eventually, he settled on a reptile of some sort. We visited an “exotic” pet store when we were visiting my sister in law and with the “encouragement” of his mother they settled on a Bearded Dragon. That was in July.
This started the long journey of me researching Bearded Dragon Care. I eventually found this forum from an article I was reading by one of the Moderators, sweetiepie9. I ended up joining so I could send her a PM and ask a couple questions. She has been awesome and a huge resource for me as I started to put the habitat together. I have lost count how many questions that I have asked her. Thanks again, sweetiepie9.
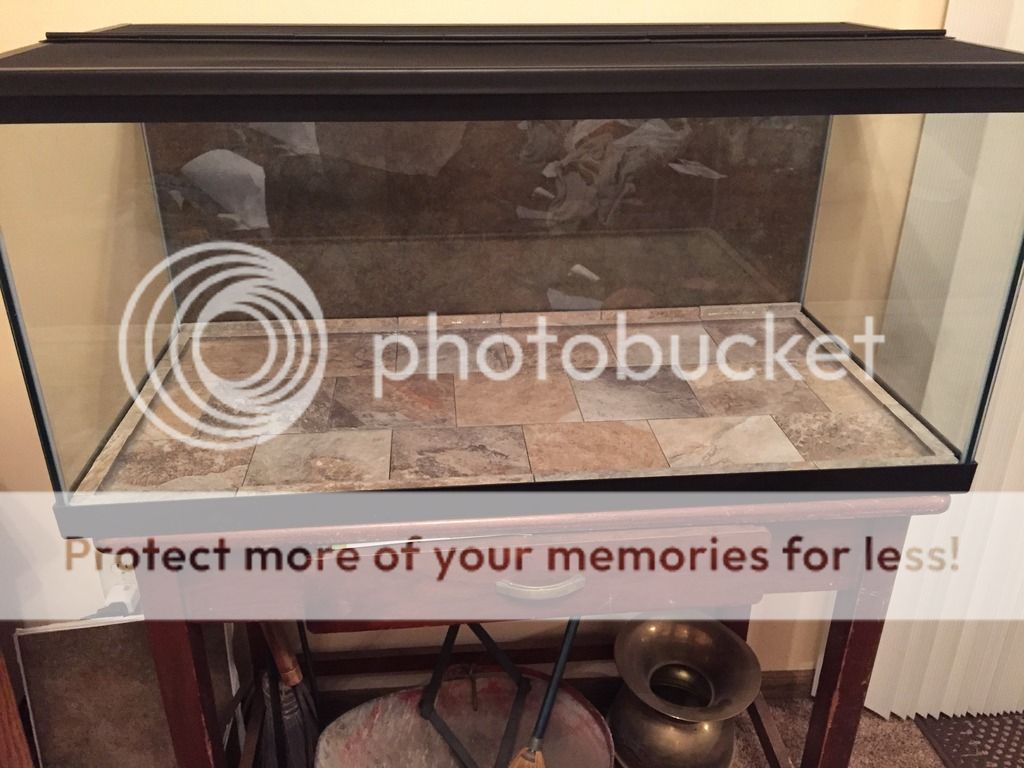
I have seen all of the beautiful custom enclosures that some of you have but I was not ready to take that step so we decided that we would go the aquarium route to start. (On a side note, my wife’s cousin is a carpenter and over thanksgiving we discussed the plans for a wooden enclosure that he is going to build us eventually, I am really looking forward to bringing that home.) I was able to get a 40 gallon breeder at petco on the dollar a gallon sale so that started as my blank canvas for the habitat.
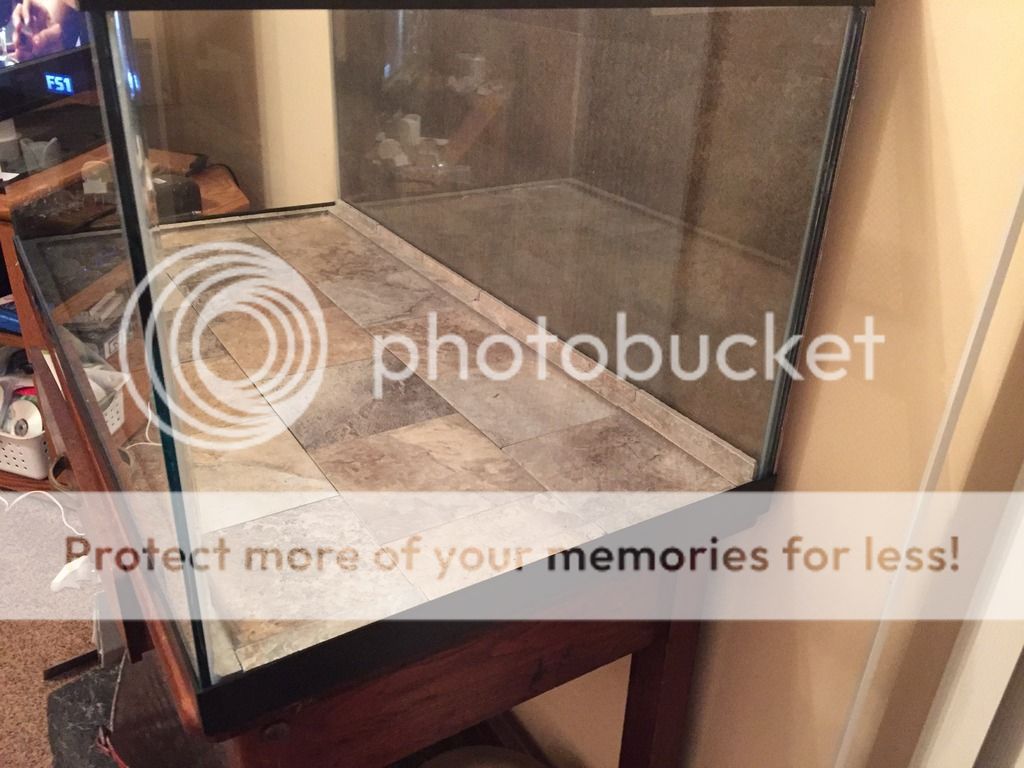
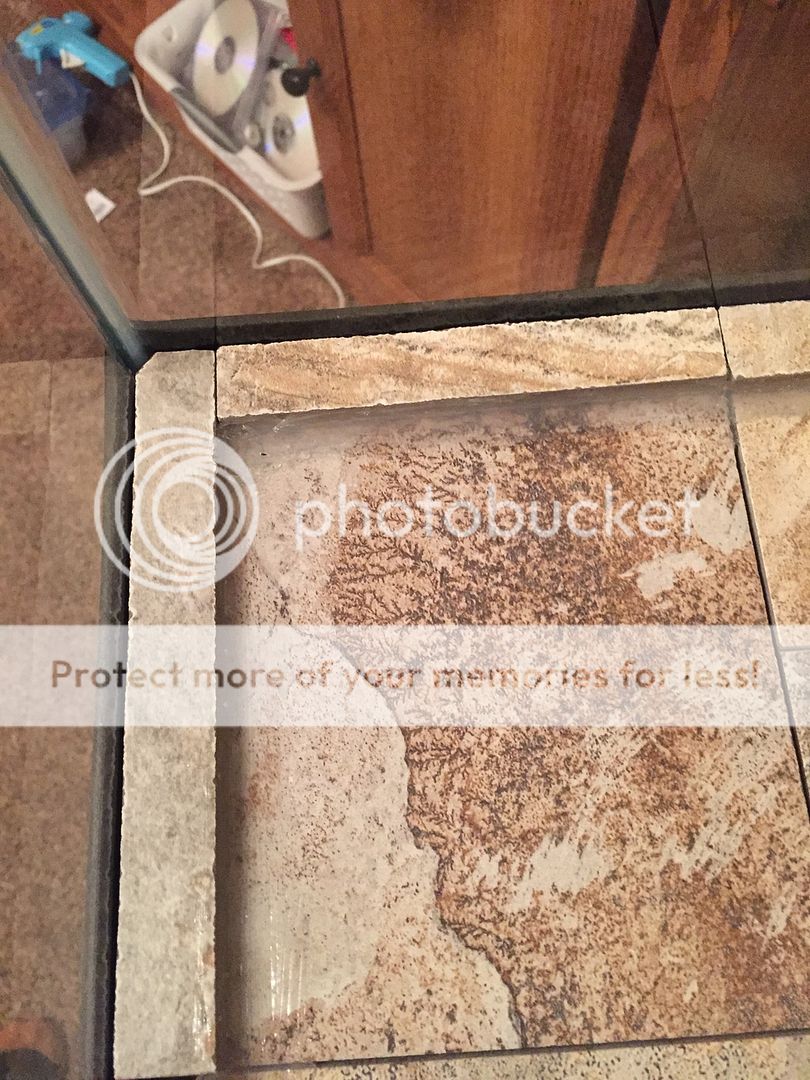
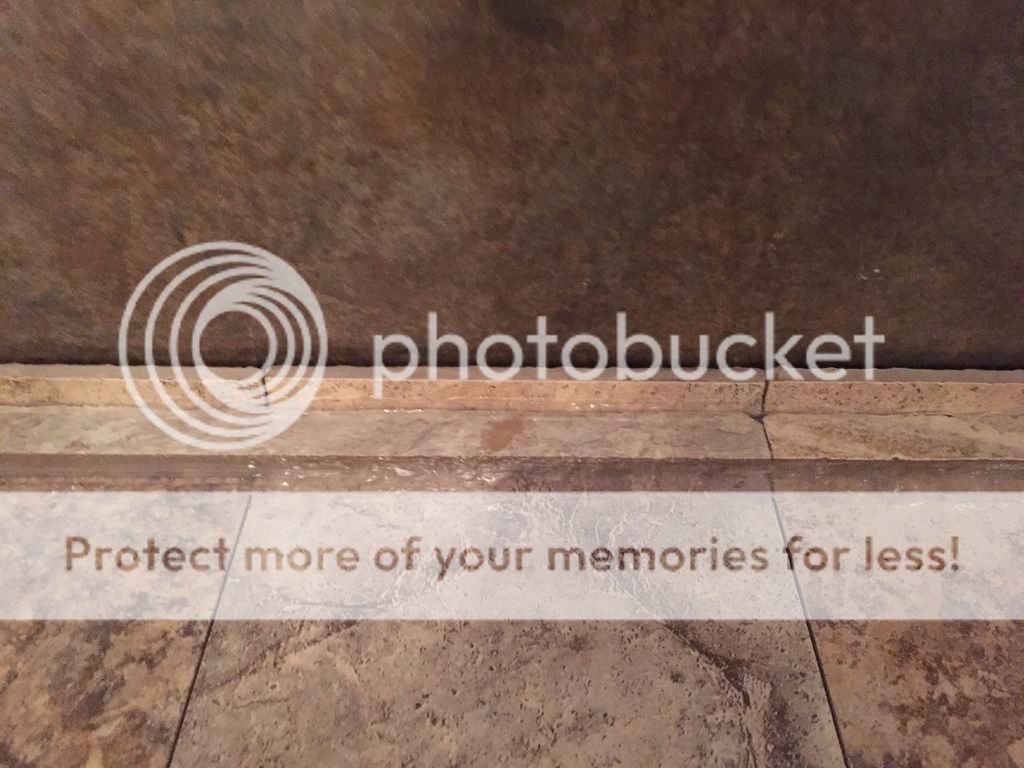
After reading I do not know how many things about substate, I ended up going with tile. So, my son and I went and picked out some 6x6 tile for the bottom of the tank and some vinyl 12x12 tile to put on the back of the tank so it was not completely open. When we got it home, I was not pleased with how they fit into the bottom of the tank because of the silicone sealant, so I borrowed the neighbors tile saw and cut some strips that fit around the edges to bring them tight up against the glass. Aquarium silicone was used to “glue” the strips down on the full tiles. For my first adventure with any kind of tile, I was pleased with myself.
The images below so the tile work on the bottom and the vinyl on the outside of the back of the tank.
Somewhere along this time I started reading everything I could on lighting. I ended going with a T5HO 10.0 bulb mounted inside the tank with no reflector. The UVB meter group on yahoo I believe provided a lot of data on distances from bulbs and the like. I am not sure if this was the best choice but it is what I went with.
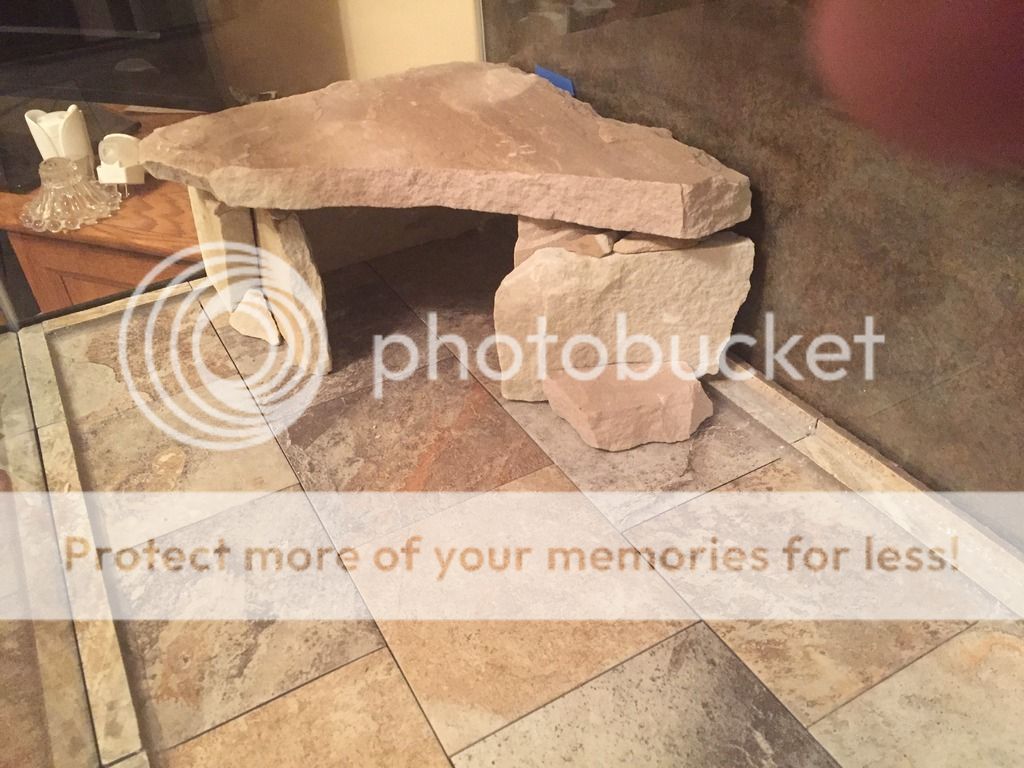
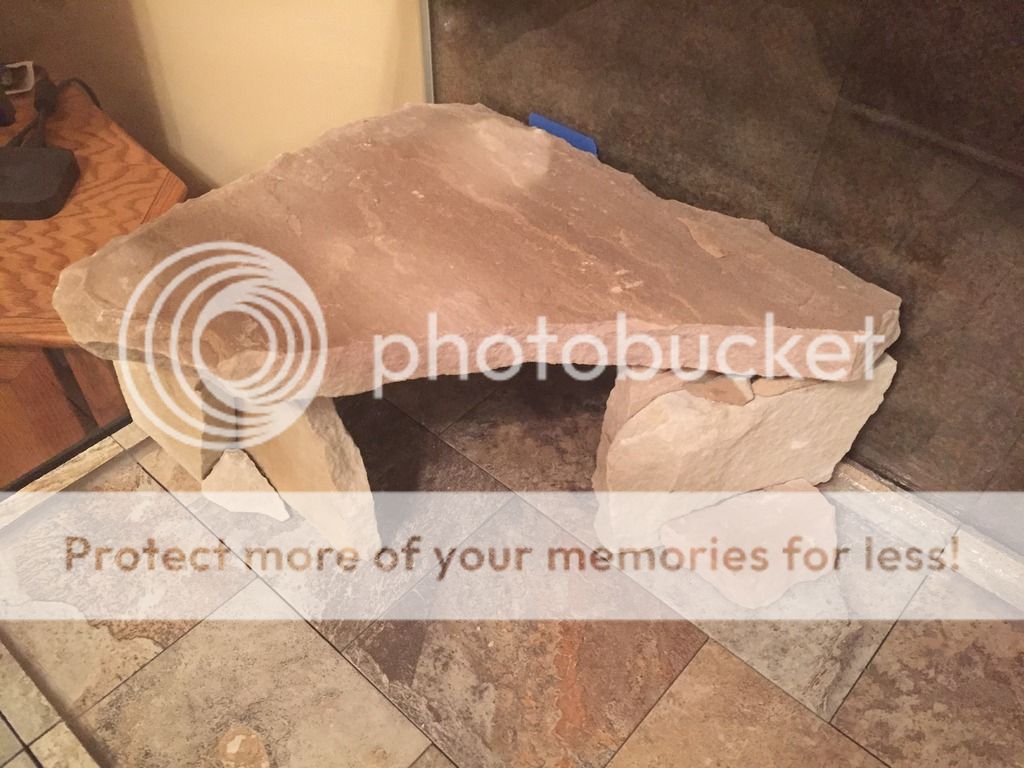
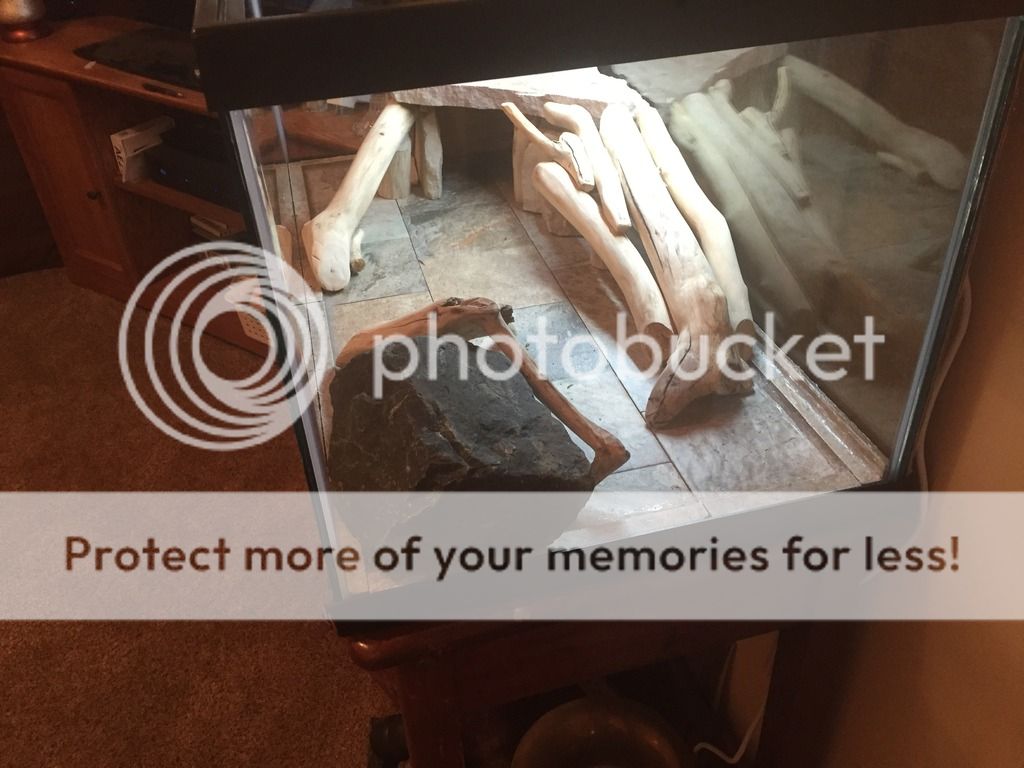
Next was a basking area. Using the data from the UVB group, I knew how high I needed it to be. Again, reading a lot of things I decided that I wanted some sort of stone for the basking area. I picked up some stone at a Home Depot thinking that would break it and use stone steps to also hold up the platform. That did not work out very well, so I set about just making a platform. Breaking the stone apart was not nearly as easy as I was hoping it to be and I ended up using a grinder to help me break it where I wanted to. As I was putting this together the thought came to me that I should make it a hide as well, so what was supposed to be a simple platform ended up being a much more complex task. Oh well, I ended up being relatively happy with the results. I used aquarium silicone again to hold some the stones together.
Below is pictures of the hide/basking platform completed.
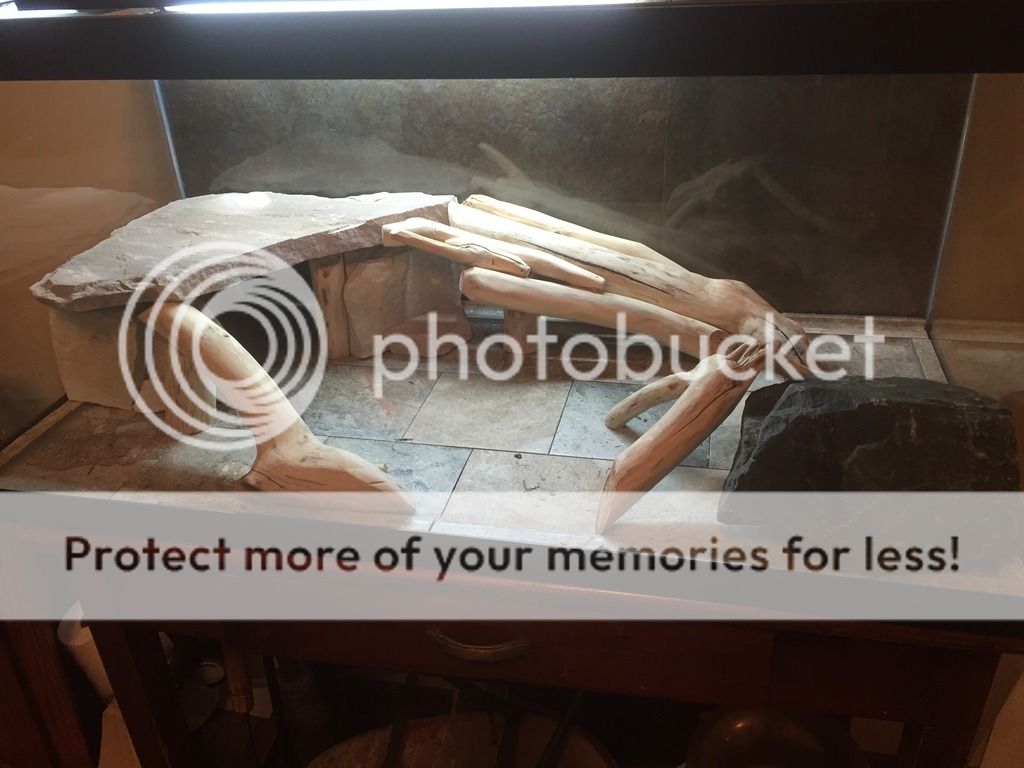
With the platform completed I needed a way for the little guy to get up there. So, returning from one of my trips out into the great outdoors, I grabbed some branches from a fallen tree. I started piecing branches together and once I had a “relatively” good fit I debarked, sanded, and then baked them in the oven before the final fitting. I then had a couple ramps made from tree limbs.
Below is a picture of the what I thought was completed ramps.
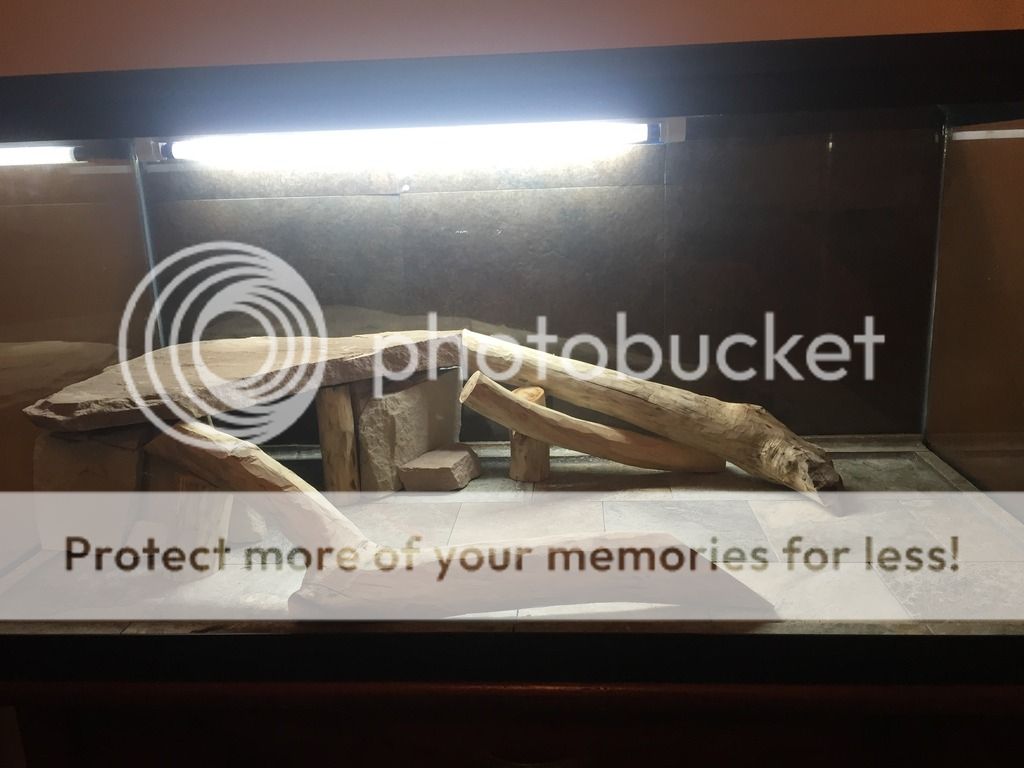
I said “what I thought was completed ramps,” because I continued to tinker with the habitat adding things along the way. At this time I was contemplating putting in the slate rock that I had as well.
At some point during the work on the enclosure I had begun trying to find a place to purchase the dragon itself. We visited our local petco as well as driving a couple hours to visit a shop that breeds dragons in a different town. I did not feel all that great about any of the “local” places to purchase a dragon, so I had to come to grips that I was going to have to have one shipped to us.
The more I read about breeders the more I kept coming back to David at Carolina Classic Dragons. He was fantastic to visit with via email and we began the process of finding one of his dragons at a price that I could spend. He has some beautiful dragons posted on his website and on their facebook page but I was not ready to spend quite that much. But, after a couple weeks of discussions we settled on one and I went ahead and made a purchase. I can not say enough nice things about that process with him. He is was great. We were able to look at weather reports and pick a date for shipping. He did not rush the ship date of the dragon, making sure that he was going to make it healthy. I would buy from him again in an instant.
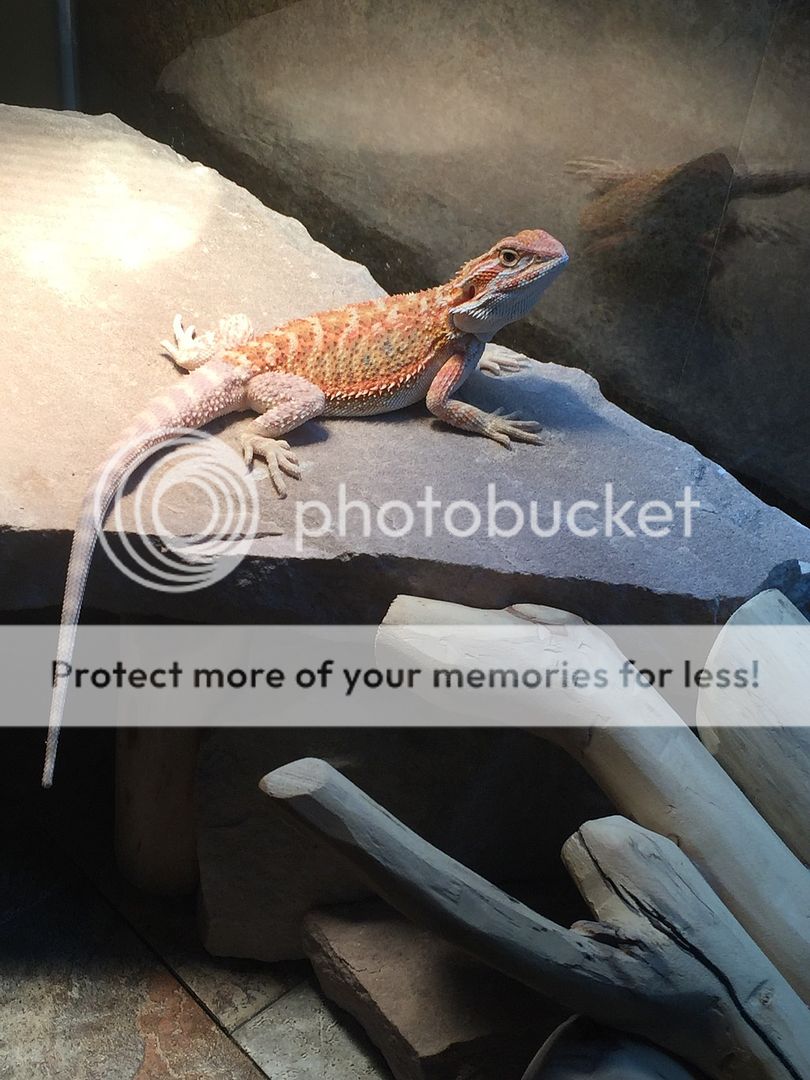
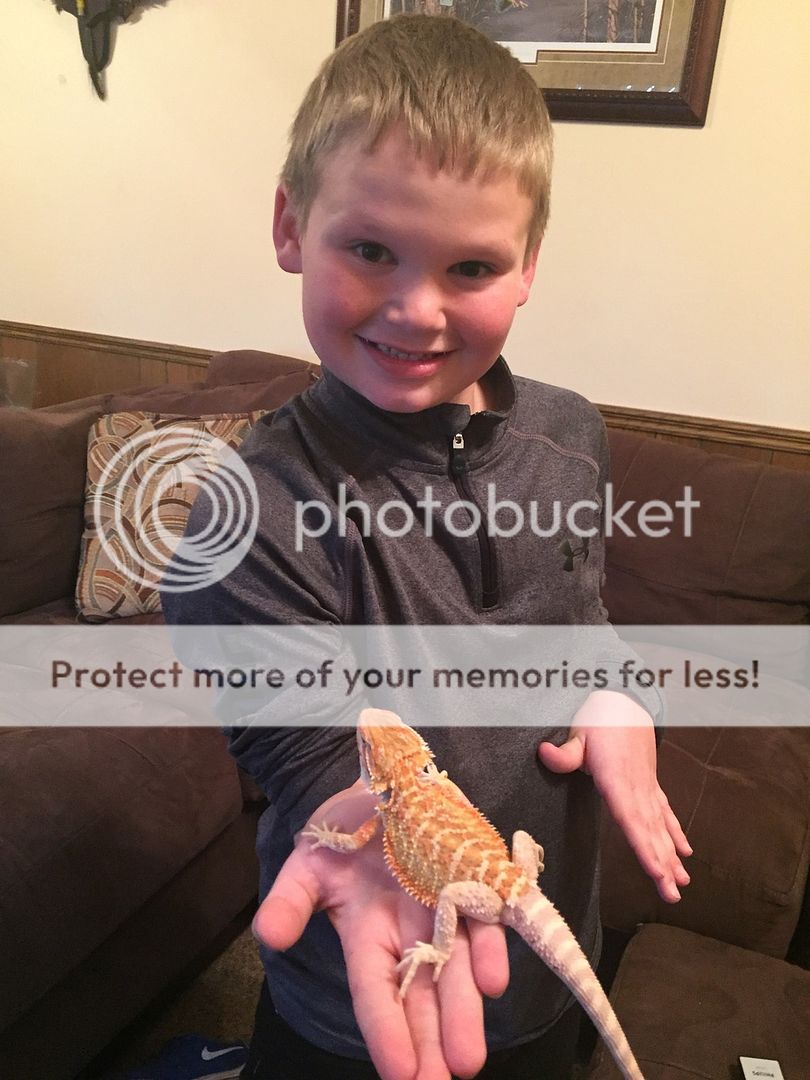
So, while we waited on the ship date I was able to get all the feeders that I would need for arrival. This proved challenging as the USPS seemed to lose a box full of feeders and I had to run to petco, but we were ready for Gus when he arrived. My son and I went and picked him up from the fedex hub and he was pretty excited to get him out of the box. Gus came out perfectly healthy and ready to see his new home. He is shedding but you can still see how beautiful he is.
Next stop was his new home.
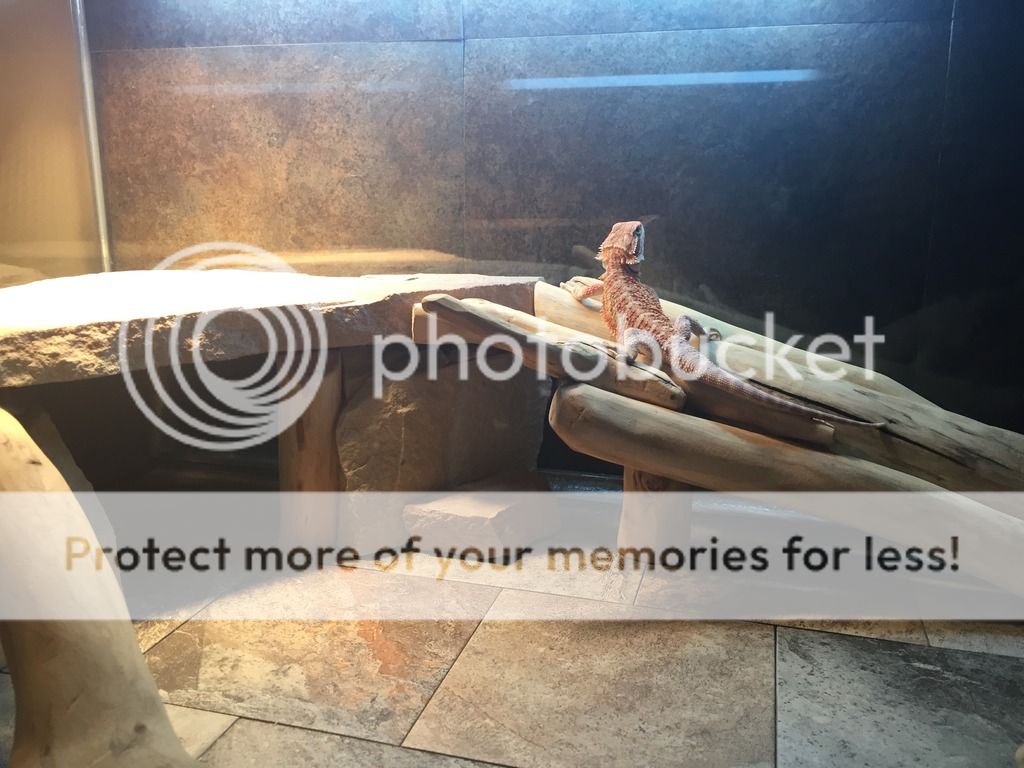
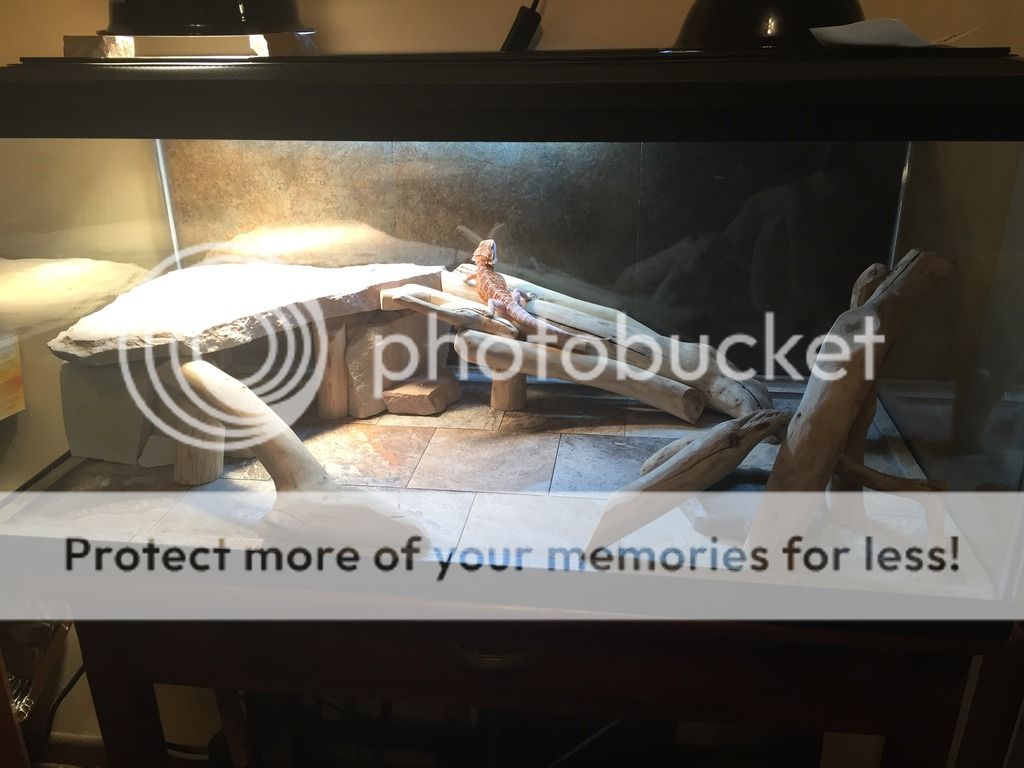
As you can see, I had also made a few additions/subtractions to the habitat. I do not know how I feel about it. Hopefully, I gave him all that he needs to be happy and healthy.
David had told me to give him a couple hours and then give him a small meal. He ate 2.5 hours out of the box and then chilled up on the basking platform for a couple hours before lights out. After the lights went out he ventured down into the cave and that is where he was when my wife walked by him really early this morning before the lights came back on. When I got up, he had moved up and was warming on the platform. Hopefully, we can keep him as healthy as he was when David sent him to us.
Thought I would go ahead and start a thread. My family is very new to Bearded Dragons. My son has been asking for a “pet” of his own for quite some time. His sister has a hamster and he decided that he should have something that was his. So, for the past 9 months we have been trying to figure out what he wanted. He went from hamster to fish to a turtle to...well you get the idea. Eventually, he settled on a reptile of some sort. We visited an “exotic” pet store when we were visiting my sister in law and with the “encouragement” of his mother they settled on a Bearded Dragon. That was in July.
This started the long journey of me researching Bearded Dragon Care. I eventually found this forum from an article I was reading by one of the Moderators, sweetiepie9. I ended up joining so I could send her a PM and ask a couple questions. She has been awesome and a huge resource for me as I started to put the habitat together. I have lost count how many questions that I have asked her. Thanks again, sweetiepie9.
I have seen all of the beautiful custom enclosures that some of you have but I was not ready to take that step so we decided that we would go the aquarium route to start. (On a side note, my wife’s cousin is a carpenter and over thanksgiving we discussed the plans for a wooden enclosure that he is going to build us eventually, I am really looking forward to bringing that home.) I was able to get a 40 gallon breeder at petco on the dollar a gallon sale so that started as my blank canvas for the habitat.
After reading I do not know how many things about substate, I ended up going with tile. So, my son and I went and picked out some 6x6 tile for the bottom of the tank and some vinyl 12x12 tile to put on the back of the tank so it was not completely open. When we got it home, I was not pleased with how they fit into the bottom of the tank because of the silicone sealant, so I borrowed the neighbors tile saw and cut some strips that fit around the edges to bring them tight up against the glass. Aquarium silicone was used to “glue” the strips down on the full tiles. For my first adventure with any kind of tile, I was pleased with myself.
The images below so the tile work on the bottom and the vinyl on the outside of the back of the tank.
Somewhere along this time I started reading everything I could on lighting. I ended going with a T5HO 10.0 bulb mounted inside the tank with no reflector. The UVB meter group on yahoo I believe provided a lot of data on distances from bulbs and the like. I am not sure if this was the best choice but it is what I went with.
Next was a basking area. Using the data from the UVB group, I knew how high I needed it to be. Again, reading a lot of things I decided that I wanted some sort of stone for the basking area. I picked up some stone at a Home Depot thinking that would break it and use stone steps to also hold up the platform. That did not work out very well, so I set about just making a platform. Breaking the stone apart was not nearly as easy as I was hoping it to be and I ended up using a grinder to help me break it where I wanted to. As I was putting this together the thought came to me that I should make it a hide as well, so what was supposed to be a simple platform ended up being a much more complex task. Oh well, I ended up being relatively happy with the results. I used aquarium silicone again to hold some the stones together.
Below is pictures of the hide/basking platform completed.
With the platform completed I needed a way for the little guy to get up there. So, returning from one of my trips out into the great outdoors, I grabbed some branches from a fallen tree. I started piecing branches together and once I had a “relatively” good fit I debarked, sanded, and then baked them in the oven before the final fitting. I then had a couple ramps made from tree limbs.
Below is a picture of the what I thought was completed ramps.
I said “what I thought was completed ramps,” because I continued to tinker with the habitat adding things along the way. At this time I was contemplating putting in the slate rock that I had as well.
At some point during the work on the enclosure I had begun trying to find a place to purchase the dragon itself. We visited our local petco as well as driving a couple hours to visit a shop that breeds dragons in a different town. I did not feel all that great about any of the “local” places to purchase a dragon, so I had to come to grips that I was going to have to have one shipped to us.
The more I read about breeders the more I kept coming back to David at Carolina Classic Dragons. He was fantastic to visit with via email and we began the process of finding one of his dragons at a price that I could spend. He has some beautiful dragons posted on his website and on their facebook page but I was not ready to spend quite that much. But, after a couple weeks of discussions we settled on one and I went ahead and made a purchase. I can not say enough nice things about that process with him. He is was great. We were able to look at weather reports and pick a date for shipping. He did not rush the ship date of the dragon, making sure that he was going to make it healthy. I would buy from him again in an instant.
So, while we waited on the ship date I was able to get all the feeders that I would need for arrival. This proved challenging as the USPS seemed to lose a box full of feeders and I had to run to petco, but we were ready for Gus when he arrived. My son and I went and picked him up from the fedex hub and he was pretty excited to get him out of the box. Gus came out perfectly healthy and ready to see his new home. He is shedding but you can still see how beautiful he is.
Next stop was his new home.
As you can see, I had also made a few additions/subtractions to the habitat. I do not know how I feel about it. Hopefully, I gave him all that he needs to be happy and healthy.
David had told me to give him a couple hours and then give him a small meal. He ate 2.5 hours out of the box and then chilled up on the basking platform for a couple hours before lights out. After the lights went out he ventured down into the cave and that is where he was when my wife walked by him really early this morning before the lights came back on. When I got up, he had moved up and was warming on the platform. Hopefully, we can keep him as healthy as he was when David sent him to us.