DIY Basking Platform

Status
Not open for further replies.
Hello all! I'm new to this forum and only slightly new to beardies. I am in the process of setting things up for my new beardie, Khaleesi, who will be coming home a week from today. I'm currently making a basking platform for her and had a few questions. It is seems that everyone that has made a platform used grout to cover the structure. My boyfriend works in construction and is concerned that because grout is designed to be spread over a very small space, and typically flakes and cracks when spread over a space greater than what is recommended, that I may run into issues down the road with the grout possibly coming off.

He says I should use a sealant that he uses to seal A/C ducts called A/C mastic. He thinks that would be a better alternative because the mastic will not flake or crack. Once its there its there forever. What I'm curious about is whether or not this would be safe to use. I will also be spraying the entire structure with several coats of the stone texture paint and sealer recommended by beautifuldragons.com.

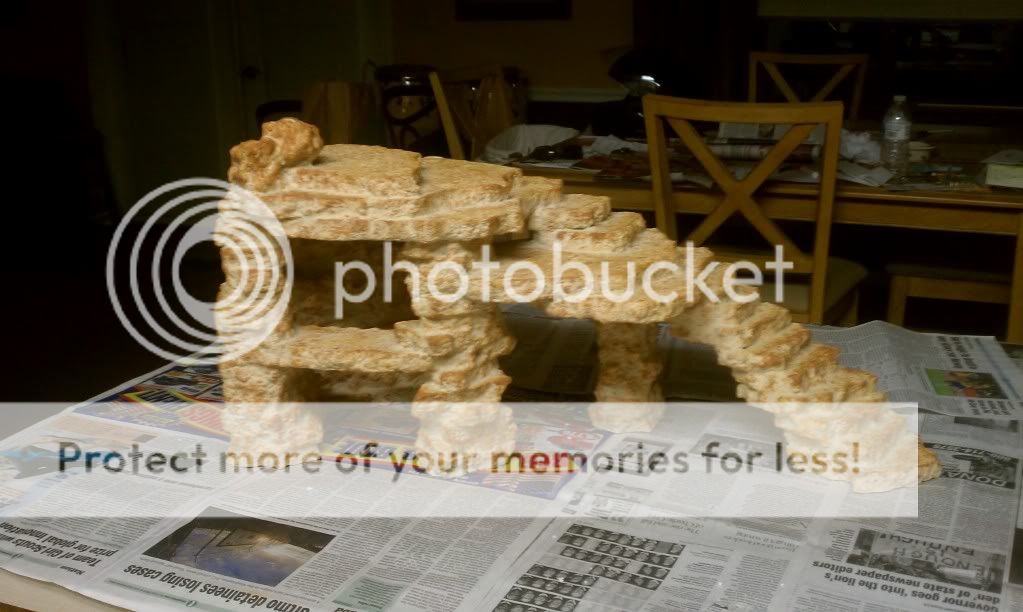
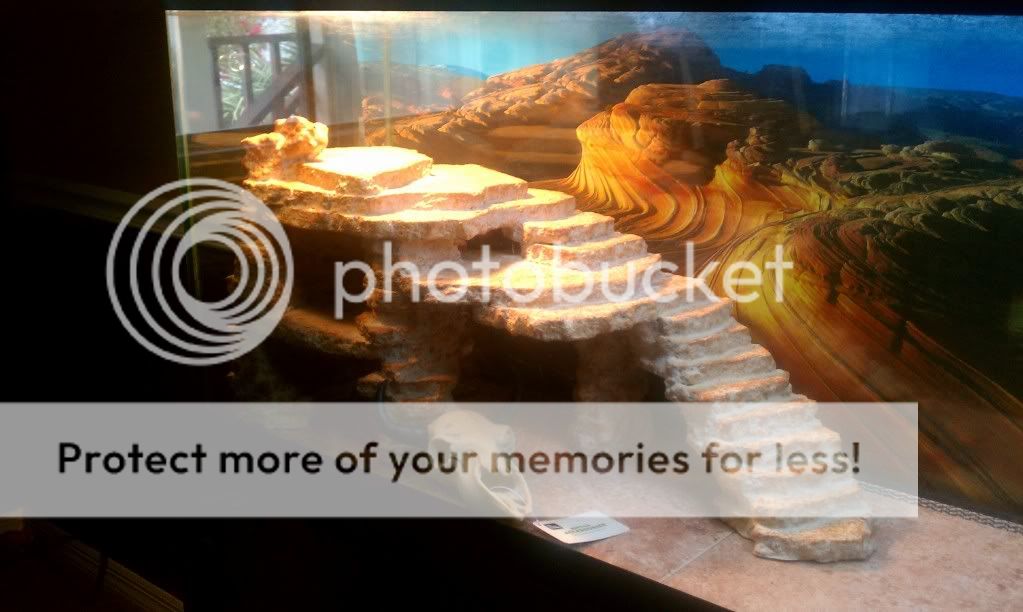
Here's a few pics to show you how things look at the moment. If you have any ideas for additions to the platform please don't hesitate to speak up. It's all just tooth-picked together at the moment and easily changed.

IMAG0314.jpg


I will be attaching a piece of 1/4" plywood to the back of the structure to close it off and make it more cozy and cave-like. I haven't decided how I will be arranging the wood branches yet but Repticon is coming to my area on the 16th so I'll probably have more stuff to play with and arrange in her viv :mrgreen: .

IMAG0315.jpg


I'm also going to add a few more of the chuncky pieces that are my attempts at stalactites lol.

IMAG0316.jpg


I will be using tile in the enclosure. If you look in the bottom left of the first pic you can see one of the tiles sitting on the table. The material you see in the bottom of the tank now is that rubbery cabinet liner stuff to prevent the tile from slipping and/or damaging the glass

Thanks in advance for you help!

-Stephanie & Khaleesi
 

Jess

Extreme Poster
Hi!

As long as you apply the grout thick enough, it stays on pretty well. With the first DIY platforms I made, I watered the grout down too much and it ended up having major cracking issues. My most recent one turned out MUCH better! Here are the consistencies you want:
1st coat: watery pancake batter
2nd coat: normal pancake batter
3rd & 4th coat: pudding
Final coats: Peanut butter or frosting

That's the best way I can explain it LOL. The first 3 coats should be non sanded grout, and the coats after that should be a 2:1 mix of nonsanded:sanded grout. I used the textured spray paint too, and I used Mod Podge Hard Coat to seal it. Mine was pretty big, since I made it for a 4x2x2 viv, and I had no cracking or flaking issues. Here is how it turned out:

DSC01274.jpg

DSC01487.jpg

DSC01343.jpg


Don't expect your first sculpture to be perfect though. :wink: It take a little experimenting before you really get used to it, from my experience at least.
 

CitrusDragon22

Member
Original Poster
Thanks Jess!

I decided to just go ahead and use grout for my structure (which has been upgraded btw lol). My bf was trying to be helpful and save me money by donating his foam leftovers from his homebrewing endeavors, but the 2" foam was just too thick and bulky for the look I was trying to acheive. So I said, "Hunny, you're wonderful but..." and went on my merry way to Lowe's yesterday afternoon and picked up a pack of 3/4" foamboard (the pack had six 13 5/8" x 48" sheets which is equal to the huge sheet of foam but $2 less!). I also picked up bag of grout mix and some expanding foam just in case I feel like getting really creative.


Here's the new and improved platform:

IMAG0320.jpg


IMAG0318.jpg


IMAG0317.jpg


The platform is still toothpicked together because when I actually read the back of the Titebond glue (which is the stuff that was recommended by beautifuldragons.com) it said "not for use on foamboard". So now I have to make yet another trip to Lowe's and get some Liquid Nails. :roll:

Current tank is a 55 gal which I know is on the narrow side but I have been looking for a 75 so, if anyone has one they don't need/want or if you know of someone that does please let me know. I'm in need of a stand too :mrgreen:

Thanks!
 

Jess

Extreme Poster
It looks great!

Just a warning with the expanding foam though: After it expands, it shrinks again over the next couple days. So don't start grouting it or carving it until you are sure it is 100% finished shrinking. I learned this the hard way. :roll:
 

CitrusDragon22

Member
Original Poster
Ooooh...Thanks for the warning. That's definately good to know! I'm not sure if I'm even going to use it yet. I got it because I wasn't sure what my platform was going to end up looking like and I wanted to have some on hand incase I ended up needing it. I just designed the platform it as I pieced together. Do you think it could use any additions?
 

Jess

Extreme Poster
Yup, you're welcome. Personally, I would just return it. I know some people have had success with it, but with all the shrinking/expanding it does, it ruined my first scultures. :|

And I think it looks awesome the way it is! Your little guy is going to be one lucky beardie. :D
 

CitrusDragon22

Member
Original Poster
Hey Jess...how long did you let the adhesive set after glueing everything together? I finally got everything glued together tonight. I'd like to start grouting tomorrow, but I'm not sure how long I should let everything set first. Oh and what about between coats of grout?
 

Jess

Extreme Poster
I just used hot glue to glue my foam together, so there wasn't much drying time needed LOL. :) As long as it seems to be dry, you should be set to grout it. For the coats of grout, I did one coat a day, so I waited 24 hours between coats. You can wait 4-6 hours if you want to, but IMO waiting the full 24 is better because it gives the grout a chance to dry out. If you do another coat while the layer of grout underneath it is still wet, it is more likely to crack.
 
Stephanie,

The enclosure looks fabulous! I can't wait to too what your DIY platform looks like completed. Those are always so awesome. I wish I had more time to make a few of my own :)
 

Fortunate

Hatchling Member
I want one of those platforms soooo much! they are amazing!!

Is there a site that you got your building instructions from?

Both of those platforms are soo nice!!
 

CitrusDragon22

Member
Original Poster
whitehotdragons":14wlvo8s said:
Stephanie,

The enclosure looks fabulous! I can't wait to too what your DIY platform looks like completed. Those are always so awesome. I wish I had more time to make a few of my own :)

Thanks Amy! If you know which tanks you want to put platforms in just let me know and I'll get to work on a couple different sizes for you. Just let me know which tanks and I'll come in and get measurements. I'll be in first thing tomorrow to pick up Khaleesi!!

Fortunate":14wlvo8s said:
I want one of those platforms soooo much! they are amazing!!

Is there a site that you got your building instructions from?

Both of those platforms are soo nice!!

I got my original idea from beautifuldragons.com. My new and improved idea came from lizard-landscapes.com.

I was going to use stone textured spray paint but ended up just texturing the grout as it was drying and then I went back with some diluted acrylic paints and sponged the entire structure. I'm really pleased with the way it turned out and the fact that I'm saving myself $20 by returning the spray paint and spray paint sealer. And speaking of sealer, I still have to seal it. I went out and got some Mod Podge yesterday but I wasn't sure of which one to get...Jess? lol The people at the craft store were about as helpful as a box of rocks...I probably would have gotten farther with the rocks :roll: . I ended up with the Mod Podge Hard Coat. Is that the right stuff?

Here's some pics of the final look...all thats left is the sealer! And Khaleesi of course (she comes home tomorrow!! :blob8: )

SU1BRzAzNDMuanBn.jpg


SU1BRzAzNDUuanBn.jpg


SU1BRzAzNDcuanBn.jpg


SU1BRzAzNDkuanBn.jpg
 

Jess

Extreme Poster
Wow, that looks fantastic! What a lucky little dragon Khaleesi will be!

And yup, Mod Podge Hard Coat is the right stuff! So, you're good to go.
 

CitrusDragon22

Member
Original Poster
Thanks Jess! I can't wait to bring her home tomorrow, even though she won't get to use her platform for a little while yet. The directions on the Mod Podge says the cure time is 4 weeks. Did you let your's cure for that long? That seems like an awfully long time!
 

Jess

Extreme Poster
You only need to let it dry for a day or two before you put it in. The cure time just means it will be about 4 weeks until it becomes more water resistant. So until it cures, treat it like normal Mod Podge and try to avoid getting it very wet, if you can. But it's perfectly safe to use in the mean time!
 
Status
Not open for further replies.

Members online

No members online now.

Latest resources

Latest posts

Latest profile posts

Go88 là một trong những nhà cái cá cược trực tuyến hàng đầu với danh tiếng vững chắc trong cộng đồng người chơi.
Website: https://https://appgo88.link/
Tag: #appgo88link #go88link #Game_Go88 #Game_bài_Go88 #Cổng_game_Go88 #Tài_xỉu_Go88 #Nạp_tiền_Go88 #Rút_tiền_Go88 #play_Go88
Website:
https://smartcity.bandung.go.id/member/bsc3090527795d
Mirage came out of brumation on April 26. He was doing great. On May 2 he started acting funny. We just redid his tank, and he keeps going into one of his hides. He just lays there. He shows no intrest in food. HELP!
is tape safe for fixing something in my leopard geckos hide?
Day 3 of brumation. It's a struggle. I really miss my little guy. 😔
Mirage entered brumation yesterday, I'm gonna miss hanging out with my little guy.

Forum statistics

Threads
156,215
Messages
1,259,061
Members
76,138
Latest member
Nef123
Top Bottom