I am almost done with my first ever built enclosure. I would like to start off by giving a shout out to dragonov because after doing hours and hours of research I ended up stealing a lot of his ideas, mainly the basic box design, with a few tweaks of my own of course. 
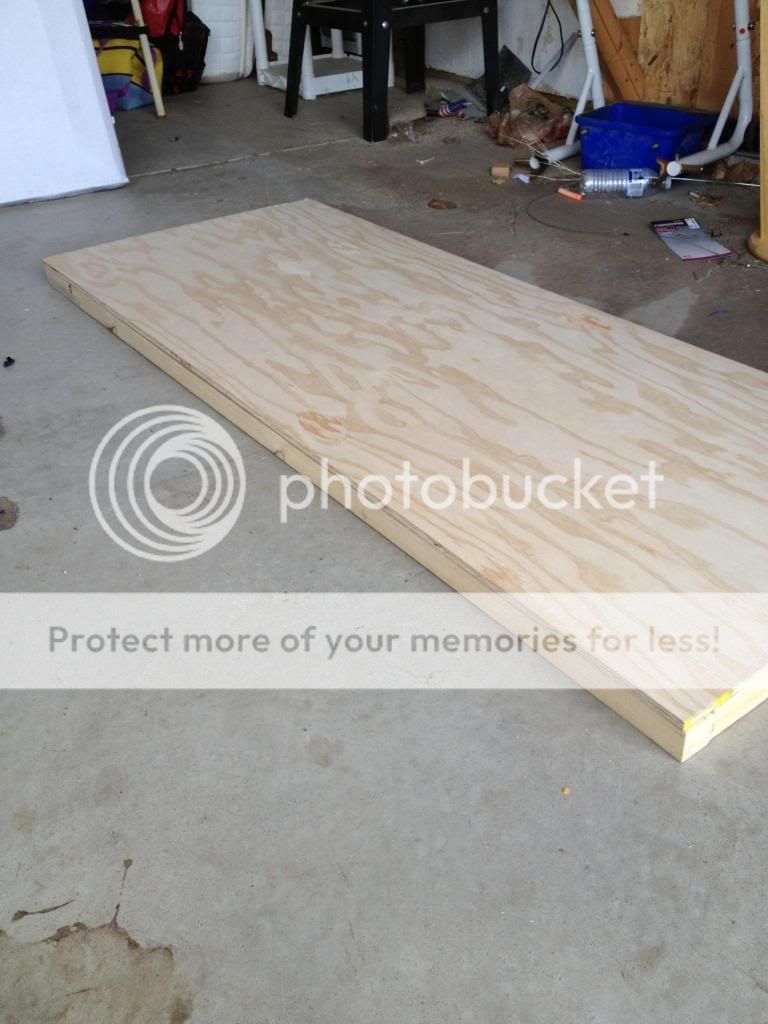
I started by making the frame out of 2x2 (just like in dragonovs design) and glued and screwed the plywood on it. This is the floor. I also built a second identical one for the roof.
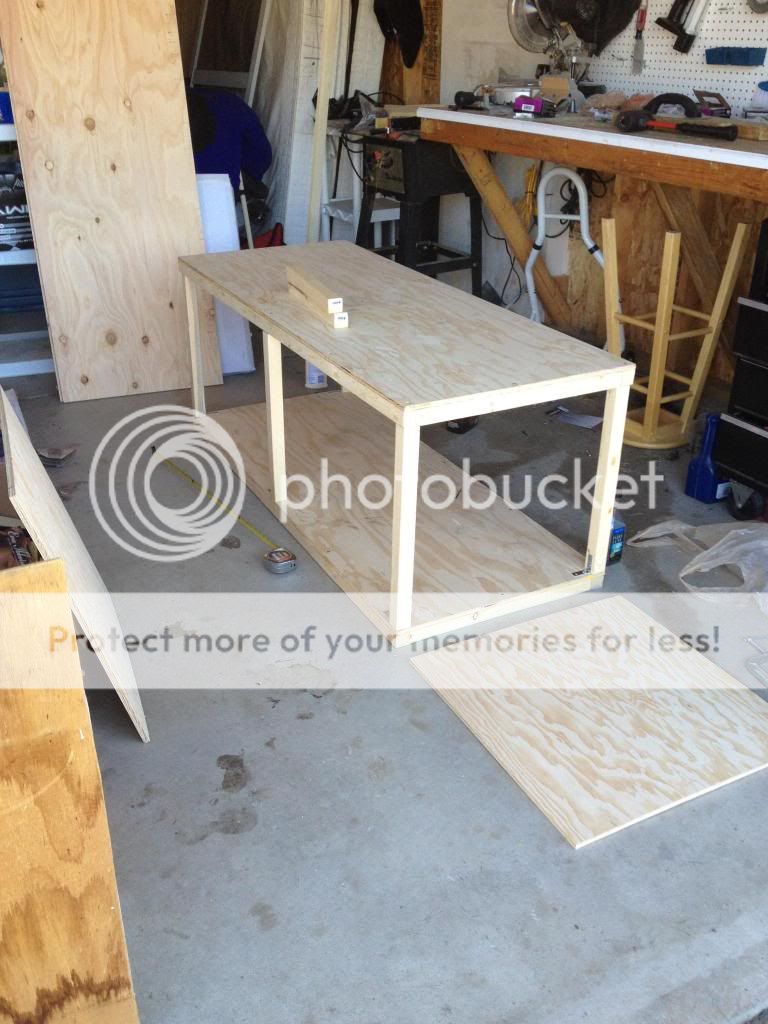
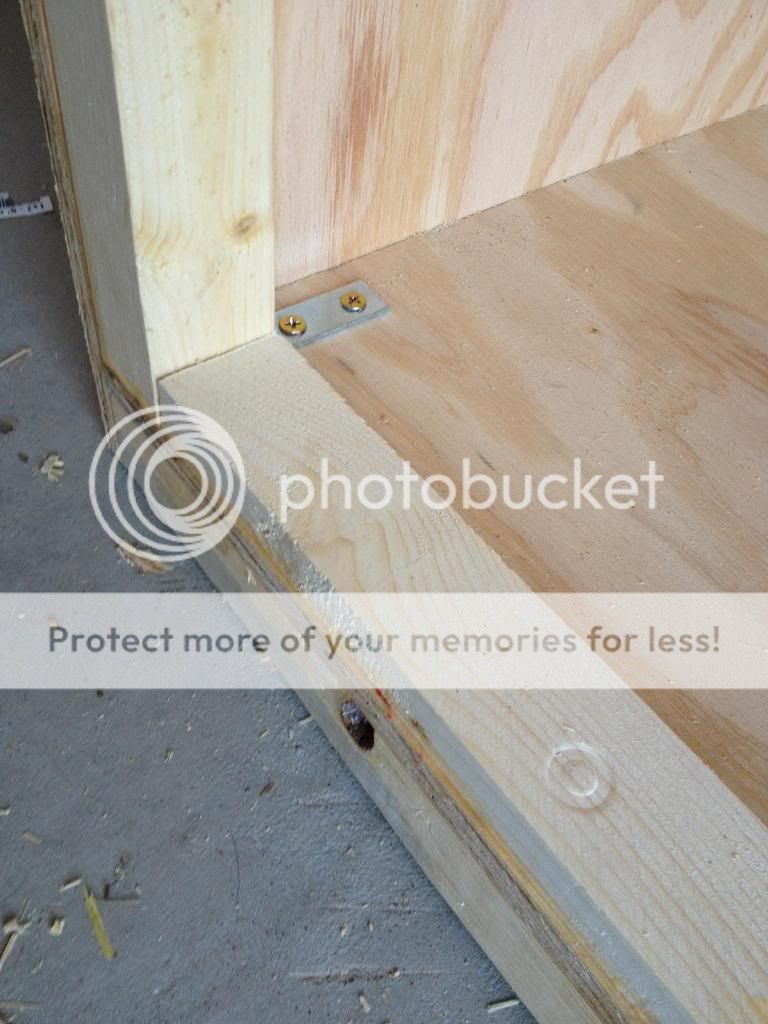
I then cut 2x2 posts to hold the roof and again glued and screwed (using L-brackets) to hold everything in place.
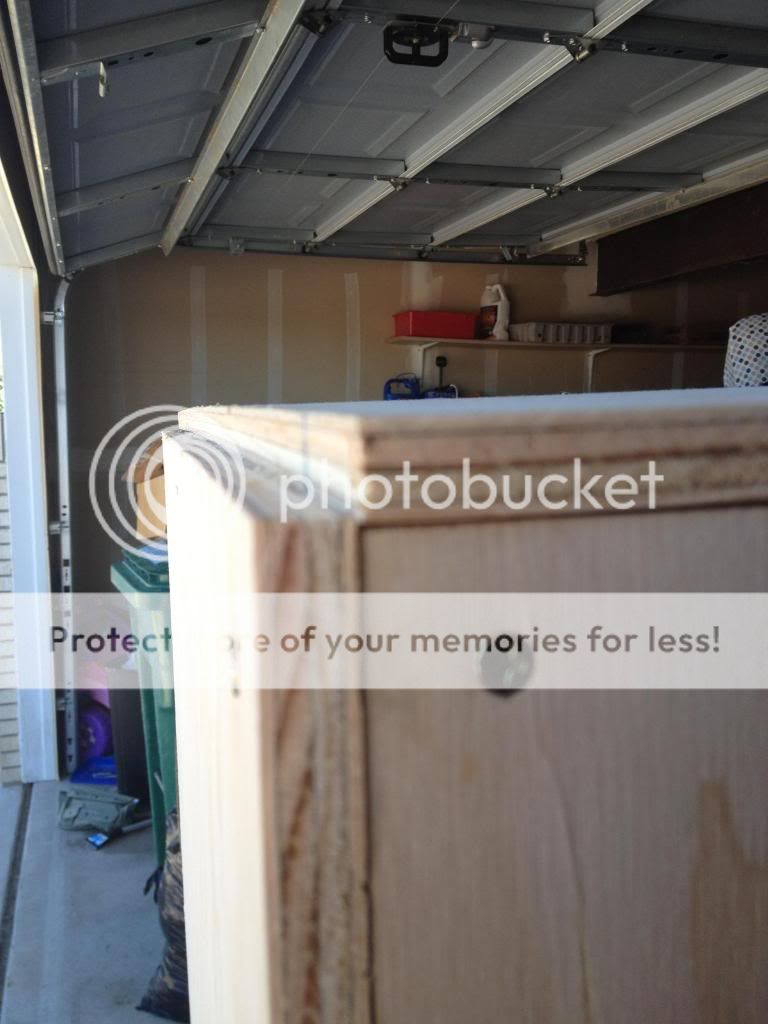
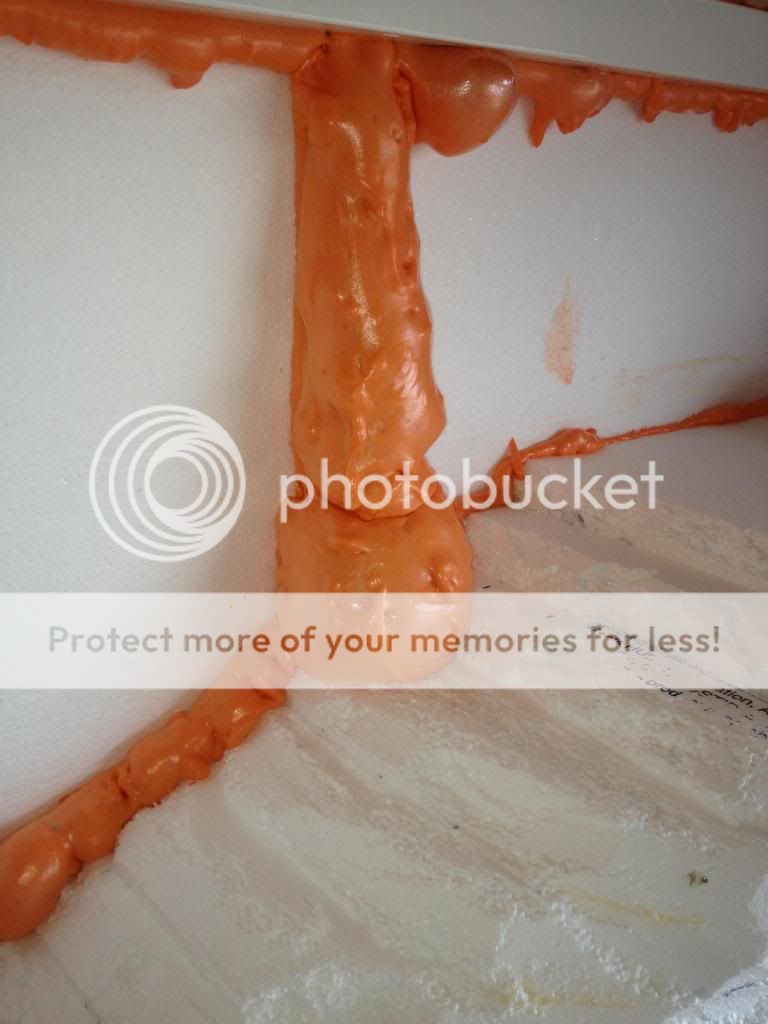
After that I installed the sides and the back using the same methods as above. When that was done I glued a piece of 1x2 as you can see in the pic being held by C-Clamps and weighted down with horseshoes (I only had 2 clamps haha.
The last pic is one of my many "OOPS" moments. When I had them cut the plywood at the hardware store, I forgot to take into account the half inch that would be added once I put the backboard on. LOL So I aligned it with the top, front and bottom and the pic shows where the side meets the back of the viv.

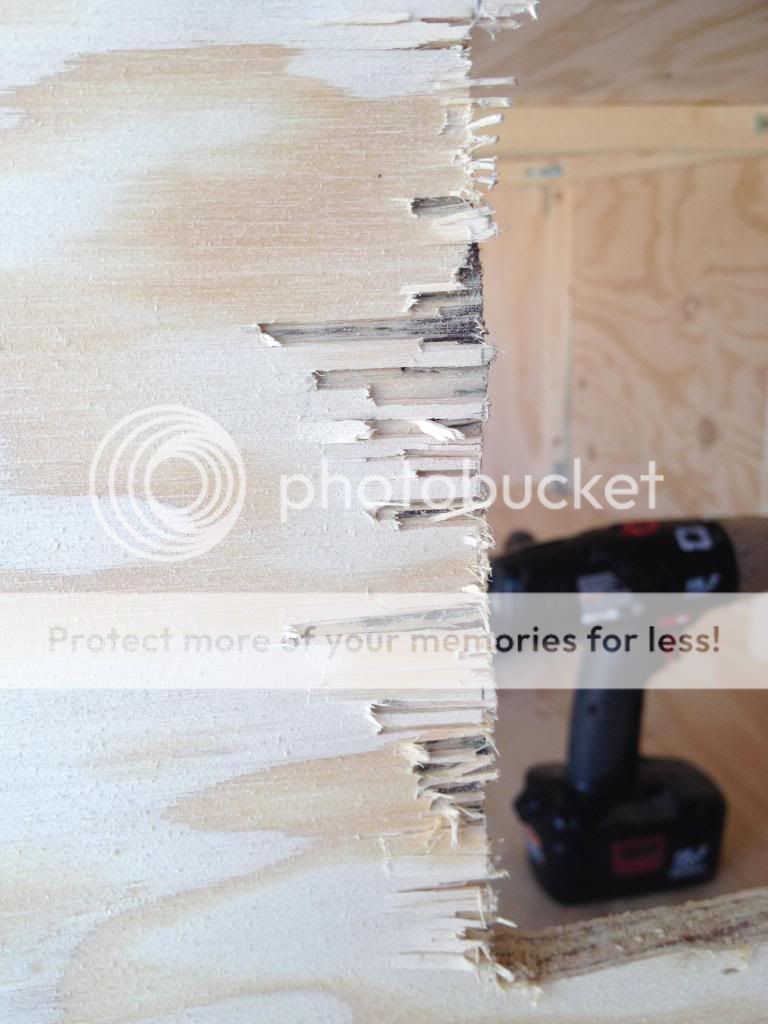
Instead of cutting the holes for the vents before I put the sides on, I did afterwards which was okay but I should of done it beforehand. I did this with by drilling a 1" hole in the wood and then used a reciprocating saw to cut the rest. Boy was that a pain! And it destroyed the edges of my plywood. (I used what I had and I did not have a jigsaw)

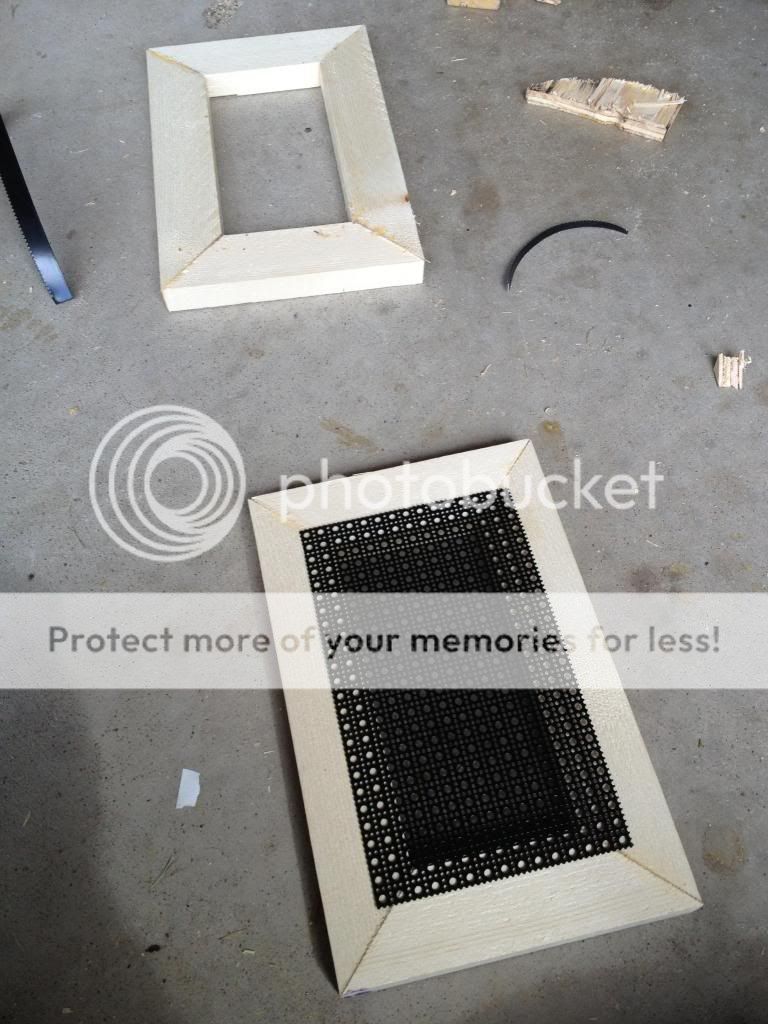
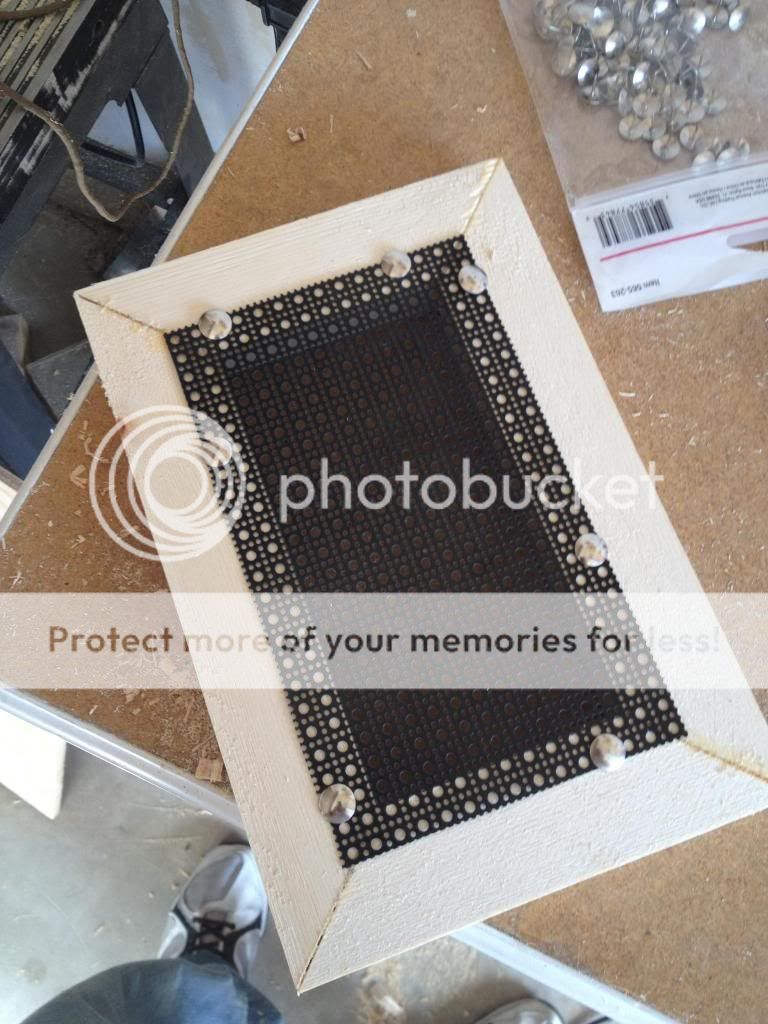
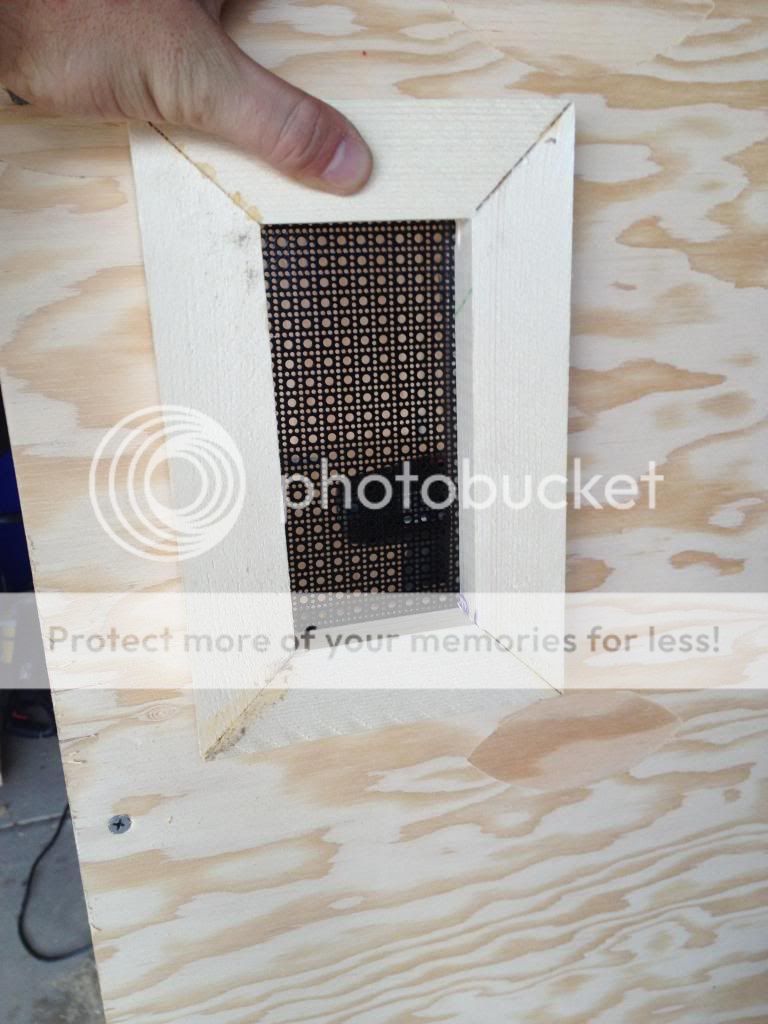
In the end it worked out though. I just made a frames out of the extra 1x2 I had and then cut the perforated metal to fit. I attached the vent to the frame using thumbtacks and gently using a hammer to flatten them out. The vents are 3x6" on opposite sides of the enclosure.
After I got those glued in place I bought a fine cut wood blade for the saw hoping it would help to cut the holes in the top for the lights. It helped a little but still kinda tore up the edges of the wood, which some smoothing sandpaper took care of quite nicely. The only pics I have of these holes is after the viv is stained and everything so that's why they are the way they are. I also then glued pieces of extra 1x2 around the holes to keep the light fixtures in perfect position and to keep them from sliding around. The first pic is of the hole I cut for the warm side. I am using Zoomeds large combo deepdome light fixture. The second pic is of the hole on the opposite side for a regular 5 1/2 inch fixture that will be used for just extra light, not heat. As you can see they are cut to fit the fixtures so hopefully they last awhile.


After the holes were done I then began to stain the viv. I used two coats of outdoor spar urethane clear coat for the inside and 2 coats of polyurethane/stain mix for the outside. As you can see I chose flat black. This pic is after the first coat of the black.

This is the point where I realized that I didn't have anyway to mount my 4' light fixture for the UVB tube. So I cut some 2x2 and glued them to the back 2x2 to be able to mount the fixture. You will see this in later pics and I will point this out. I then drilled a hole in the back for the cord of the florescent fixturce to pass through.
After this it was time to start cutting Styrofoam! I had no idea what I was doing (as in what design I wanted) so everything you are about to see was done as it came to my head, no plan. I am kind of a perfectionist and was overthinking a lot of it but I think it turned out alright. As you can see I placed sheets to cover the back and the sides and cut holes for the vents. You can also see the 2 random 2x2s in the back along with the hole on the left for the florescent light fixture. As far as the mound of rock, I just glued pieces of broken Styrofoam together and used a sharp knife to carve it into the shape, leaving a space underneath in the corner so he has a cave of sorts to hide in. I used leftover wood glue till I ran out and then started using liquid nails.
The pillar on the far right was a block of foam from hobby lobby (they are very proud of there Styrofoam, its expensive, but its the only place I could find blocks rather than sheets) Then on top I used broken pieces of Styrofoam to make that tri-layered rock formation for him to bask on. Same method as stated before.
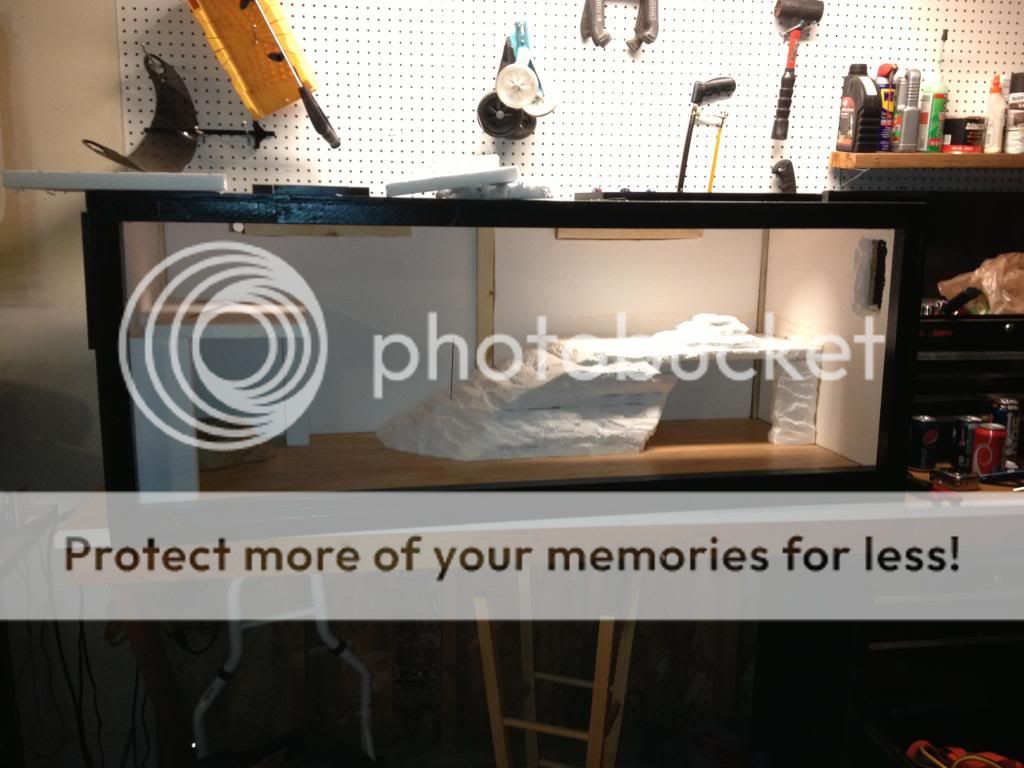

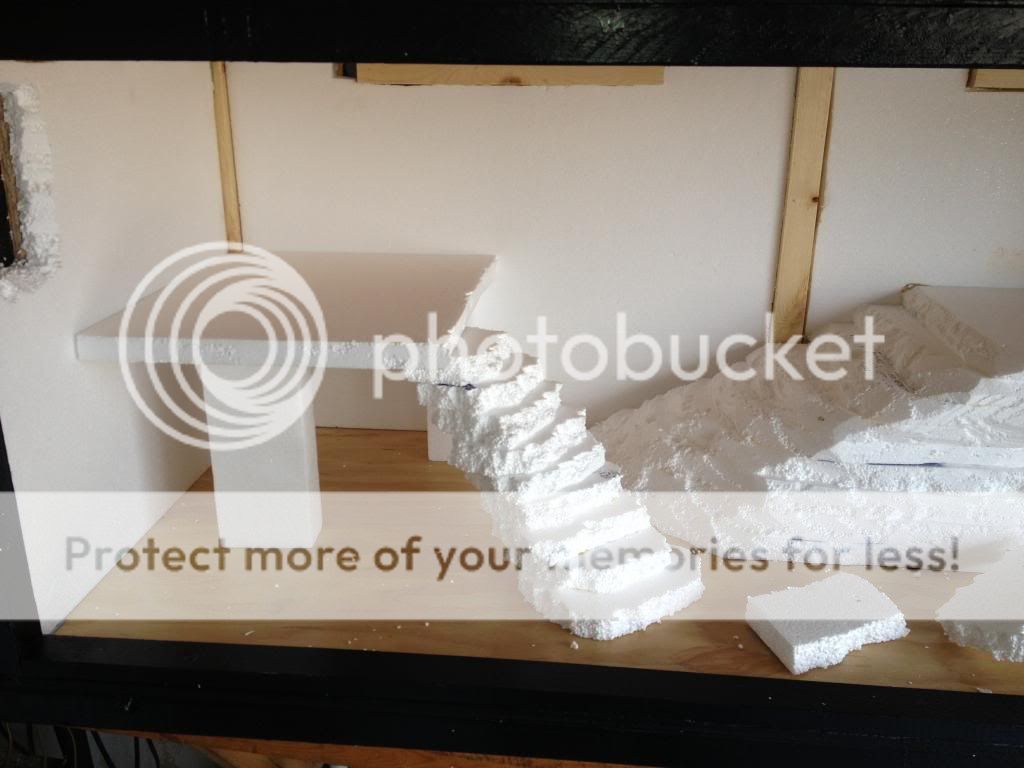
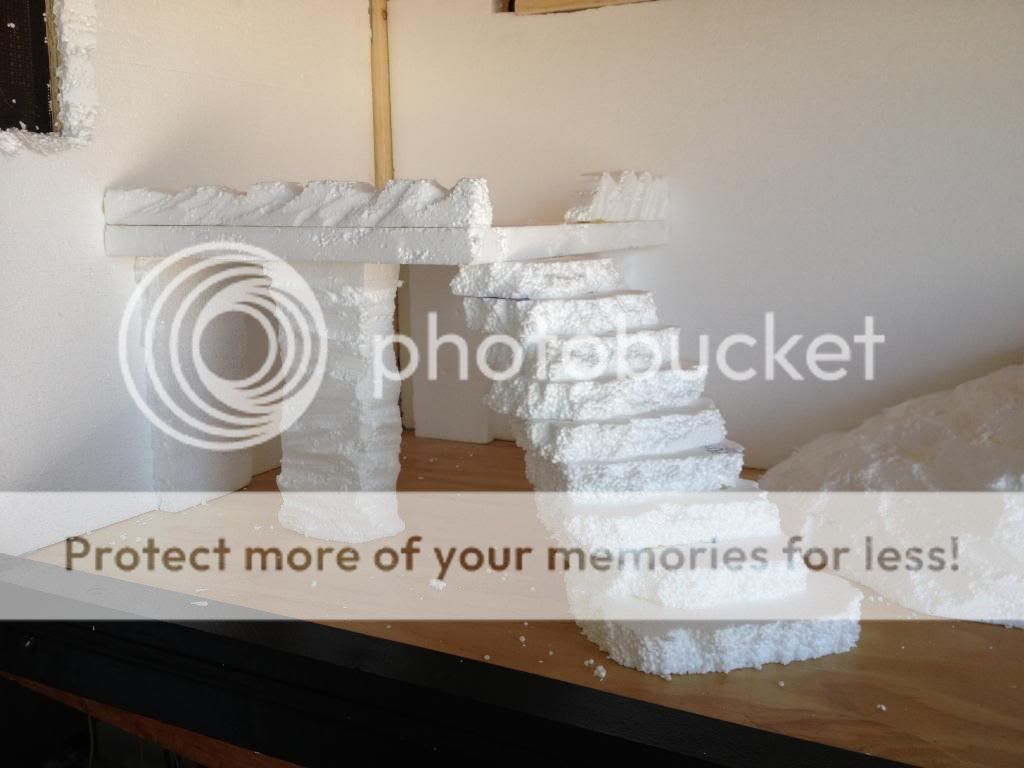
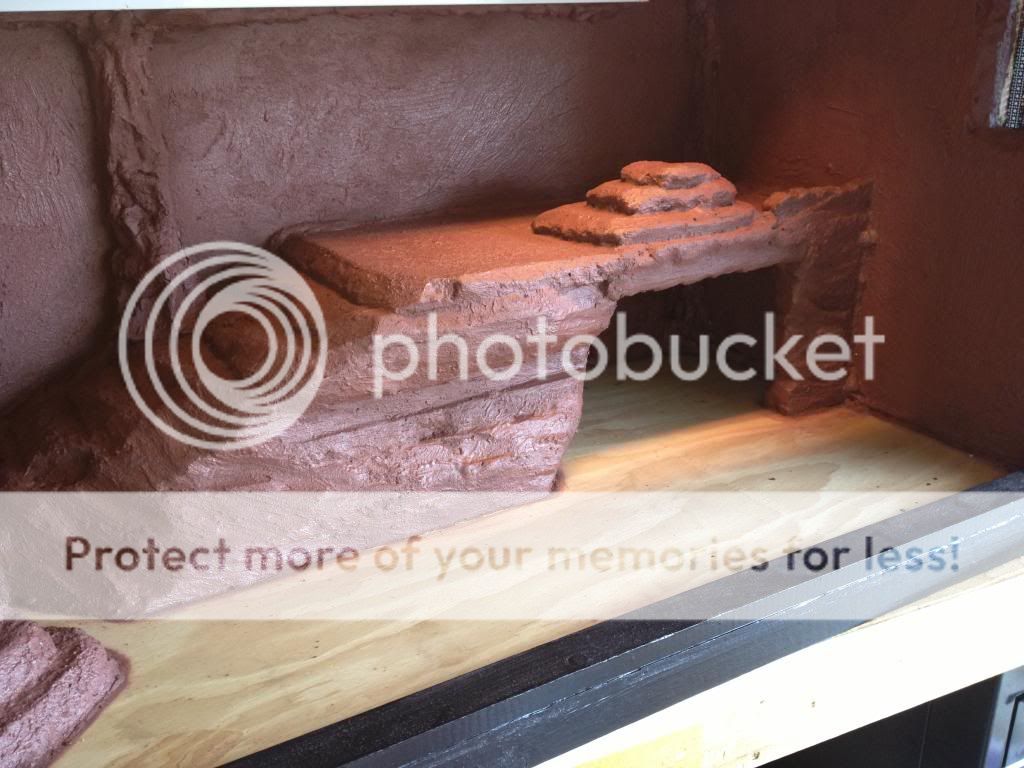
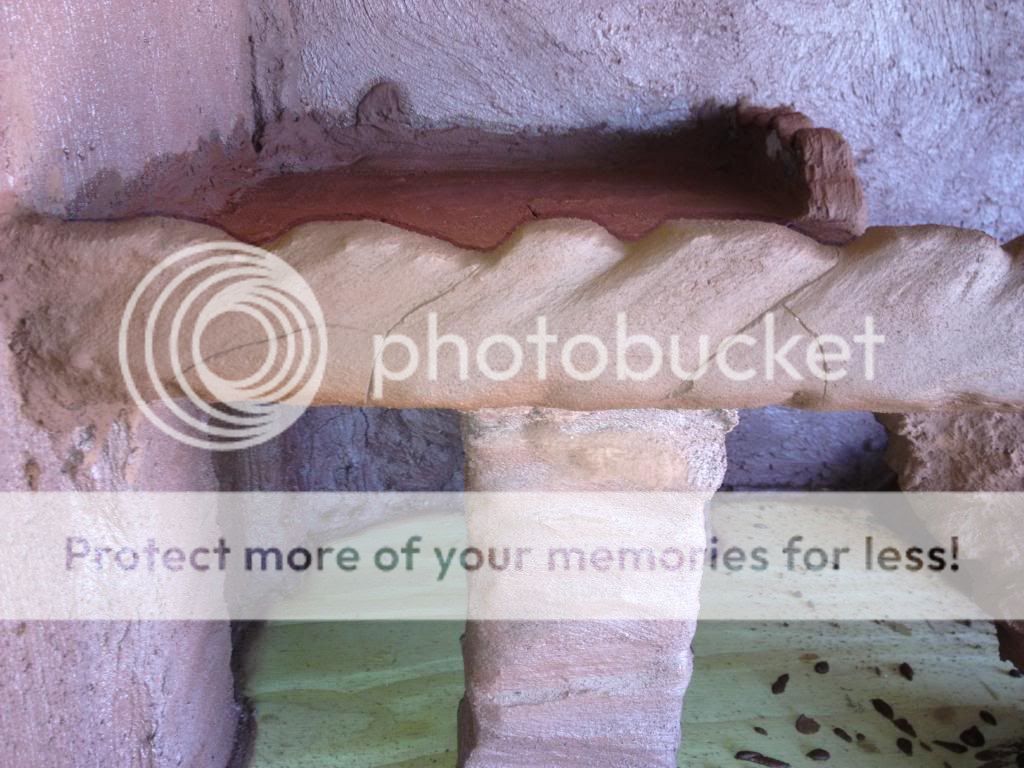
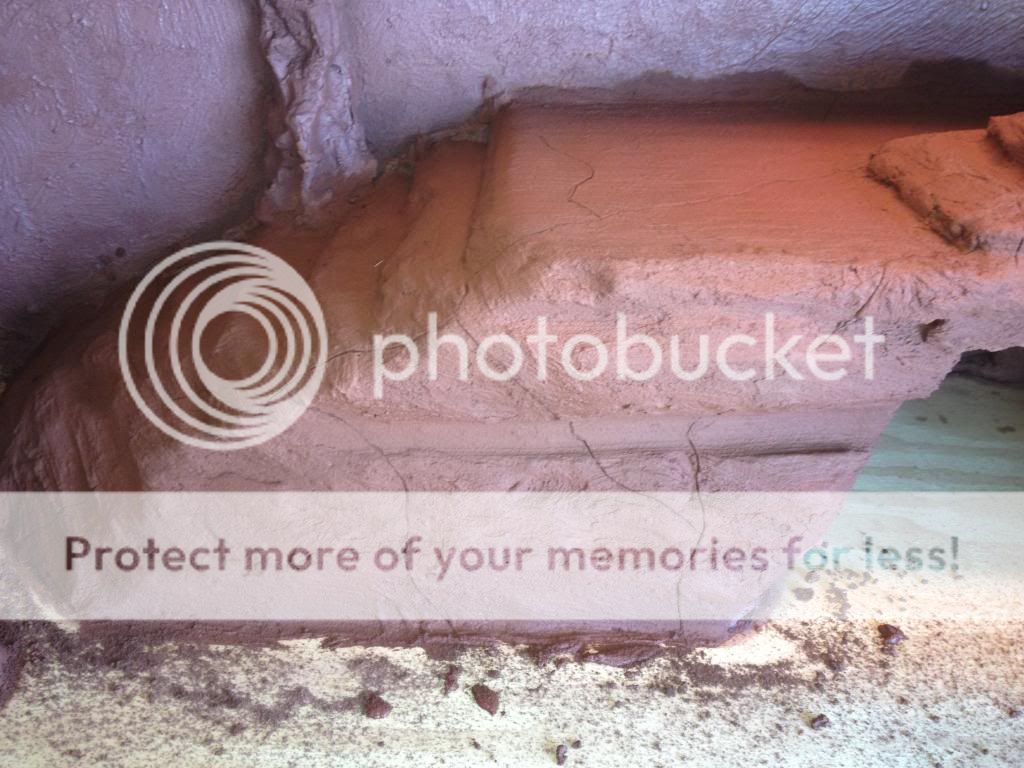
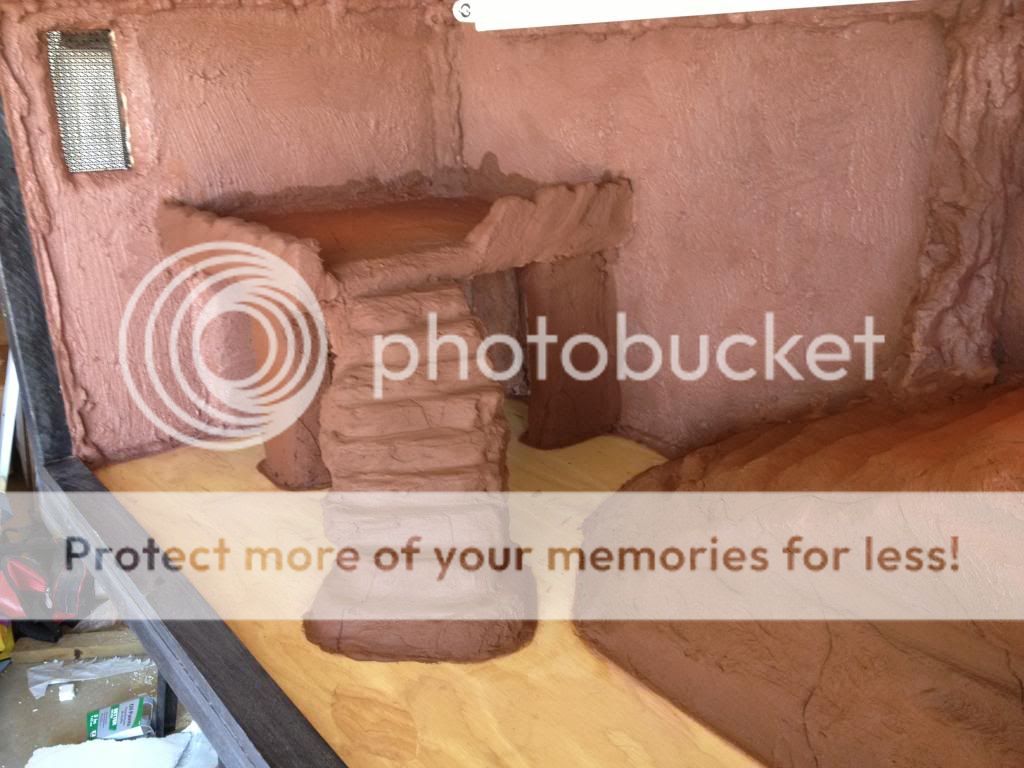
Then I started the Styrofoam on the other side. I decided to make a steep staircase for him to climb with a platform for him to rest on. He can also hide underneath this as well. You can see the blocks I used as pillars before I cut the rocky shapes into them. In the last pic you can see it done with the ledges on the top. You can also see that I cut and glued more Styrofoam to the back walls to give the platform more support.
This is the viv with all the Styrofoam complete.

Then I mounted the 4' light fixture in the back and now it was time to use the expanding foam. I basically foamed all the corners throughout the viv. I also used it to fill in the gaps behind the light fixture and the back of the cage. Or any gaps for that matter. I chose to use the fireblock just because of the heat lamps, etc. I know it probably wasn't needed but I did it anyway.
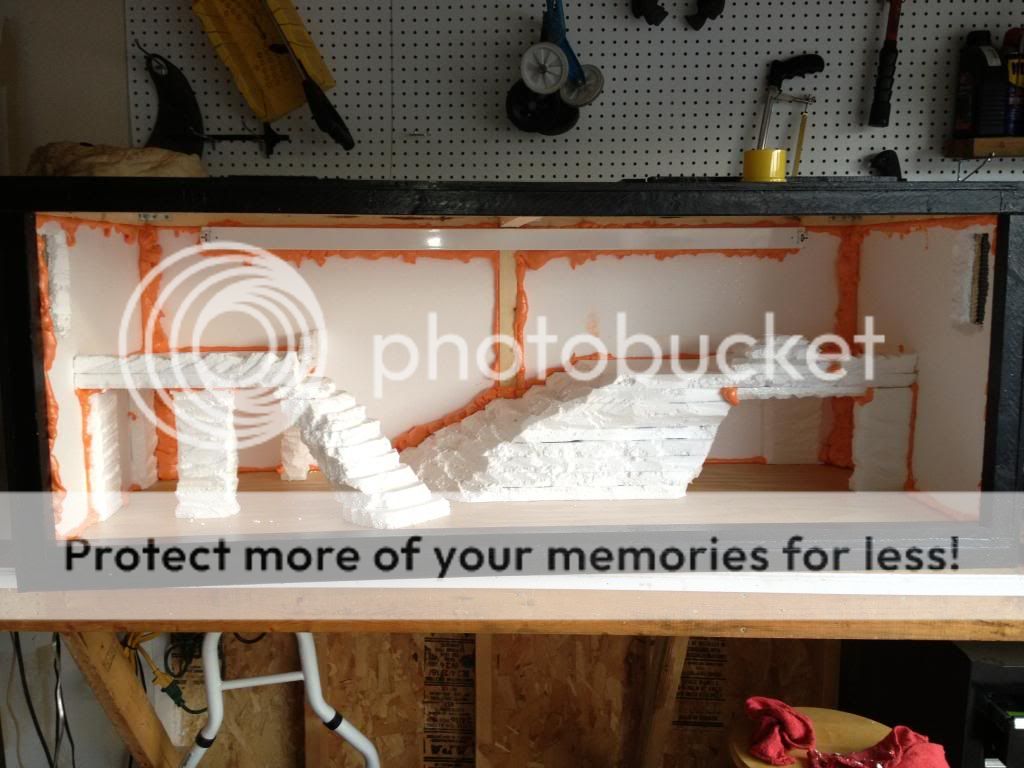
I then covered the center 2x2 in it on purpose so I could make some sort of pillar later.
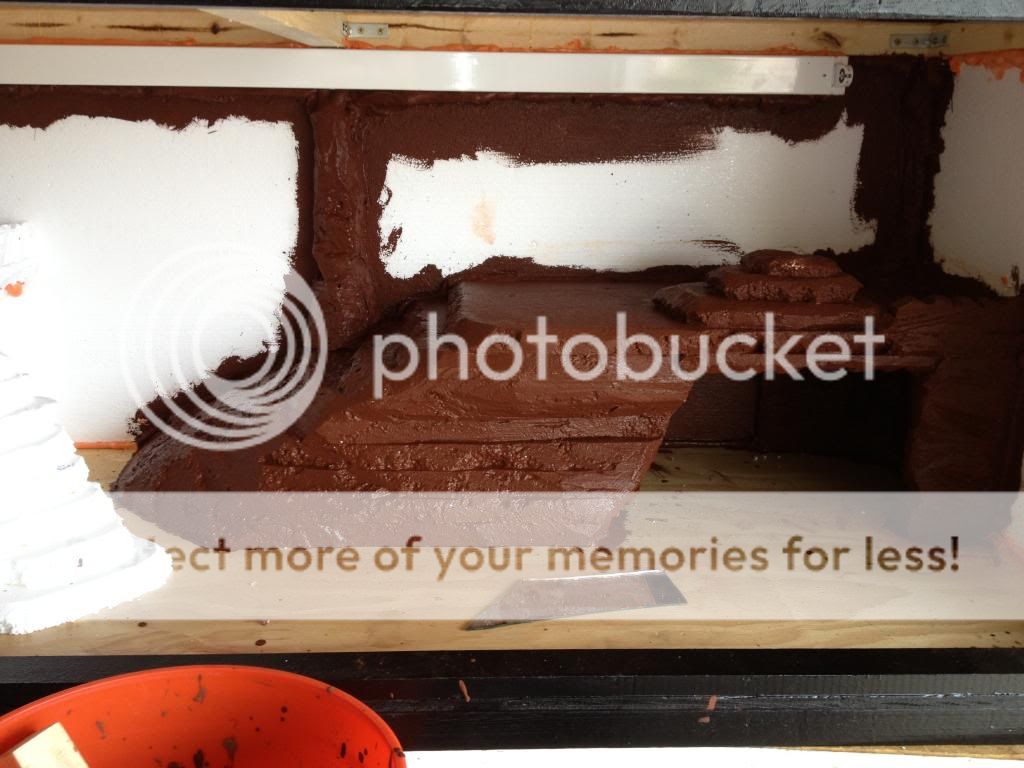
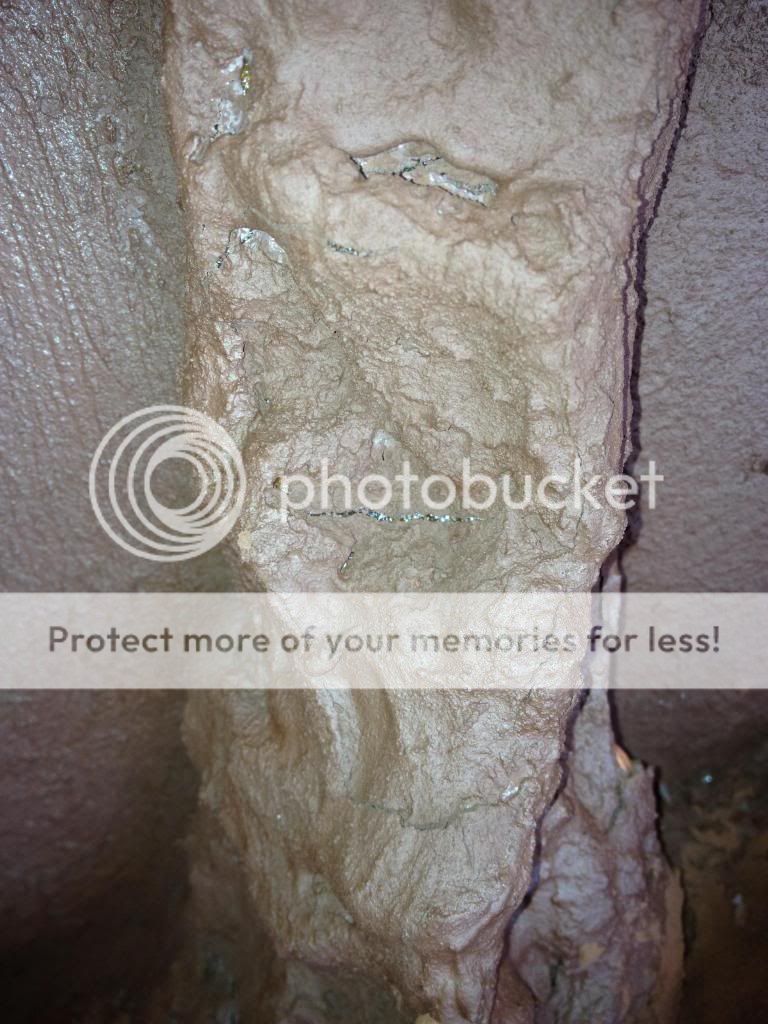
Once that was done I carved the expanding foam as best as I could to match the Styrofoam. Then it was time for the tile grout. I used a sanded grout. (wasn't as hard as some people claimed. The only issue I had was while I was at home depot I asked them about the colors. I said I wanted a red rock, red desert sorta look. They pointed me directly to the quarry red clay color. As you can see, apparently they don't know what the red rock, red desert color looks like :lol: And this is the first layer. I thinned it out quite a bit, to ALMOST a water consistency (thinned it a lot) You could see just a little thickness in it. This was so I could get in all the cracks and crevices.
This is of the first layer done a drying. I chose to stick with the color primarily because I had over spent my budget on the project already. (I spent roughly $600!!) Some reasons why the cost was so high was because I spent around $130 on lighting alone, no to mention tools and extra things I needed that I didn't have. I don't think the color turned out pretty good even though it wasn't quite what I was looking for.

This was after the second layer. For this layer I thickened up the grout a lot. To the point where it was like a toothpaste consistency. I blabbed a lot of it on there and it wasn't too hard to get it where I wanted. I couldn't paint it on anymore, I had to blab it on with the paintbrush which gave it a pretty cool effect, I think.
In this photo you can see (on the upper left) that my center pillar didn't really turn out like a pillar. I was going to leave it like that till it started cracking (already :? ) as you can see in the second and third photo.
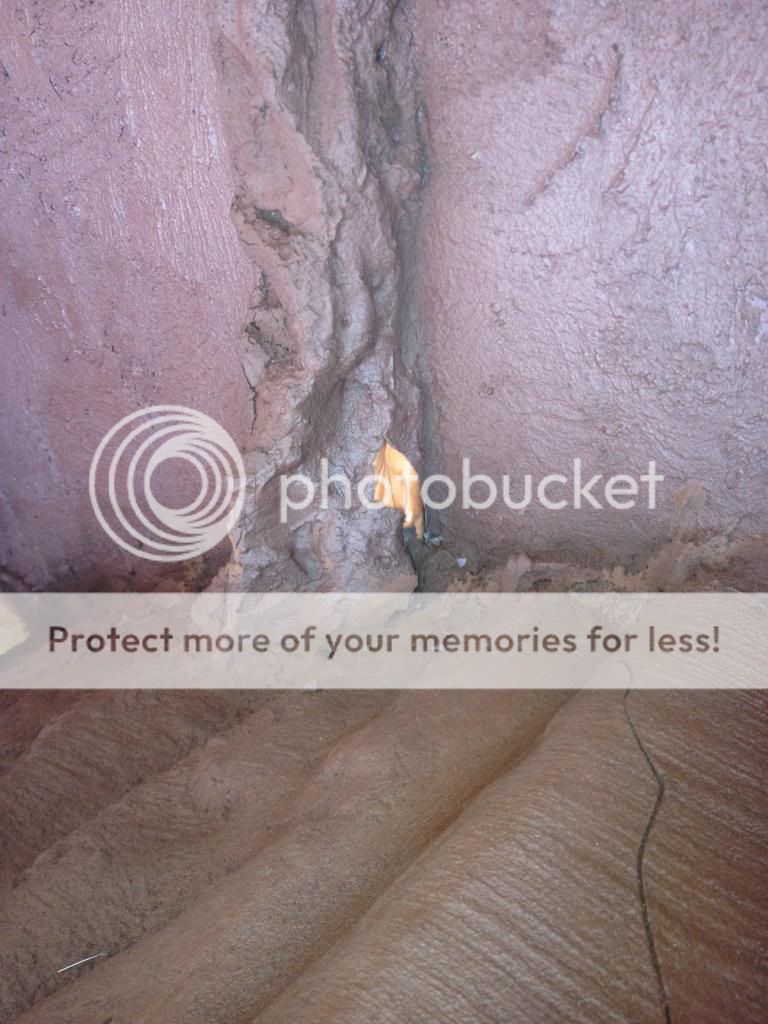
To fix this I completely covered the pillar with a lot of grout. And now it kinda looks like a tree trunk so I will probably add fake leaves to the top to make it look like a tree.

Then I added a third layer, about the same thickness as the second. This layer I really cake on there, but I only put it on the areas of high traffic. Basically I put in on everything except the walls. (Which he has already climbed up a few times so I'm thinking maybe I should have done the walls with a thick third layer too but oh well, the second layer was pretty thick so we will see how it holds). While the third layer was still wet I used I razor blade to carve some cracks into the rocks, to make it look more like rock. These are some examples:
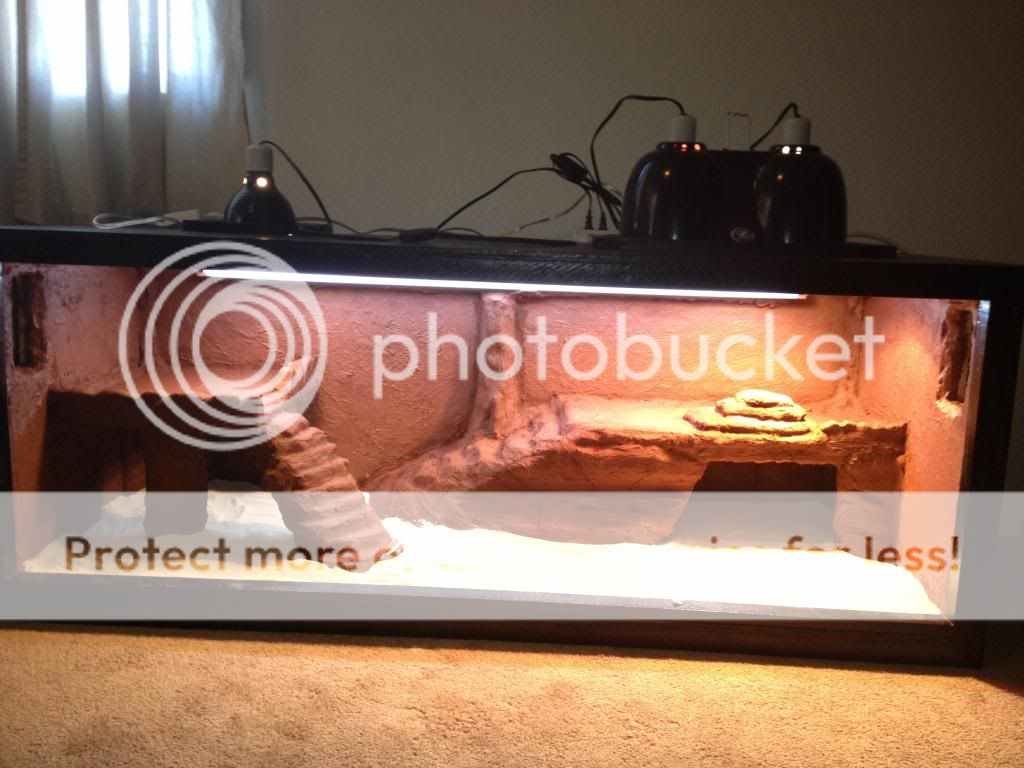
I waited a couple days for all this to dry and then brought it in the house and hooked up the lights! Right now in the double dome I have a 50W basking and a 50W red light. on the left I have a 60W normal house bulb for extra light. I was worried about the cool side temps with this but even up on that platform its holding around 80 which is good. See what happens when I add the glass. In the back I have a 48" ReptiSin 10.0 tube.
At first because it is such a large enclosure I had initially bought a 150W basking bulb and a 75 watt infared for the double dome (my beardie sleeps very soundly through the red light, that's why I chose it for night) However, in the first test the temps got up to 150* F at the basking site!! This was without the glass on too. SO I went back and exchanged with a 75W Bask and a 50W red. Still got a little too hot so no I am using a 50W bask and a 50W red. The temps are slightly lower than I want but I think once I get the glass on it will retain enough heat to bring the temps to optimum range. And when I say this I mean that I am getting these temps with ONLY the 50W basking bulb, the red light is off and only used for night. the red light makes it around 80 on the warm side at night. I think the reason I am getting such high temps with a lower wattage bulb is because I covered the inside of the viv with the Styrofoam, which is normally used as insulation in houses. I don't mind that though, cheaper power bill .
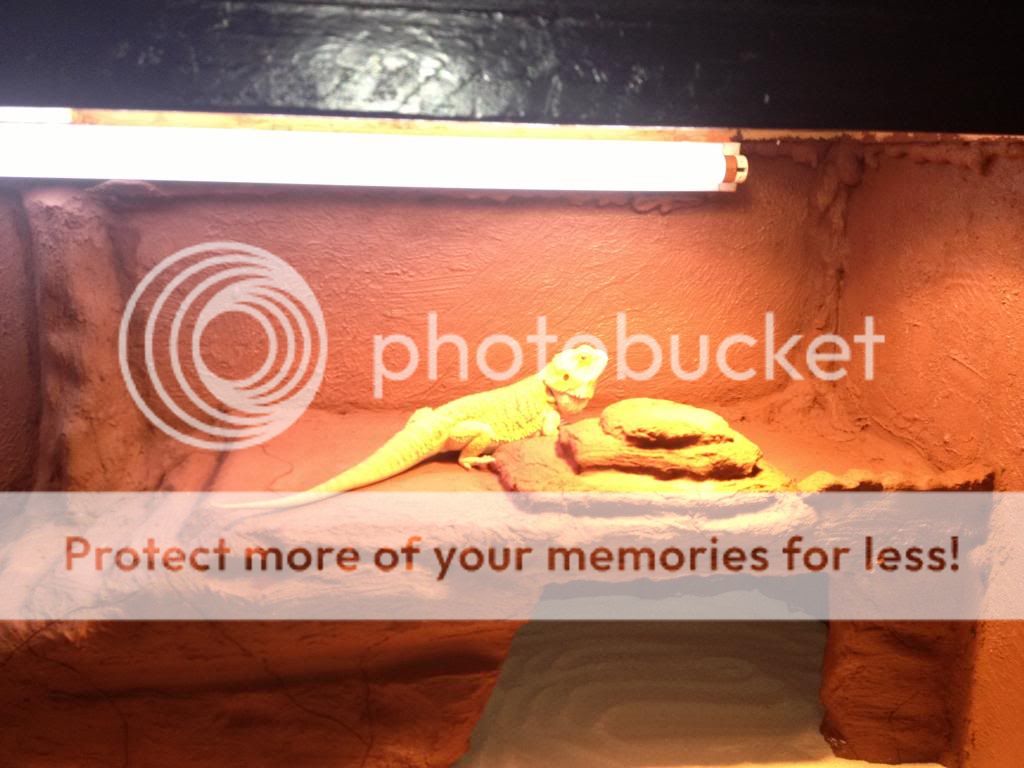
I also added the substrate. I used CaribSea aragonite reef sand. I know that sand is controversial on here and that everyone advises against using it, but I have taken the precautions and done the research before choosing this substrate. He has plenty of space with no sand as well. Not trying to start another sand debate, so I will leave it at that.
I have introduced him to his new viv which he loves to explore. It's currently on the floor so after a few minutes he jumps out and runs around the living room. I am still currently waiting on the glass and then it is finally done. I spent about 2 weeks on the project, mainly because it takes so long for things to dry and also because I am a perfectionist and try to get everything just right (even though it didn't haha, but I am still happy with it.) I used almost the entire 25lbs bag of grout so I am thinking it should be tough enough to withstand whatever Bowser throws at it. I did not seal it with anything for the same reasons that others haven't. To preserve the look and to keep his nails filed down.
Anyway, that's my new viv (I built it because the guy I got him from kept him in a 20L since he got him at a petsmart, they told him it was a 40g and it was good when he was an adult too................................................ he said he was about a year and a half old but hes only 16 inches and I think it might be because he's been in such a small tank. I've had him for about a month) All I need now is the glass, and over time I will add some fake plants to it as well. Maybe some small branches/logs. Im also going to have to build a stand/table for it to get it off the floor but its good right where its at for now. Once again, thanks to dragonov (and others) for the ideas and inspiration. Like he said, its really not that hard, especially if you do your research. I spent a lot but I do imagine that you could make it cheaper if you wanted. I don't have much woodworking/construction/concrete/art experience either but it still turned out very sturdy and I don't think I did too bad, if I do say so myself. A lot of the things I did with this build were first time experiences, tile grout, carving Styrofoam into shapes, staining wood, etc. But if you really WANT to do it, you can.
Thanks for looking and I will update as often as I make changes and if you have any questions, feel free to ask. I'm no expert but I may be able to help.
-Me
I started by making the frame out of 2x2 (just like in dragonovs design) and glued and screwed the plywood on it. This is the floor. I also built a second identical one for the roof.

I then cut 2x2 posts to hold the roof and again glued and screwed (using L-brackets) to hold everything in place.

After that I installed the sides and the back using the same methods as above. When that was done I glued a piece of 1x2 as you can see in the pic being held by C-Clamps and weighted down with horseshoes (I only had 2 clamps haha.
The last pic is one of my many "OOPS" moments. When I had them cut the plywood at the hardware store, I forgot to take into account the half inch that would be added once I put the backboard on. LOL So I aligned it with the top, front and bottom and the pic shows where the side meets the back of the viv.


Instead of cutting the holes for the vents before I put the sides on, I did afterwards which was okay but I should of done it beforehand. I did this with by drilling a 1" hole in the wood and then used a reciprocating saw to cut the rest. Boy was that a pain! And it destroyed the edges of my plywood. (I used what I had and I did not have a jigsaw)


In the end it worked out though. I just made a frames out of the extra 1x2 I had and then cut the perforated metal to fit. I attached the vent to the frame using thumbtacks and gently using a hammer to flatten them out. The vents are 3x6" on opposite sides of the enclosure.


After I got those glued in place I bought a fine cut wood blade for the saw hoping it would help to cut the holes in the top for the lights. It helped a little but still kinda tore up the edges of the wood, which some smoothing sandpaper took care of quite nicely. The only pics I have of these holes is after the viv is stained and everything so that's why they are the way they are. I also then glued pieces of extra 1x2 around the holes to keep the light fixtures in perfect position and to keep them from sliding around. The first pic is of the hole I cut for the warm side. I am using Zoomeds large combo deepdome light fixture. The second pic is of the hole on the opposite side for a regular 5 1/2 inch fixture that will be used for just extra light, not heat. As you can see they are cut to fit the fixtures so hopefully they last awhile.


After the holes were done I then began to stain the viv. I used two coats of outdoor spar urethane clear coat for the inside and 2 coats of polyurethane/stain mix for the outside. As you can see I chose flat black. This pic is after the first coat of the black.

This is the point where I realized that I didn't have anyway to mount my 4' light fixture for the UVB tube. So I cut some 2x2 and glued them to the back 2x2 to be able to mount the fixture. You will see this in later pics and I will point this out. I then drilled a hole in the back for the cord of the florescent fixturce to pass through.
After this it was time to start cutting Styrofoam!
I had no idea what I was doing (as in what design I wanted) so everything you are about to see was done as it came to my head, no plan. I am kind of a perfectionist and was overthinking a lot of it but I think it turned out alright. As you can see I placed sheets to cover the back and the sides and cut holes for the vents. You can also see the 2 random 2x2s in the back along with the hole on the left for the florescent light fixture. As far as the mound of rock, I just glued pieces of broken Styrofoam together and used a sharp knife to carve it into the shape, leaving a space underneath in the corner so he has a cave of sorts to hide in. I used leftover wood glue till I ran out and then started using liquid nails.The pillar on the far right was a block of foam from hobby lobby (they are very proud of there Styrofoam, its expensive, but its the only place I could find blocks rather than sheets) Then on top I used broken pieces of Styrofoam to make that tri-layered rock formation for him to bask on. Same method as stated before.


Then I started the Styrofoam on the other side. I decided to make a steep staircase for him to climb with a platform for him to rest on. He can also hide underneath this as well. You can see the blocks I used as pillars before I cut the rocky shapes into them. In the last pic you can see it done with the ledges on the top. You can also see that I cut and glued more Styrofoam to the back walls to give the platform more support.


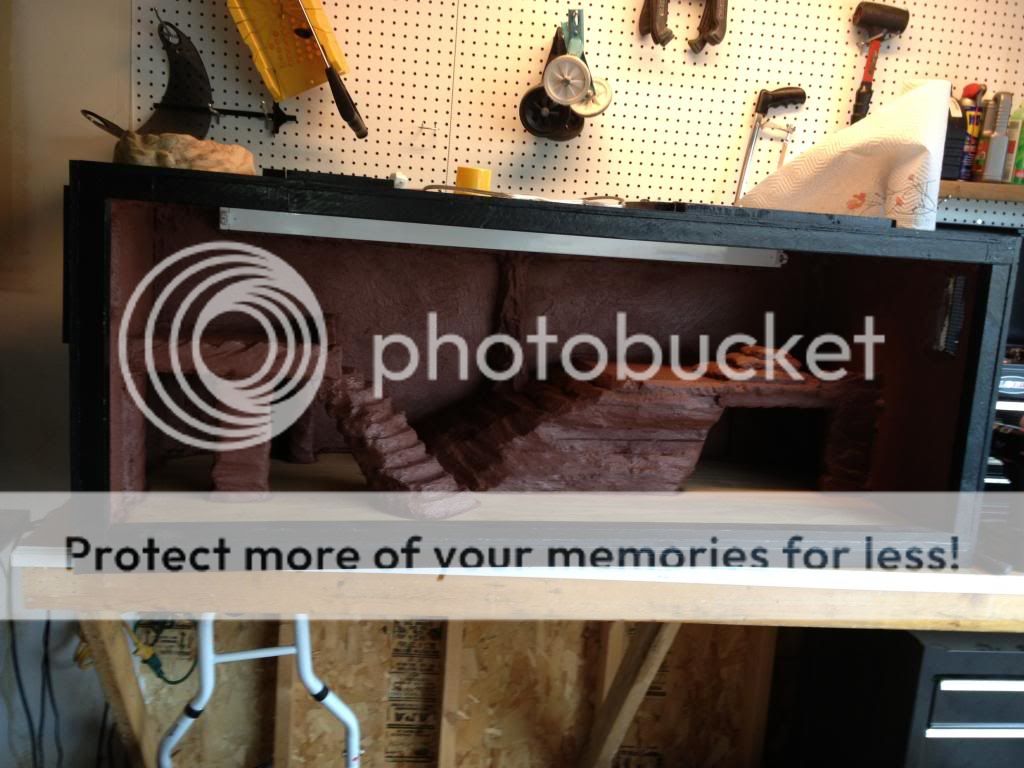
This is the viv with all the Styrofoam complete.

Then I mounted the 4' light fixture in the back and now it was time to use the expanding foam. I basically foamed all the corners throughout the viv. I also used it to fill in the gaps behind the light fixture and the back of the cage. Or any gaps for that matter. I chose to use the fireblock just because of the heat lamps, etc. I know it probably wasn't needed but I did it anyway.

I then covered the center 2x2 in it on purpose so I could make some sort of pillar later.

Once that was done I carved the expanding foam as best as I could to match the Styrofoam. Then it was time for the tile grout. I used a sanded grout. (wasn't as hard as some people claimed. The only issue I had was while I was at home depot I asked them about the colors. I said I wanted a red rock, red desert sorta look. They pointed me directly to the quarry red clay color. As you can see, apparently they don't know what the red rock, red desert color looks like :lol: And this is the first layer. I thinned it out quite a bit, to ALMOST a water consistency (thinned it a lot) You could see just a little thickness in it. This was so I could get in all the cracks and crevices.

This is of the first layer done a drying. I chose to stick with the color primarily because I had over spent my budget on the project already. (I spent roughly $600!!) Some reasons why the cost was so high was because I spent around $130 on lighting alone, no to mention tools and extra things I needed that I didn't have. I don't think the color turned out pretty good even though it wasn't quite what I was looking for.

This was after the second layer. For this layer I thickened up the grout a lot. To the point where it was like a toothpaste consistency. I blabbed a lot of it on there and it wasn't too hard to get it where I wanted. I couldn't paint it on anymore, I had to blab it on with the paintbrush which gave it a pretty cool effect, I think.

In this photo you can see (on the upper left) that my center pillar didn't really turn out like a pillar. I was going to leave it like that till it started cracking (already :? ) as you can see in the second and third photo.


To fix this I completely covered the pillar with a lot of grout. And now it kinda looks like a tree trunk so I will probably add fake leaves to the top to make it look like a tree.

Then I added a third layer, about the same thickness as the second. This layer I really cake on there, but I only put it on the areas of high traffic. Basically I put in on everything except the walls. (Which he has already climbed up a few times so I'm thinking maybe I should have done the walls with a thick third layer too but oh well, the second layer was pretty thick so we will see how it holds). While the third layer was still wet I used I razor blade to carve some cracks into the rocks, to make it look more like rock. These are some examples:


I waited a couple days for all this to dry and then brought it in the house and hooked up the lights! Right now in the double dome I have a 50W basking and a 50W red light. on the left I have a 60W normal house bulb for extra light. I was worried about the cool side temps with this but even up on that platform its holding around 80 which is good. See what happens when I add the glass. In the back I have a 48" ReptiSin 10.0 tube.

At first because it is such a large enclosure I had initially bought a 150W basking bulb and a 75 watt infared for the double dome (my beardie sleeps very soundly through the red light, that's why I chose it for night) However, in the first test the temps got up to 150* F at the basking site!! This was without the glass on too. SO I went back and exchanged with a 75W Bask and a 50W red. Still got a little too hot so no I am using a 50W bask and a 50W red. The temps are slightly lower than I want but I think once I get the glass on it will retain enough heat to bring the temps to optimum range. And when I say this I mean that I am getting these temps with ONLY the 50W basking bulb, the red light is off and only used for night. the red light makes it around 80 on the warm side at night. I think the reason I am getting such high temps with a lower wattage bulb is because I covered the inside of the viv with the Styrofoam, which is normally used as insulation in houses. I don't mind that though, cheaper power bill
.I also added the substrate. I used CaribSea aragonite reef sand. I know that sand is controversial on here and that everyone advises against using it, but I have taken the precautions and done the research before choosing this substrate. He has plenty of space with no sand as well. Not trying to start another sand debate, so I will leave it at that.
I have introduced him to his new viv which he loves to explore. It's currently on the floor so after a few minutes he jumps out and runs around the living room. I am still currently waiting on the glass and then it is finally done. I spent about 2 weeks on the project, mainly because it takes so long for things to dry and also because I am a perfectionist and try to get everything just right (even though it didn't haha, but I am still happy with it.) I used almost the entire 25lbs bag of grout so I am thinking it should be tough enough to withstand whatever Bowser throws at it. I did not seal it with anything for the same reasons that others haven't. To preserve the look and to keep his nails filed down.

Anyway, that's my new viv (I built it because the guy I got him from kept him in a 20L since he got him at a petsmart, they told him it was a 40g and it was good when he was an adult too................................................ he said he was about a year and a half old but hes only 16 inches and I think it might be because he's been in such a small tank. I've had him for about a month) All I need now is the glass, and over time I will add some fake plants to it as well. Maybe some small branches/logs. Im also going to have to build a stand/table for it to get it off the floor but its good right where its at for now. Once again, thanks to dragonov (and others) for the ideas and inspiration. Like he said, its really not that hard, especially if you do your research. I spent a lot but I do imagine that you could make it cheaper if you wanted. I don't have much woodworking/construction/concrete/art experience either but it still turned out very sturdy and I don't think I did too bad, if I do say so myself. A lot of the things I did with this build were first time experiences, tile grout, carving Styrofoam into shapes, staining wood, etc. But if you really WANT to do it, you can.
Thanks for looking and I will update as often as I make changes and if you have any questions, feel free to ask. I'm no expert but I may be able to help.
-Me

