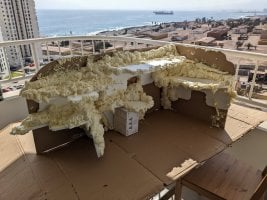
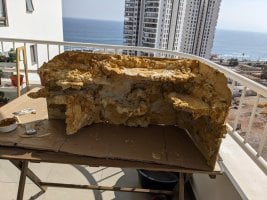
The rocky area in the back and right is made of MDF to which I nailed some styrofoam (actually: nails through the MFD, then press the styrofoam onto the nails). Then styrofoam covered in expansion foam (construction foam). The construction foam, once dried (I gave it a week as only working on it on weekends), I then cut in a bit a better shape using a knife (as it will expand, the foam will often get larger than intended). Then I covered it with two layers of tile glue (that's something similar to concrete). Into the last layer of tile glue I mixed sand and then covered it with sand. Once dried, I put it in the enclosure (I'd say, give it another week).
It needs to be built outside of the enclosure, then put in, and it must be fixed to the back and side using aquarium-grade silicone to prevent it from falling over. Also, around it I sealed it off with the silicone to prevent any feeder insects from running behind it. Otherwise, you would soon have the dubias behind it.
I have it now for about a year and it looks just like it did in the beginning.
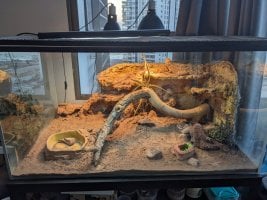
It's a standard way to construct "stone walls" for desert terrariums. It's also quite simple. The one you see in the photo is the first one and it immediately worked out so well. I don't say this for bragging but just to show that it won't go terribly wrong - with that material you will always get a natural-looking object. It might not always look like intended (here, during building it, I broke off a piece of styrofoam accidentially knocking something over with the can of expansion foam...), but it always looks natural and about "accidents", only you would know
")
As the styrofoam is completely covered, there is no risk of little styrofoam beads coming lose. Also, there is no squeaking styrofoam sound or such for the same reason as there is nothing exposed and everything is hard, like stone.
The rocks on the sand are all real.