JayStation3
Hatchling Member
Hey every one,
I am going to make my baby beardie a new VIV, and I am going to write out my progress of my project right here - prices, items used, ideas came up with etc... I hope this helps out who ever plans to build a CROSSFIRE ENCLOSURE for thier Beardie...I know the directions on that website are pretty easy to follow, but even I had some questions on it's construction. So I plan on listing detailed instructions on EXACTLY how I built mine. And I will be taking pictures of the project through out the steps as well...If you are planning or already in the process of building one and you have any questions - I will do my best to help you out - feel free to ask here in the post or private messege me...
PS - Sorry if the pictures seem to be a lil out of order, I will work on getting them in the proper order when I am complete with construction...thanks for understanding.
If you have any questions or need to report a broken link to the supplies - please feel free to PM me!!
Also - after completeing the construction of the VIV - i plan to make a stand to put it on, i found some very simple inexpensive aquarium/VIV stand plans at Fish and Tips
If you are looking for a good place to find plans for a fake rock wall- Try lizard-landscapes.com
Supplies list (per cage)
*MDF MELAMINE - 1 - 8ft x 4ft sheet of Black Melamine (Special Ordered) $54.00 x 2 (Rugby - Construction Distribution Center - Houston Texas - 599 Garden Oaks Blvd
Houston, TX 77018 (713) 692-3388) The business was listed under Plastics-High & Pressure Laminates
*8 Return Air Vent Grilles w/screen - (4 total for the sides - 2 inside and 2 out - 8"x16") $1.54 ea. (4 for the back - 2 inside and 2 out - 3"x16") $1.09 ea. (Roofing section - Home Depot) x 2
(You can also find the original ROUND Vents at Custom Cages . Com - If that's what you prefere to use. (Thanks - MrJayD)
*"PlexiGlas" for sliding front doors - 19.5" X 24" - .220 (Approx. 1/4") X2 + shipping = $53.24 x 2 (ordered online HERE)
(How ever I would go with actual "Tempered Glass" - it costs the same and it looks ten times better. No scratches, static and easy to clean.) You can look in your phone book under "doors and windows" or just "glass".
*4' Sliding Panel Tracks (ordered online HERE Or HERE) = $6.49 + shipping = $11.48 x 2
Or if you prefere to use Aluminum tracks you can find them HERE. (Thanks MrJayD)
*Liquid Nails = $2.99 (Caulk & Epoxy Isle - Home Depot)
*36" White Single Flourecent Tube Light Fixture = $12.67 x 2 (Lighting section - Home Depot)
*Caulk (Black) = $3.50 (Caulk & Epoxy ilse - Home Depot)
*Iron on Melamine Edge-banding Tape (black) (ordered online HERE) = $8.99 + shipping = $15.98
*25ft GROUNDED extention cord = Already owned it (Home Depot)
*White Outdoor Double Spot Light Fixture = $9.93 x 2 (Lighting section - Home Depot)
*1 1/2" Finishing Nails = $3.99 (Home Depot)
*1 1/2 " Drywall Screws = 2.99 (Home Depot)
*5 Cans Grey Primer & 5 Cans Black Spray Paint = Approx. $9.99 (Walmart)
*2 Silver Handles = (optional) $3.99 x 2 (Ace Hardware)
*8 1 1/2" Bolts, nuts and washers for Silver Handles = $1.45 (Ace Hardware)
*1 2 ft x 4 ft sheet of plain MDF (for making Door Track Frames) = $7.59 (Home Depot)
* Trim - 4 - 3 x 48" pieces & 4 - 3/4" x 18" = $8.76 (Home Depot)
_________________________________________________________________________
STAND
*5 - 7 ft peices of 4X4 wood = $29.80 (Home Depot)
*24 - 4" "L" Brackets = $29.94 (Home Depot)
*30 - 5.5" Screws = $16.64 (Home Depot)
TOTAL PRICE FOR 2 ENCLOSURES AND STAND $433.22
---------------------------------------------------------------------------------------------------------------------------
Step 1 - "BUY SUPPLIES" - Get all the supplies listed above.
NOTE - You can always change some of the items up as far as the Melamine (white or black or even an almond tone). Also instead of useing a single spot light fixture - I bought one that had two light sockets in it. I also bought vents to my taste. I got 2 - 8x16 inch - silver vents for the outside sides and 2 white ones for the inside sides (which I am going to paint black). I also got 2 - 3x16 - matching silver vents for the back out side and 2 for the inside (which will also be painted black). I just bought a few cans of grey primer and a few glossy black. I put two coats of primer and 3 coats of the black. I actually bought every thing that was needed to be painted first and had most of it completely painted before I started construction.


You - however, can build these cages however you want to, with what ever you want. If you have any questions on using your own ideas and need help - Just let me know - I will do my best to help you out. These plans are meant to a "hand rail", if you will, to helping people build an enclosure themselves. If you find a cheaper or better way to do something - let me know and I will pass it on through the thread.
Step 2 -"CUT YOUR WOOD TO SIZE" - Cut your Melamine (you can do it your self if you WANT TO, but to get perfectly straight cuts - I used my local hardware store.)

^^8'1" x 4'1" Sheet of black melamine.

^^Wood all cut to size.
2 peices - 48 inches by 24 inches (top and bottom)
2 peices - 24 inches by 24 inches (left and right side)
1 peice - 46.5 inches by 24 inches (back)
Step 3 - "CUT HOLES FOR VENTS -SIDES" - Now You need to cut your Holes on the sides for the screens - In the side pieces - I cut holes that were 1.5 inches smaller than the vents themselves - (6.5x14.5 inches.)
Measure from the out side edge of the melamine - 4.75 inches,make a line with a T-Square -
then meausre from that point to 14.5 inches over and make another line -
then you should have another 4.75 inches left on the other side...
From the Top Measure down 3.5 inches and draw a line - then measure 6.5 inches down from there and draw another line -
NOW connect the lines to the corners with quare and then drill 2 pilot holes with a 1/4 inch drill bit - on opposite corners, that way you can put your saw blade and and begin the cut -
Then cut along the lines you drew (double check your measurements BEFORE YOU CUT - You only get one cut!!)


Step 4 - "CUT HOLES FOR VENTS - BACK" - Now you are ready to cut the screen holes for the back, you are gonna use the same method that you used on the sides...
determine how close you want your vents from the side of the cage and measure out - draw a line with your T-Square -
then measure from there over till you are at 14.5 inches... then repeat on the opposite...then you are gonna measure down from the top 3.5 to 4 inches and then from that line - measure down 2 to 2.5 more inches (depending on how big you want your holes) and draw your guide lines...again connect all lines to the corners useing your T-Square (Again - Double check ALL your measurements)...drill pilot holes at opposite corners and cut away...If your cut comes out a little off - Don't worry - you will not be able to see it once you put on your vents - just be sure the hole is smaller than your vents and that there is enough wood to put in your screws.
Now you should have one hole in each side and two holes in the back piece. Pictures below...
(please note - these are not screwed together - I just placed them together to show you what it should look like)


Step 5 - "PREDRILLING THE HOLES FOR THE VENTS" - Now you want to predrill your holes for the vents, that way once you get the enclosure together - you will be able to easily install the vents with out any hassle -
All I did was measure 4 inches from the out side and marked a line to align the side of the vent,and then measured 3 inches down from the top of the wood and made a line.
Then I made a mark with a marker in each screw hole after lining up the two lines...and did this for each vent....basically 8 times...
Let me know if you have any questions about how to "center" the vent...most people have thier own way of doing it,
This was mine and it came out perfect - All my vents are even on the top and even from the sides...
(please note - these are not screwed together -i just placed them together to show you what it should look like)


Step 6 - "PUTTING THE "BOX" TOGETHER" - The next step is Kinda easy - Putting the cage together, but you need to pre drill your holes for your nails/screws. (I used 1&1/2" drywall screws for added strength) Make sure you use a drill bit that is NOT bigger than the Nails/screws are round - so that way - the screws can grip the wood. I actually used a counter-sinking drill bit to make my screws "sink" into the wood so they are not sticking out and more importantly - so they Don't split the wood. Also make sure NOT to get any closer than 2.5 inches to the corners/edges of the cage. The closer to the edge you get - the more likely it is that you will split the wood. I found that by connecting the sides first is alot easier than any other way. Start by marking your holes with a sharpie marker. I started at 3 inches apart from the top and bottom - and then I centered a screw in the middle and then two more screws in the middles of that...that way all the screws looked even. - then you want to measured 3/8ths of an inch from the outter edge of the wood to center the screw in the wood. I then marked each mark I made with the sharpie with a nail (just tap it a few times to start a hole). It made for a nice starting hole for the drill bit. After that - I began my drilling - I drilled with my counter sink bit first - then I went back with the longer 2 inch bit and finished my perdrill. then I went through and then finally I put in the screws, very easy!! Repeat for each side, then put on the top - then flip it over and do the bottom, i doubled up on the screws on the bottom - placing one screw every 3 inches for added strength...(You can optionally add a small bead of liquid nails as well before you screw it all together for even more strength.) Pictures below!


Step 7 - "CUT THE RUNNERS TO FIT IN SIDE THE ENCLOSURE" - All you need to do here - if you have 4 ft runners like I have. You will need to measure your enclosure from inside right to inside left... match you inside cage measurements - measure, then cut off the excess.


Step 8 - "PREDRILLING LIGHT FIXTURE SCREWS" - I flipped the enclosure over so that the top is on the floor. I marked my holes where i wanted to put my lights and predrilled 3/8ths of an inch in to the wood. i also marked a second set of holes and predrilled them as well, so once its all together if i want to change the location of my basking light - i can do that easily.
Step 9 - "INSTALLING FRONT DOOR RUNNERS" - Now you can get the front ready for the doors. I didnt have enough left over wood from my 4x8 sheet of melamine to make my track wood out of , so i was forced to go buy a sheet of 2 ft x 4 ft of MDF wood. I cut 2 pieces to 47 5/16" x 2" inches. (thats what my VIV dimensions are from inside to inside) and then 1 peice is 1 & 3/4 of an inch (for the bottom track) and one is 1 1/2" (for the top track). I painted them black to match my VIV , and also so i didnt have to use the melemine edge banding tape on them.
Make sure to pre drill your holes just like before. You can glue the front and back pieces together and place a few screws in them if you want... screw them into the cage from the sides once you make them flush with the front of the VIV.


Step 10 - "INSTALLING OPTIONAL HANDLES" - I bought 1 1/2 inch bolts to put through the wood. I also bought nuts to match and some flat washers as well. Just drill your holes at desired location for the handles. You could buy bolts that will screw into the handle if you choose, which - i will more than likley do later on, but for easier moving of the enclosure - handles are a good idea. I installed the screws from the inside out, so that the extra length of the bolts sticks out of the cage instead of having unsightly bolts sticking out - inside the cage.

Step 11 - "CAULKING THE ENCLOSURE" - Before you install the lights and wire them up for power, it's a good idea to first wipe down your enclosure to get rid of any access dirt and oil from your hands, then caulk all the creases with your caulk. This will help to keep out any moisture from getting in the melamine and causing it to crack in the long run...also will help to keep any food or "poo" from getting in the creases. Make sure to let the caulk stand and cure for at least 24 hours. Caution : THIS STEP IS VERY MESSY. MAKE SURE TO HAVE A FEW SHOP TOWELS.
Step 12 - "WIRING YOUR LIGHTS" - First drill a hole thats big enough to fit your wire through in the back near the top of the enclosure. I used a 3/4" bit. I also placed another piece of wood on the other side - so when i drilled through - it didnt crack the melamine.

For your wire - Do not use a simple extention cord. it's not safe...you need to have a ground. You can either make an extension cord out of SJ cord and a male grounded plug. (which you can buy at any hard ware store) or just use a grounded extention cord that you may already have... Since I used a Grounded extention cord I already had...I will explain how I did it that way -
First cut off the female part of the cord (the part that you plugs other things into) and strip off the plastic coverings over all the wires about 1/2 - 3/4 of an inch will do. Then measure about 16-20 inches and cut the cord again and strip both of those ends as well, the same way you did the first end.
Now you should have 2 wires - One short one that you will use to connect the circuit between the two lights and then the one that you will plug in the wall. You need to take the end that you stripped and stick it through the hole you drilled...Pull it through to give you the slack you need to work.
Now you need to take the short piece and connect both ends to each color wire, (black to black (HOT), Green to the green (GROUND), and white to white (NEUTRAL)) Do this with both lights then you will take the wires from the long one coming through the hole you drilled and connect the colors to the respective colors there.
It's a good idea to wire nut all the wires and test the lights before you screw everything in. If something is wrong with the wiring - you will have to take it all apart again and start over.


Step 13 - "INSTALL FRONT SLIDING DOORS" - I got my doors installed, its a pretty easy step. as long as all your measurements are correct, The plastic doors should just slide into place, put the top edge in to the top tracks and push into the bottom tracks. They should just slide right in. Repeat for the second door. You can buy self adhesive door handles or just drill a hole into the plastic. The handles keep you from being able to clean the entire peice, but they look nice.


ALMOST FINISHED

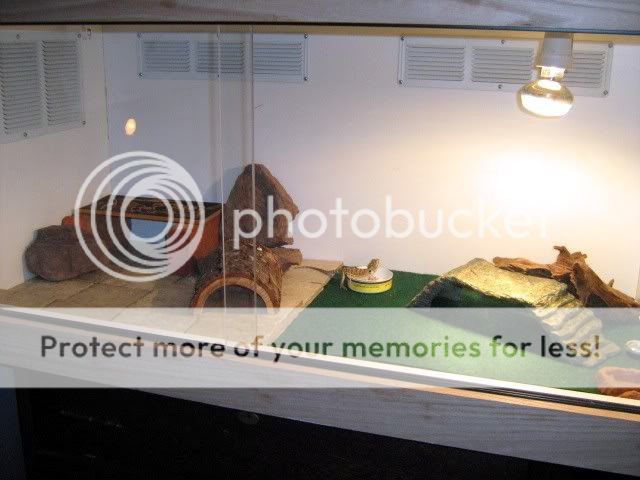
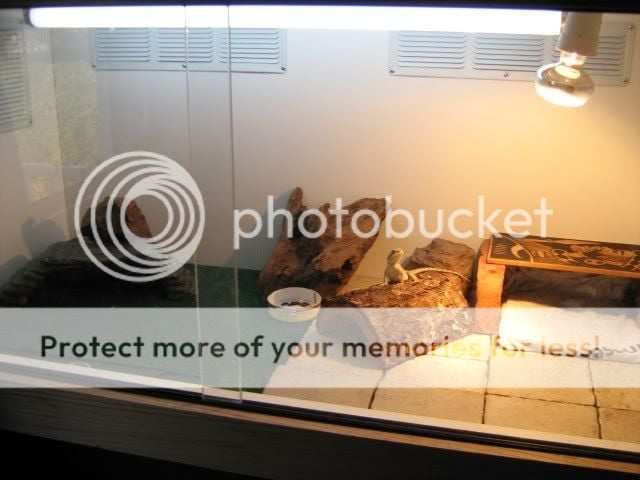
**BOTH CAGES COMPLETE MINUS TRIM AND STAND**


Step 14 - "INSTALL THE TRIM" - I am using 3 inch trim for the top and bottom and 1 inch for sides.


Step 15 - "BUILD STAND" - I am using 4X4 pices of wood. I just grabbed the cheapest stuff i could find. I bought 5 - 7 ft peices and had about 30 or so inches left over for extra. I cut 4 pieces at 50", 6 peices at 17" and 6 pieces at 16". After screwing all the pieces together with 5 1/2 inch hex bolts...i used 4" "L" brackets for extra strength. I will putting the plywood for the out side of the stand on here soon...
UPDATE (6/17) - I have not completed my stand yet -but am working on it. Had some water damage that is being taken care of... Will complete very soon.


I am going to make my baby beardie a new VIV, and I am going to write out my progress of my project right here - prices, items used, ideas came up with etc... I hope this helps out who ever plans to build a CROSSFIRE ENCLOSURE for thier Beardie...I know the directions on that website are pretty easy to follow, but even I had some questions on it's construction. So I plan on listing detailed instructions on EXACTLY how I built mine. And I will be taking pictures of the project through out the steps as well...If you are planning or already in the process of building one and you have any questions - I will do my best to help you out - feel free to ask here in the post or private messege me...
PS - Sorry if the pictures seem to be a lil out of order, I will work on getting them in the proper order when I am complete with construction...thanks for understanding.
If you have any questions or need to report a broken link to the supplies - please feel free to PM me!!
Also - after completeing the construction of the VIV - i plan to make a stand to put it on, i found some very simple inexpensive aquarium/VIV stand plans at Fish and Tips
If you are looking for a good place to find plans for a fake rock wall- Try lizard-landscapes.com
Supplies list (per cage)
*MDF MELAMINE - 1 - 8ft x 4ft sheet of Black Melamine (Special Ordered) $54.00 x 2 (Rugby - Construction Distribution Center - Houston Texas - 599 Garden Oaks Blvd
Houston, TX 77018 (713) 692-3388) The business was listed under Plastics-High & Pressure Laminates
*8 Return Air Vent Grilles w/screen - (4 total for the sides - 2 inside and 2 out - 8"x16") $1.54 ea. (4 for the back - 2 inside and 2 out - 3"x16") $1.09 ea. (Roofing section - Home Depot) x 2
(You can also find the original ROUND Vents at Custom Cages . Com - If that's what you prefere to use. (Thanks - MrJayD)
*"PlexiGlas" for sliding front doors - 19.5" X 24" - .220 (Approx. 1/4") X2 + shipping = $53.24 x 2 (ordered online HERE)
(How ever I would go with actual "Tempered Glass" - it costs the same and it looks ten times better. No scratches, static and easy to clean.) You can look in your phone book under "doors and windows" or just "glass".
*4' Sliding Panel Tracks (ordered online HERE Or HERE) = $6.49 + shipping = $11.48 x 2
Or if you prefere to use Aluminum tracks you can find them HERE. (Thanks MrJayD)
*Liquid Nails = $2.99 (Caulk & Epoxy Isle - Home Depot)
*36" White Single Flourecent Tube Light Fixture = $12.67 x 2 (Lighting section - Home Depot)
*Caulk (Black) = $3.50 (Caulk & Epoxy ilse - Home Depot)
*Iron on Melamine Edge-banding Tape (black) (ordered online HERE) = $8.99 + shipping = $15.98
*25ft GROUNDED extention cord = Already owned it (Home Depot)
*White Outdoor Double Spot Light Fixture = $9.93 x 2 (Lighting section - Home Depot)
*1 1/2" Finishing Nails = $3.99 (Home Depot)
*1 1/2 " Drywall Screws = 2.99 (Home Depot)
*5 Cans Grey Primer & 5 Cans Black Spray Paint = Approx. $9.99 (Walmart)
*2 Silver Handles = (optional) $3.99 x 2 (Ace Hardware)
*8 1 1/2" Bolts, nuts and washers for Silver Handles = $1.45 (Ace Hardware)
*1 2 ft x 4 ft sheet of plain MDF (for making Door Track Frames) = $7.59 (Home Depot)
* Trim - 4 - 3 x 48" pieces & 4 - 3/4" x 18" = $8.76 (Home Depot)
_________________________________________________________________________
STAND
*5 - 7 ft peices of 4X4 wood = $29.80 (Home Depot)
*24 - 4" "L" Brackets = $29.94 (Home Depot)
*30 - 5.5" Screws = $16.64 (Home Depot)
TOTAL PRICE FOR 2 ENCLOSURES AND STAND $433.22
---------------------------------------------------------------------------------------------------------------------------
Step 1 - "BUY SUPPLIES" - Get all the supplies listed above.
NOTE - You can always change some of the items up as far as the Melamine (white or black or even an almond tone). Also instead of useing a single spot light fixture - I bought one that had two light sockets in it. I also bought vents to my taste. I got 2 - 8x16 inch - silver vents for the outside sides and 2 white ones for the inside sides (which I am going to paint black). I also got 2 - 3x16 - matching silver vents for the back out side and 2 for the inside (which will also be painted black). I just bought a few cans of grey primer and a few glossy black. I put two coats of primer and 3 coats of the black. I actually bought every thing that was needed to be painted first and had most of it completely painted before I started construction.
You - however, can build these cages however you want to, with what ever you want. If you have any questions on using your own ideas and need help - Just let me know - I will do my best to help you out. These plans are meant to a "hand rail", if you will, to helping people build an enclosure themselves. If you find a cheaper or better way to do something - let me know and I will pass it on through the thread.
Step 2 -"CUT YOUR WOOD TO SIZE" - Cut your Melamine (you can do it your self if you WANT TO, but to get perfectly straight cuts - I used my local hardware store.)
^^8'1" x 4'1" Sheet of black melamine.
^^Wood all cut to size.
2 peices - 48 inches by 24 inches (top and bottom)
2 peices - 24 inches by 24 inches (left and right side)
1 peice - 46.5 inches by 24 inches (back)
Step 3 - "CUT HOLES FOR VENTS -SIDES" - Now You need to cut your Holes on the sides for the screens - In the side pieces - I cut holes that were 1.5 inches smaller than the vents themselves - (6.5x14.5 inches.)
Measure from the out side edge of the melamine - 4.75 inches,make a line with a T-Square -
then meausre from that point to 14.5 inches over and make another line -
then you should have another 4.75 inches left on the other side...
From the Top Measure down 3.5 inches and draw a line - then measure 6.5 inches down from there and draw another line -
NOW connect the lines to the corners with quare and then drill 2 pilot holes with a 1/4 inch drill bit - on opposite corners, that way you can put your saw blade and and begin the cut -
Then cut along the lines you drew (double check your measurements BEFORE YOU CUT - You only get one cut!!)
Step 4 - "CUT HOLES FOR VENTS - BACK" - Now you are ready to cut the screen holes for the back, you are gonna use the same method that you used on the sides...
determine how close you want your vents from the side of the cage and measure out - draw a line with your T-Square -
then measure from there over till you are at 14.5 inches... then repeat on the opposite...then you are gonna measure down from the top 3.5 to 4 inches and then from that line - measure down 2 to 2.5 more inches (depending on how big you want your holes) and draw your guide lines...again connect all lines to the corners useing your T-Square (Again - Double check ALL your measurements)...drill pilot holes at opposite corners and cut away...If your cut comes out a little off - Don't worry - you will not be able to see it once you put on your vents - just be sure the hole is smaller than your vents and that there is enough wood to put in your screws.
Now you should have one hole in each side and two holes in the back piece. Pictures below...
(please note - these are not screwed together - I just placed them together to show you what it should look like)
Step 5 - "PREDRILLING THE HOLES FOR THE VENTS" - Now you want to predrill your holes for the vents, that way once you get the enclosure together - you will be able to easily install the vents with out any hassle -
All I did was measure 4 inches from the out side and marked a line to align the side of the vent,and then measured 3 inches down from the top of the wood and made a line.
Then I made a mark with a marker in each screw hole after lining up the two lines...and did this for each vent....basically 8 times...
Let me know if you have any questions about how to "center" the vent...most people have thier own way of doing it,
This was mine and it came out perfect - All my vents are even on the top and even from the sides...
(please note - these are not screwed together -i just placed them together to show you what it should look like)
Step 6 - "PUTTING THE "BOX" TOGETHER" - The next step is Kinda easy - Putting the cage together, but you need to pre drill your holes for your nails/screws. (I used 1&1/2" drywall screws for added strength) Make sure you use a drill bit that is NOT bigger than the Nails/screws are round - so that way - the screws can grip the wood. I actually used a counter-sinking drill bit to make my screws "sink" into the wood so they are not sticking out and more importantly - so they Don't split the wood. Also make sure NOT to get any closer than 2.5 inches to the corners/edges of the cage. The closer to the edge you get - the more likely it is that you will split the wood. I found that by connecting the sides first is alot easier than any other way. Start by marking your holes with a sharpie marker. I started at 3 inches apart from the top and bottom - and then I centered a screw in the middle and then two more screws in the middles of that...that way all the screws looked even. - then you want to measured 3/8ths of an inch from the outter edge of the wood to center the screw in the wood. I then marked each mark I made with the sharpie with a nail (just tap it a few times to start a hole). It made for a nice starting hole for the drill bit. After that - I began my drilling - I drilled with my counter sink bit first - then I went back with the longer 2 inch bit and finished my perdrill. then I went through and then finally I put in the screws, very easy!! Repeat for each side, then put on the top - then flip it over and do the bottom, i doubled up on the screws on the bottom - placing one screw every 3 inches for added strength...(You can optionally add a small bead of liquid nails as well before you screw it all together for even more strength.) Pictures below!
Step 7 - "CUT THE RUNNERS TO FIT IN SIDE THE ENCLOSURE" - All you need to do here - if you have 4 ft runners like I have. You will need to measure your enclosure from inside right to inside left... match you inside cage measurements - measure, then cut off the excess.
Step 8 - "PREDRILLING LIGHT FIXTURE SCREWS" - I flipped the enclosure over so that the top is on the floor. I marked my holes where i wanted to put my lights and predrilled 3/8ths of an inch in to the wood. i also marked a second set of holes and predrilled them as well, so once its all together if i want to change the location of my basking light - i can do that easily.
Step 9 - "INSTALLING FRONT DOOR RUNNERS" - Now you can get the front ready for the doors. I didnt have enough left over wood from my 4x8 sheet of melamine to make my track wood out of , so i was forced to go buy a sheet of 2 ft x 4 ft of MDF wood. I cut 2 pieces to 47 5/16" x 2" inches. (thats what my VIV dimensions are from inside to inside) and then 1 peice is 1 & 3/4 of an inch (for the bottom track) and one is 1 1/2" (for the top track). I painted them black to match my VIV , and also so i didnt have to use the melemine edge banding tape on them.
Make sure to pre drill your holes just like before. You can glue the front and back pieces together and place a few screws in them if you want... screw them into the cage from the sides once you make them flush with the front of the VIV.
Step 10 - "INSTALLING OPTIONAL HANDLES" - I bought 1 1/2 inch bolts to put through the wood. I also bought nuts to match and some flat washers as well. Just drill your holes at desired location for the handles. You could buy bolts that will screw into the handle if you choose, which - i will more than likley do later on, but for easier moving of the enclosure - handles are a good idea. I installed the screws from the inside out, so that the extra length of the bolts sticks out of the cage instead of having unsightly bolts sticking out - inside the cage.
Step 11 - "CAULKING THE ENCLOSURE" - Before you install the lights and wire them up for power, it's a good idea to first wipe down your enclosure to get rid of any access dirt and oil from your hands, then caulk all the creases with your caulk. This will help to keep out any moisture from getting in the melamine and causing it to crack in the long run...also will help to keep any food or "poo" from getting in the creases. Make sure to let the caulk stand and cure for at least 24 hours. Caution : THIS STEP IS VERY MESSY. MAKE SURE TO HAVE A FEW SHOP TOWELS.
Step 12 - "WIRING YOUR LIGHTS" - First drill a hole thats big enough to fit your wire through in the back near the top of the enclosure. I used a 3/4" bit. I also placed another piece of wood on the other side - so when i drilled through - it didnt crack the melamine.
For your wire - Do not use a simple extention cord. it's not safe...you need to have a ground. You can either make an extension cord out of SJ cord and a male grounded plug. (which you can buy at any hard ware store) or just use a grounded extention cord that you may already have... Since I used a Grounded extention cord I already had...I will explain how I did it that way -
First cut off the female part of the cord (the part that you plugs other things into) and strip off the plastic coverings over all the wires about 1/2 - 3/4 of an inch will do. Then measure about 16-20 inches and cut the cord again and strip both of those ends as well, the same way you did the first end.
Now you should have 2 wires - One short one that you will use to connect the circuit between the two lights and then the one that you will plug in the wall. You need to take the end that you stripped and stick it through the hole you drilled...Pull it through to give you the slack you need to work.
Now you need to take the short piece and connect both ends to each color wire, (black to black (HOT), Green to the green (GROUND), and white to white (NEUTRAL)) Do this with both lights then you will take the wires from the long one coming through the hole you drilled and connect the colors to the respective colors there.
It's a good idea to wire nut all the wires and test the lights before you screw everything in. If something is wrong with the wiring - you will have to take it all apart again and start over.
Step 13 - "INSTALL FRONT SLIDING DOORS" - I got my doors installed, its a pretty easy step. as long as all your measurements are correct, The plastic doors should just slide into place, put the top edge in to the top tracks and push into the bottom tracks. They should just slide right in. Repeat for the second door. You can buy self adhesive door handles or just drill a hole into the plastic. The handles keep you from being able to clean the entire peice, but they look nice.
ALMOST FINISHED
**BOTH CAGES COMPLETE MINUS TRIM AND STAND**
Step 14 - "INSTALL THE TRIM" - I am using 3 inch trim for the top and bottom and 1 inch for sides.
Step 15 - "BUILD STAND" - I am using 4X4 pices of wood. I just grabbed the cheapest stuff i could find. I bought 5 - 7 ft peices and had about 30 or so inches left over for extra. I cut 4 pieces at 50", 6 peices at 17" and 6 pieces at 16". After screwing all the pieces together with 5 1/2 inch hex bolts...i used 4" "L" brackets for extra strength. I will putting the plywood for the out side of the stand on here soon...
UPDATE (6/17) - I have not completed my stand yet -but am working on it. Had some water damage that is being taken care of... Will complete very soon.