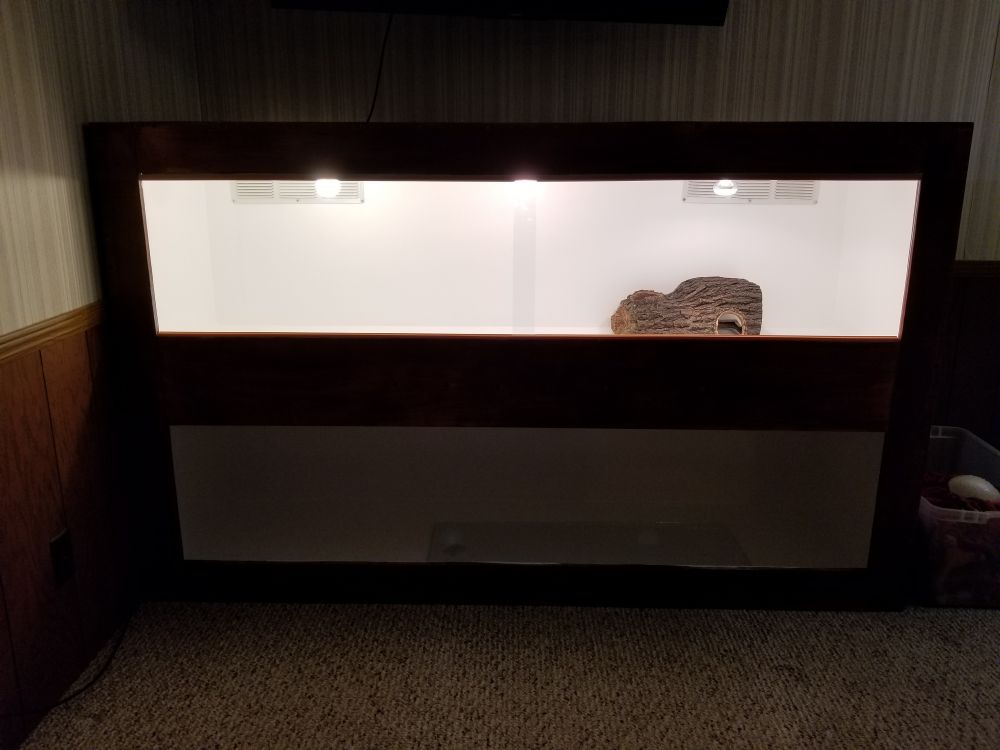
So I haven't been on here to much lately, but I finally have a minute to post an update! After scouring the forum trying to learn as much as possible and incorporate it into Pogos life, I decided to build him a new viv. He currently lives in a standard 55g aquarium with a screen top. It suits him very well right now as hes just barely as long as the tank is deep so it hasn't impeeded his movements at all really. The other drawbacks besides only being 12" deep is the fact that its a lid top which is a complete pain, is the fact that we have a cat who loves knocking things off of shelves/counters/etc, so we don't want his viv out in the house where my cat will screw with it. Pogo's tank currently resides in our bedroom with the door closed while we are at work. I have the spring clips/tie downs whatever you want to call them, but my cat is very VERY determined so we don't want to risk it. My wife likes to go to sleep early, and from 7-8 till when his lights turn out around 9:30ish we lay in our bed in what feels like broad daylight :roll: :lol: Due to this, my wife has fast tracked the project she originally deemed as "unnecesary for now" :lol: :lol:
I started out by buying Pogo a few cfl uvb bulbs and after a bit of research quickly replaced those with a t5 10.0 uvb bulb and fixture as per many members recommendations, but I failed in my research there as well, because I bought a uvb the length of his tank so he has nowhere to go without uvb. Now, as i lost the receipts and i bought a very overpriced 4ft fixture/reflector and bulb to go with it, i decided there was only one viable option left :laughhard: A truly massive viv for my not so massive baby dragon lol. I went with 3/4" Poplar which will have several coats of a stain/poly on the exterior and some sort of water tight paint for the interior. ( :help: Anyone have any recommendations of what I should use for a paint inside his actual living quarters? I'd like something available in white or a light grey for light reflection making sure i don't loose light to a dark enclosure.
Heres a pic of the first days work(I currently have both bays of my garage occupied with ongoing projects so I've been using my screened in porch as my wood shop :lol:
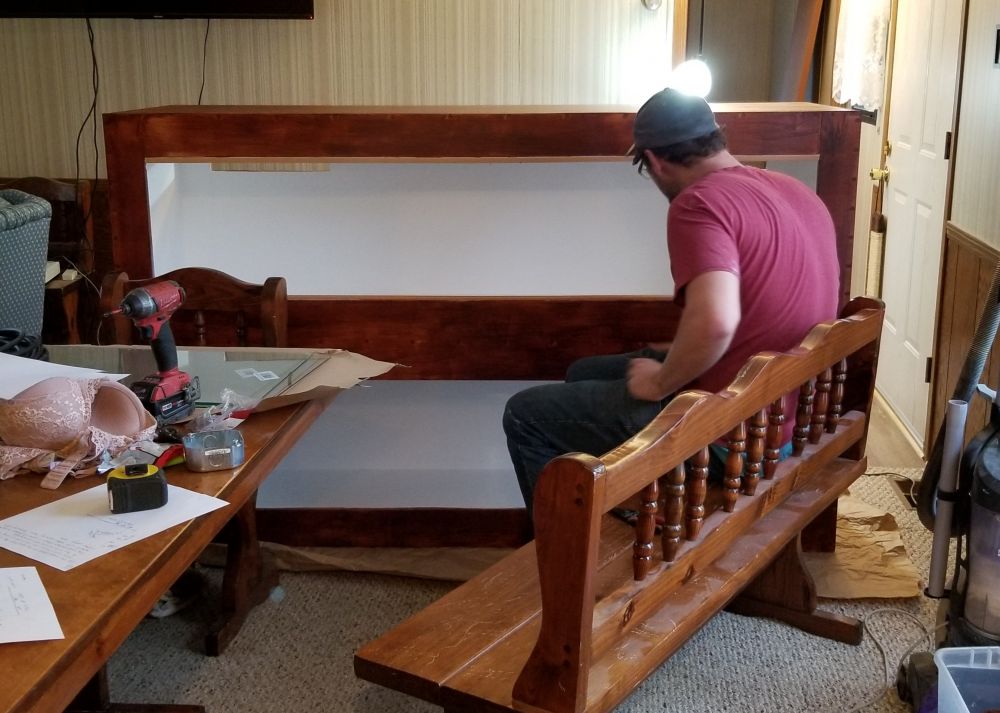
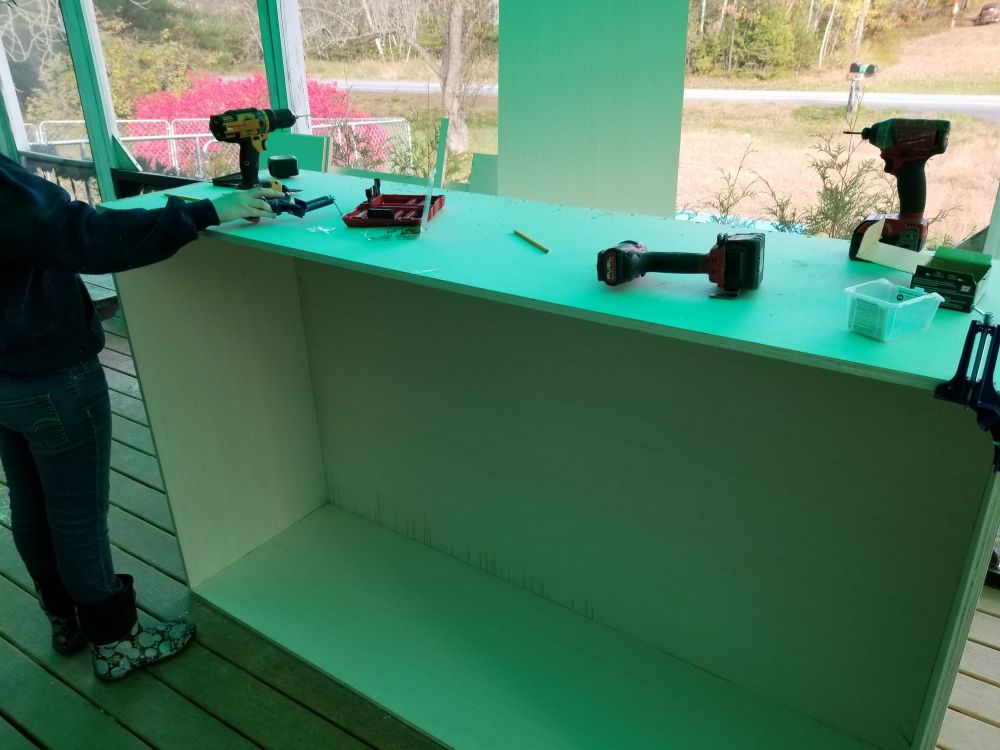 My lovely assistants there for a size scale, shes about 5'6''. I don't have a fancy jib like some others on here :roll: :wink: so i'm just counter sinking and using wood filler with my screws, I didn't have a good saw to do this so I bought that as well as some 90 degree clamps and a framing square, etc etc so I had to settle :lol: Also in some of the pictures you might noticed the edge of the wood looks like I burnt my way through the wood rather cutting it, thats because I did lol, turns out the blade of bought had a narrower kerf than the center width of the blade? so in putting a maximum plundge depth to get a clean cut (circular saw) it would bind up once I got a few inches in. I bought a new blade the next morning.
Living in Maine, the last few weeks have been kind of cold and damp so progress got held up for a few days due to weather (my porch has a few small leaks and I didn't want to risk any water damage whatsoever.) But between work, school, and the weather we got this done after about 4 more days.
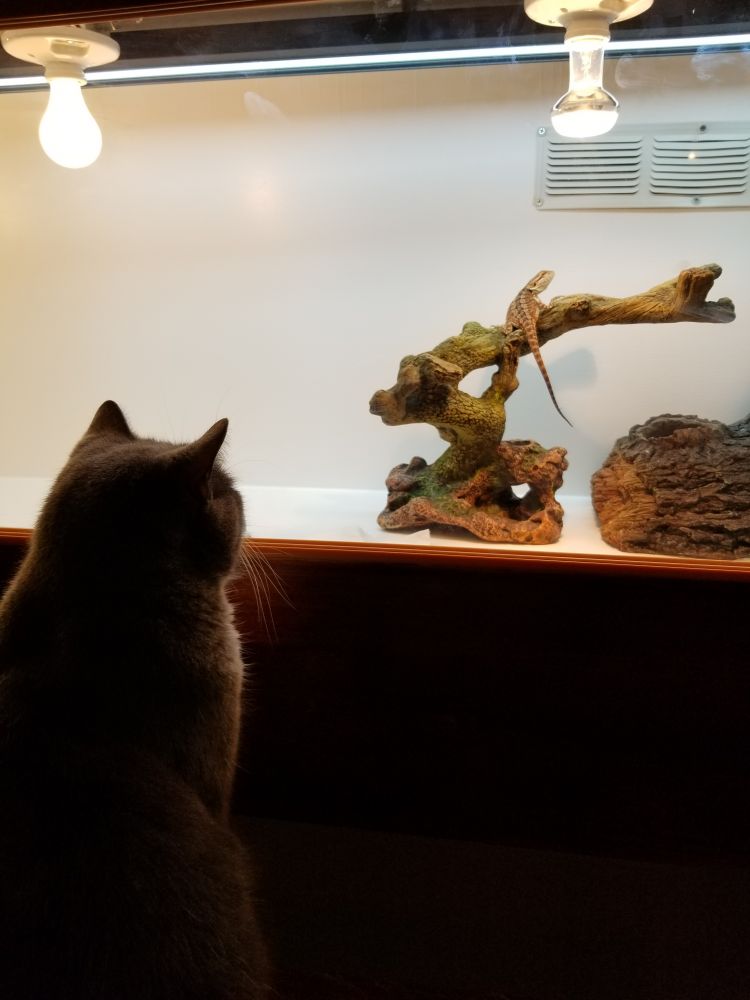
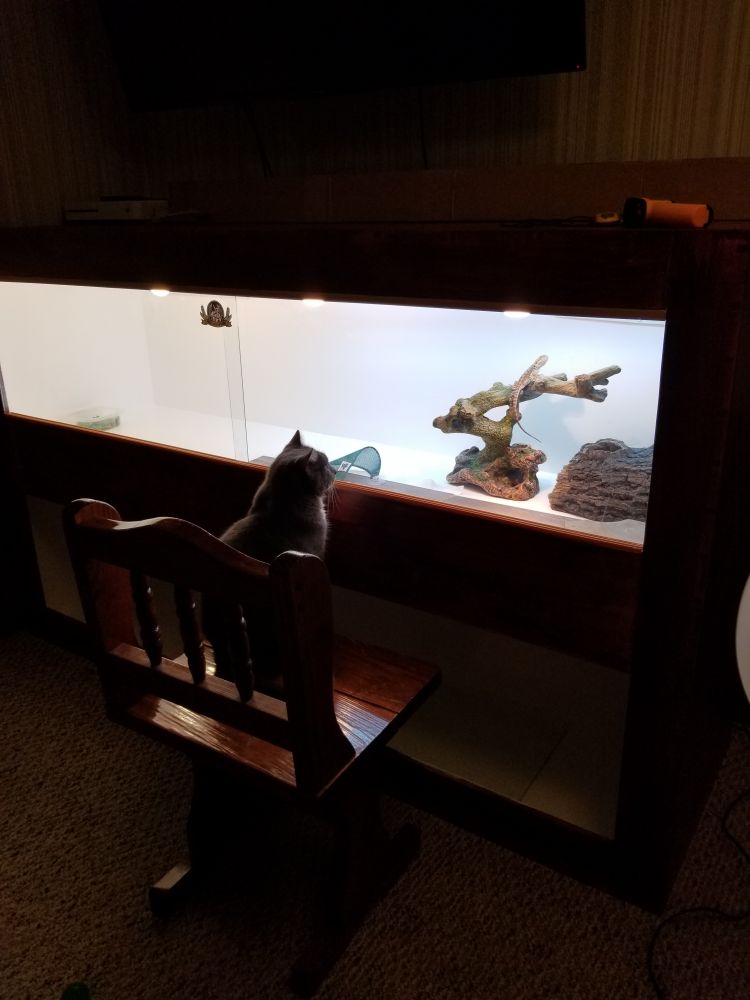
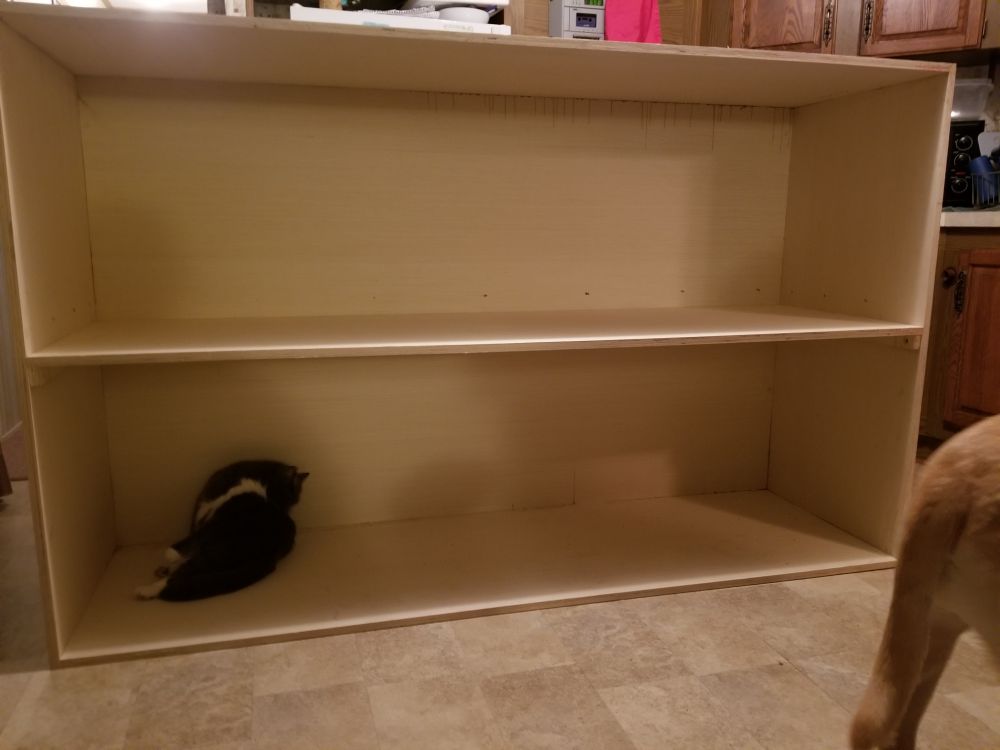 That cat there is the whole reason behind all of this and he thinks it's his... Was hoping to finish it out on the porch before we brought it in, but more rain.
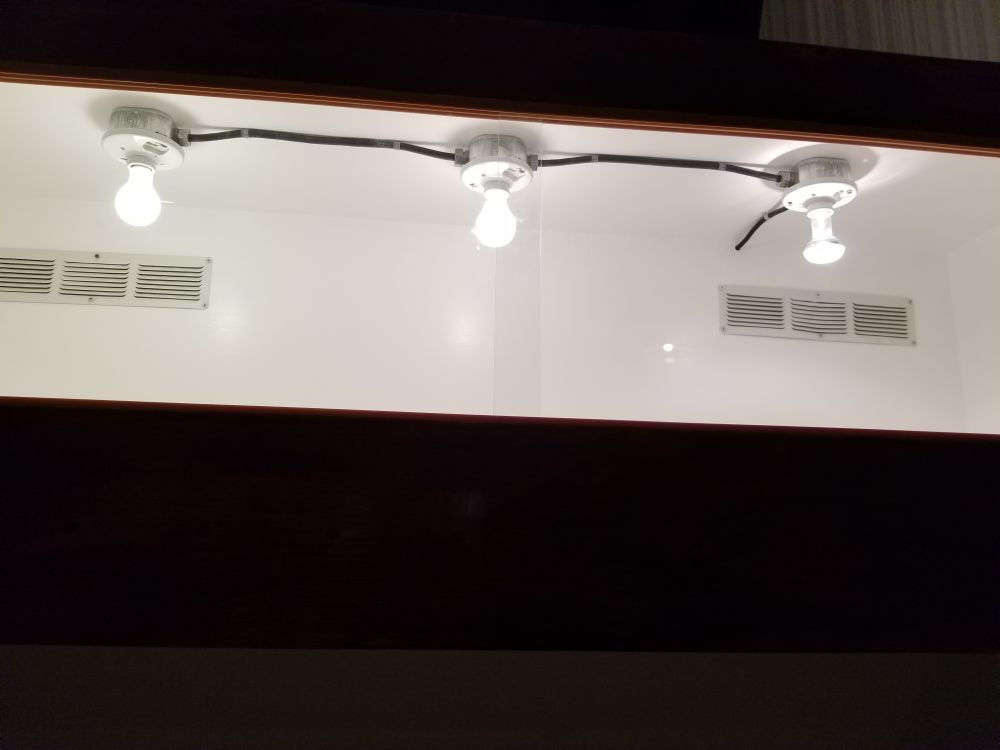
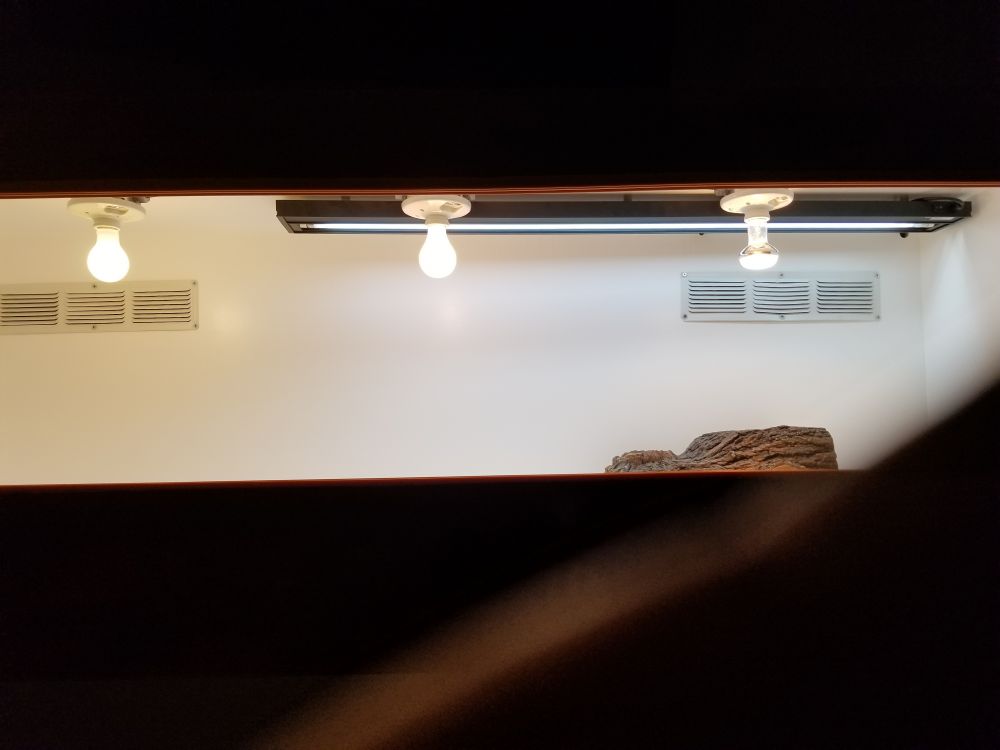
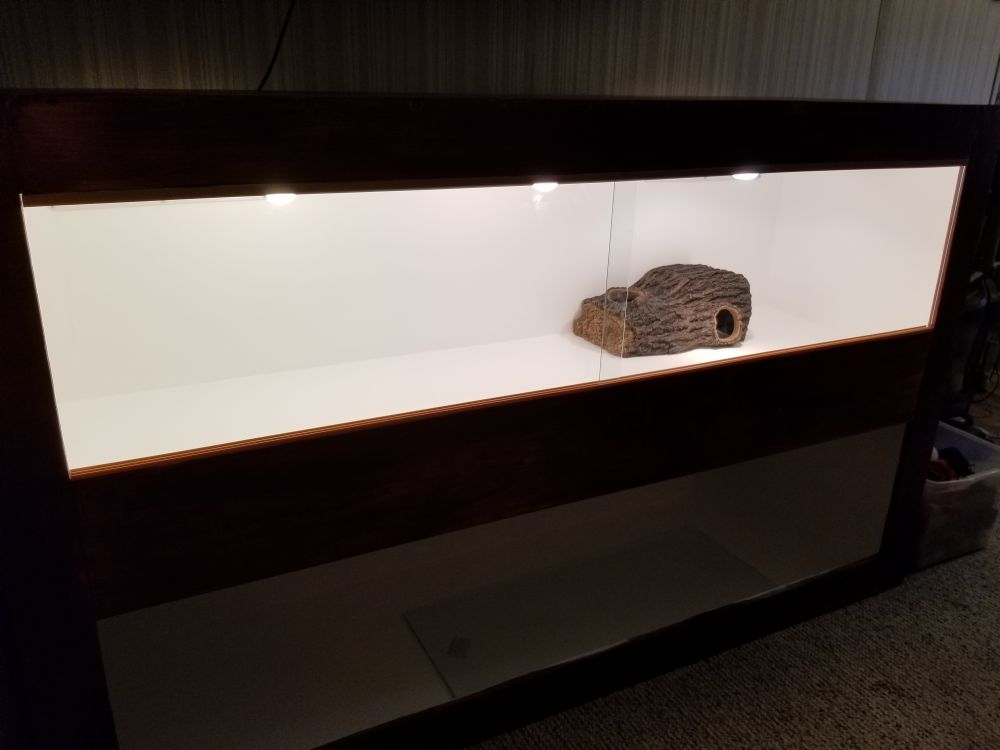
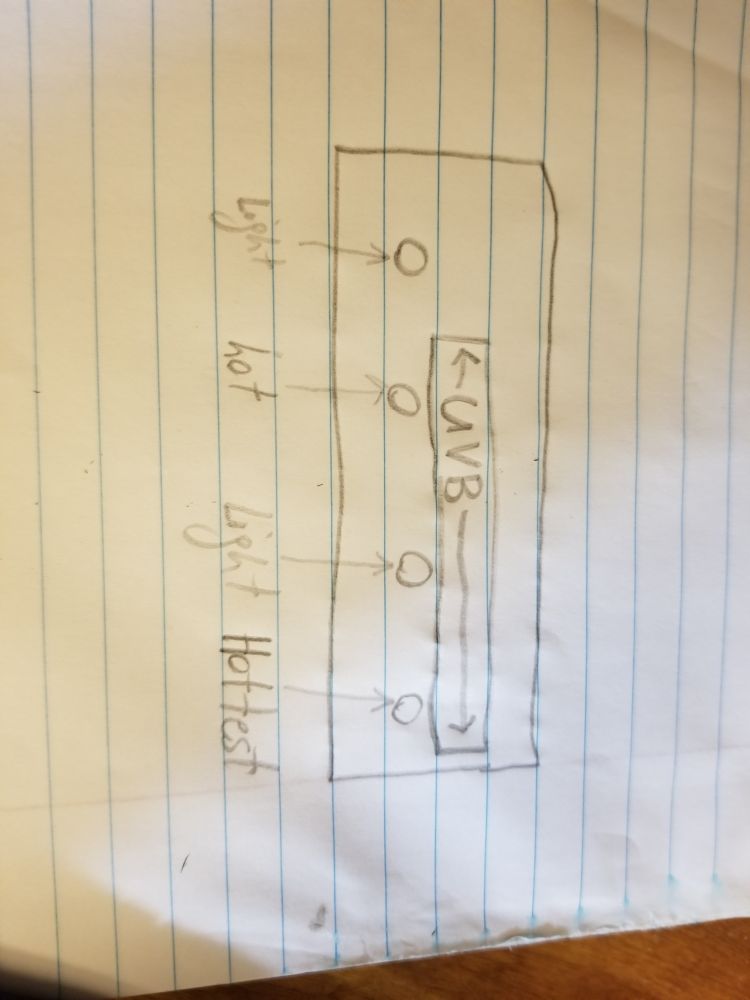
I plan on trying t finish as much as I can tommorow, but i have a few questions from someone who has experience with wooden vivs before I go shopping in the am. I was thinking about mounting my uvb inside from one far end till about 3/4 or so of the way and making the side without uvb my cool side, I also plan on putting it near the center back, around 6'' from the rear wall, bringing the opposite edge to about 10'' from the same wall. Any thoughts on this? I know he should have an area where he can go without uvb, but I feel like the hot end should have plenty of uvb. I also have some cencern as to how many ceramic light fixtures i should install. I was thinking about four. and make the first bulb(going from cool side to hot) a standard bulb for visual light, 2nd a low wattage heat bulb, 3rd another basic bulb for lighting, and the 4th a higher wattage heat bulb 1' back and 1' in cenetering it on the last quarter of the tank with uvb. Anyone have any input on this idea of a layout? Pogo never really leaves his hot side besides to eat and play "You cant get me" with the cat so I wonder if he should have a hot spot away from the uvb? Heres a crudely drawn sketch of my lighting idea.
 Besides that my only other concern is ventilation. I think I'm going to try and put a vent on each end and maybe try putting a vent 2' in of so from either direction on the back totaling 4. I do not know what size though as I havent gone in town to check out what I can find but i'm hoping to find something adjustable similar to a heat vent one might find in their house. Comments?
I started out by buying Pogo a few cfl uvb bulbs and after a bit of research quickly replaced those with a t5 10.0 uvb bulb and fixture as per many members recommendations, but I failed in my research there as well, because I bought a uvb the length of his tank so he has nowhere to go without uvb. Now, as i lost the receipts and i bought a very overpriced 4ft fixture/reflector and bulb to go with it, i decided there was only one viable option left :laughhard: A truly massive viv for my not so massive baby dragon lol. I went with 3/4" Poplar which will have several coats of a stain/poly on the exterior and some sort of water tight paint for the interior. ( :help: Anyone have any recommendations of what I should use for a paint inside his actual living quarters? I'd like something available in white or a light grey for light reflection making sure i don't loose light to a dark enclosure.
Heres a pic of the first days work(I currently have both bays of my garage occupied with ongoing projects so I've been using my screened in porch as my wood shop :lol:
Living in Maine, the last few weeks have been kind of cold and damp so progress got held up for a few days due to weather (my porch has a few small leaks and I didn't want to risk any water damage whatsoever.) But between work, school, and the weather we got this done after about 4 more days.
I plan on trying t finish as much as I can tommorow, but i have a few questions from someone who has experience with wooden vivs before I go shopping in the am. I was thinking about mounting my uvb inside from one far end till about 3/4 or so of the way and making the side without uvb my cool side, I also plan on putting it near the center back, around 6'' from the rear wall, bringing the opposite edge to about 10'' from the same wall. Any thoughts on this? I know he should have an area where he can go without uvb, but I feel like the hot end should have plenty of uvb. I also have some cencern as to how many ceramic light fixtures i should install. I was thinking about four. and make the first bulb(going from cool side to hot) a standard bulb for visual light, 2nd a low wattage heat bulb, 3rd another basic bulb for lighting, and the 4th a higher wattage heat bulb 1' back and 1' in cenetering it on the last quarter of the tank with uvb. Anyone have any input on this idea of a layout? Pogo never really leaves his hot side besides to eat and play "You cant get me" with the cat so I wonder if he should have a hot spot away from the uvb? Heres a crudely drawn sketch of my lighting idea.
")