New Fully Custom Double Stacked 4x2x2

Status
Not open for further replies.

Claudiusx

BD.org Sicko
Staff member
Moderator
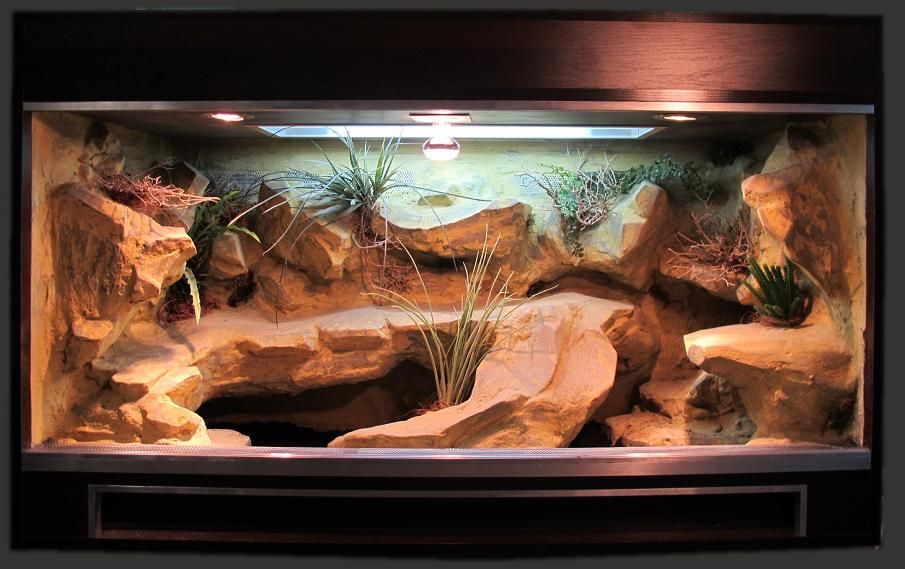
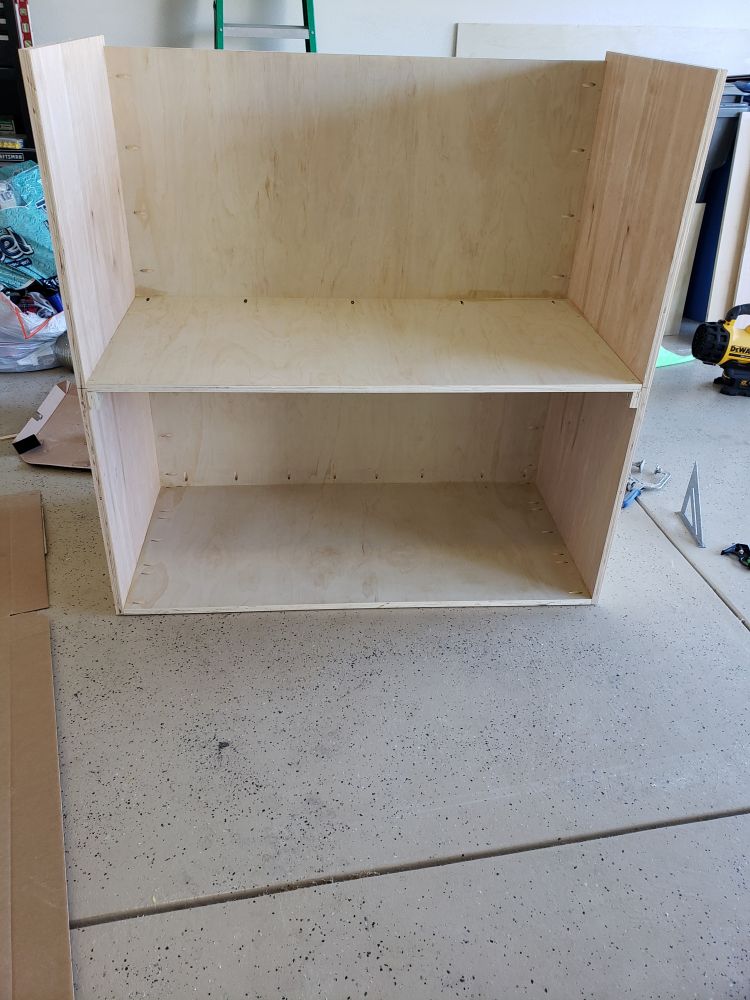
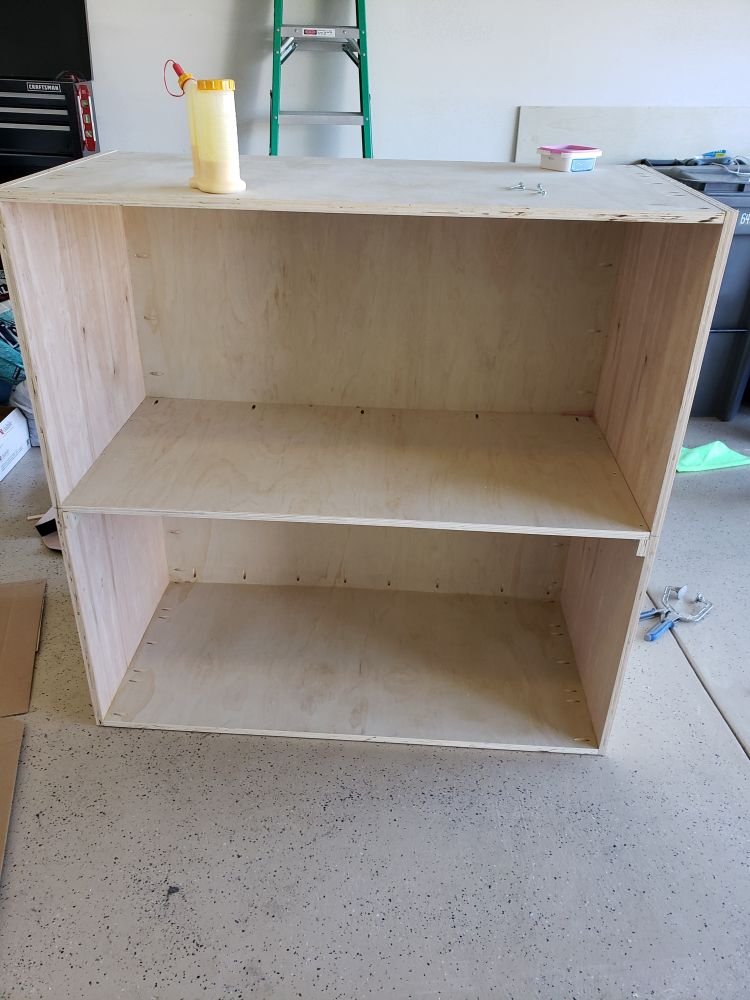
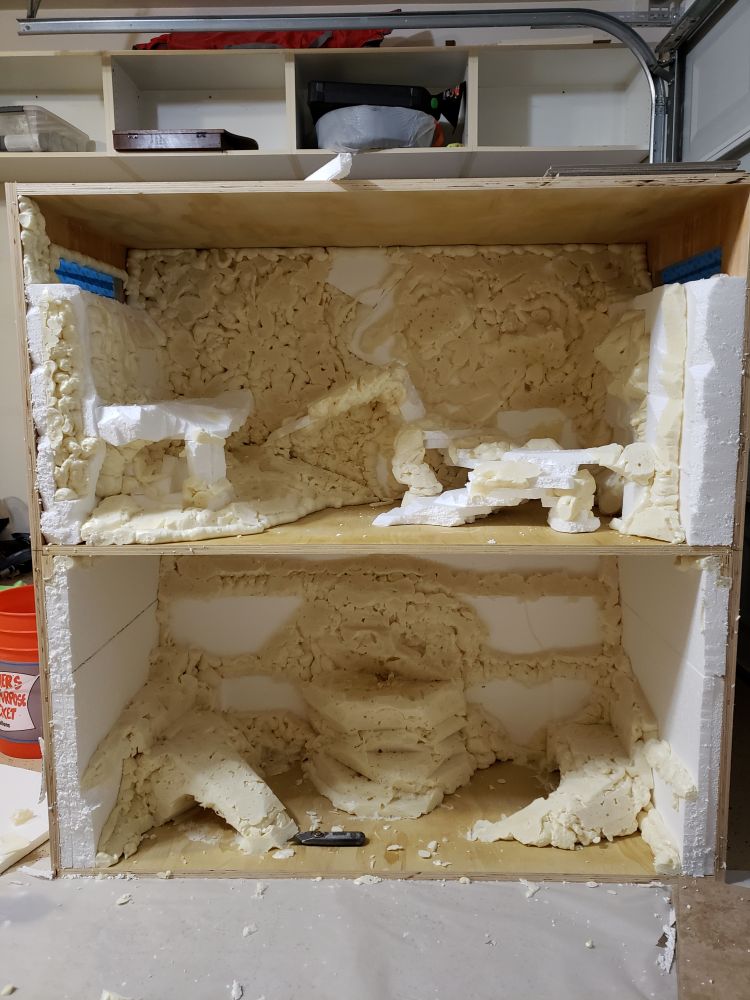
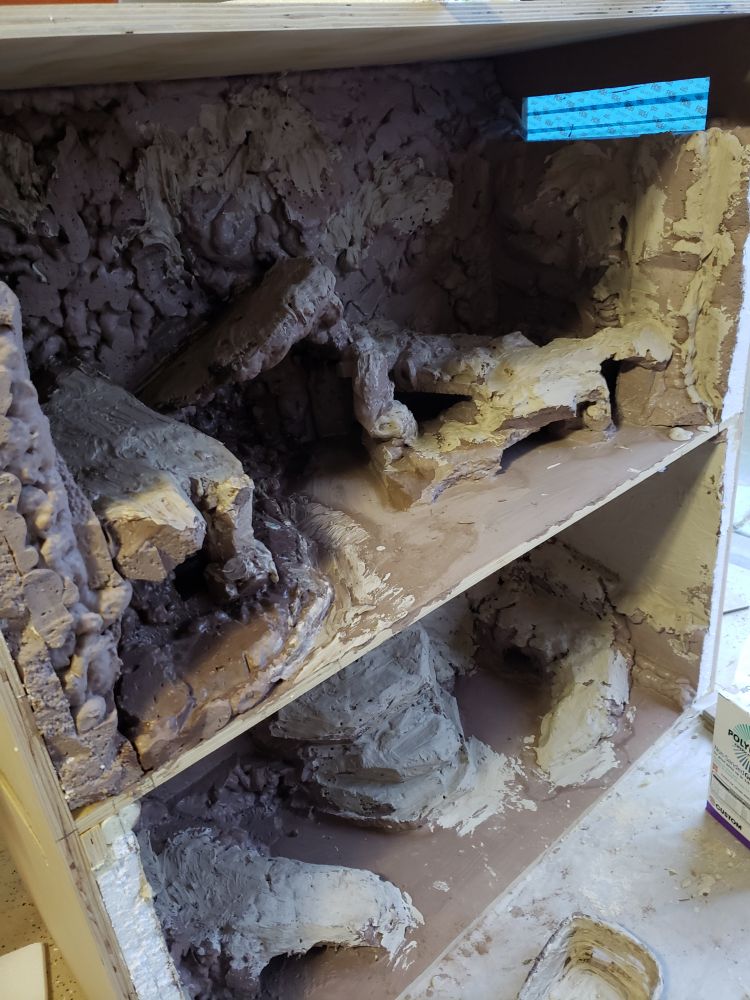
The goal with this project was to make a furniture grade double stacked 4x2x2 (4x2x4) for my dragons. I plan on going all out with a custom DIY rock feature in both of them which will add a lot of life to the tanks I believe.

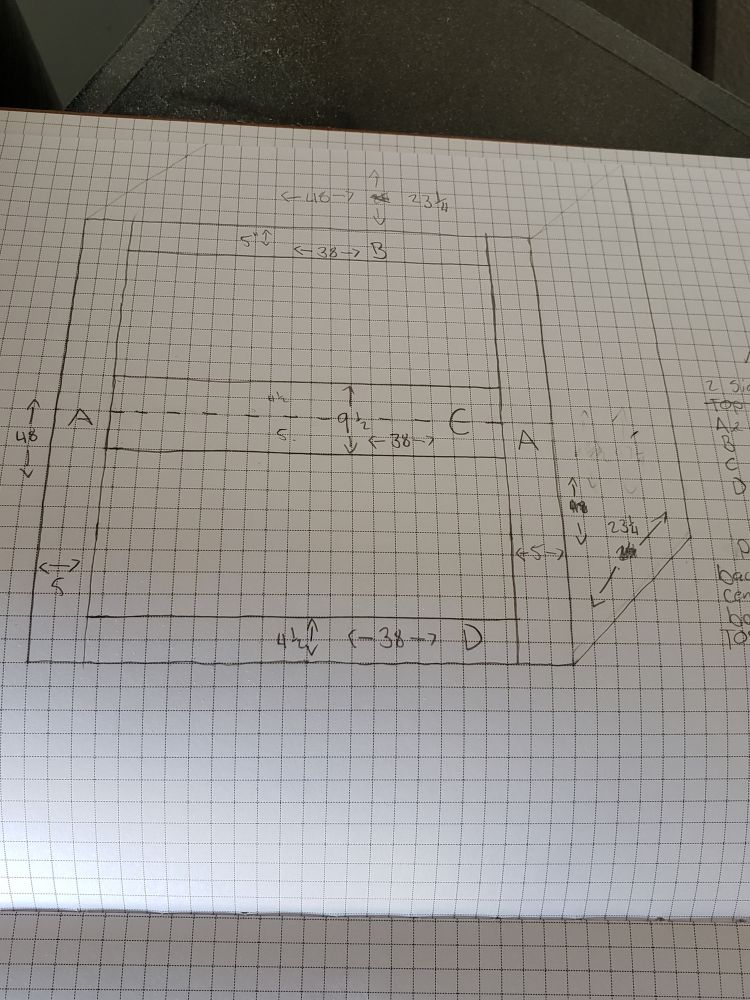
I started out with drawing it out so I could get dimensions right and a general idea of what it would look like (trust me this step helps a lot)
31715-743650166.jpg

From their I could measure out each piece on paper and plug them into a cutlist optimizer. I highly suggest using a program or an app to do this. It will tell you the most efficient way to make your cuts especially if you are using ply. It will arrange the pieces so that as many pieces as possible fit onto a sheet and you waste as little as possible.

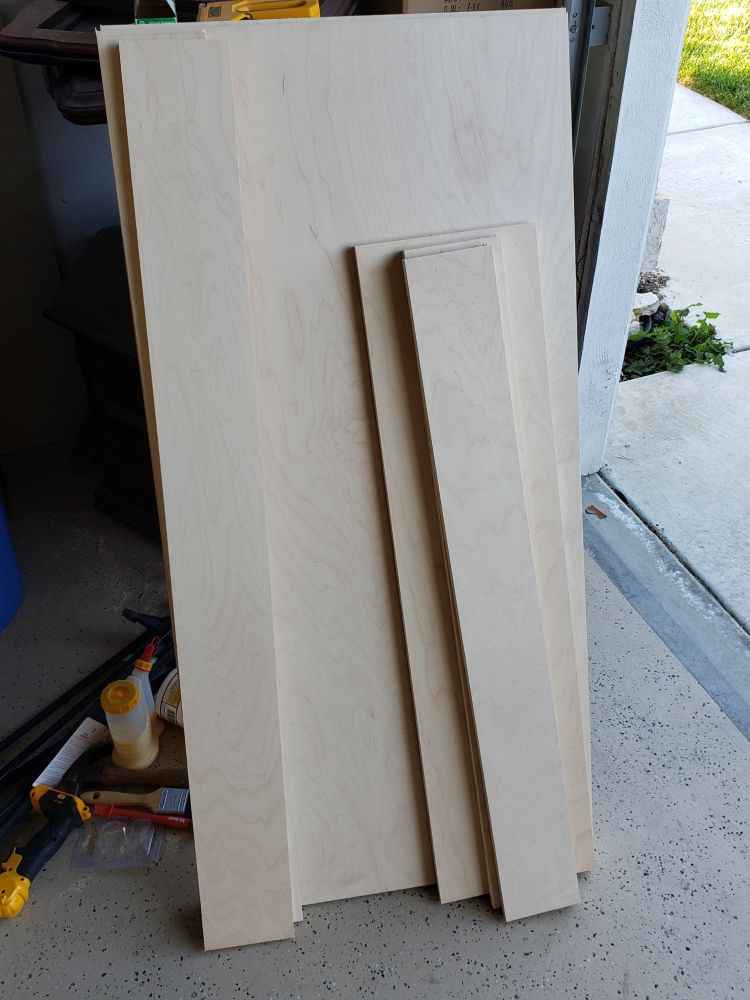
For me, I used 1 sheet of Maple ply, and 2 sheets of smooth sanded pine ply. The maple being more expensive, it made sense to only use it for the outside portions of the build, the parts that would be seen. The pine will fill in the rest because most of it will be covered or not visible.

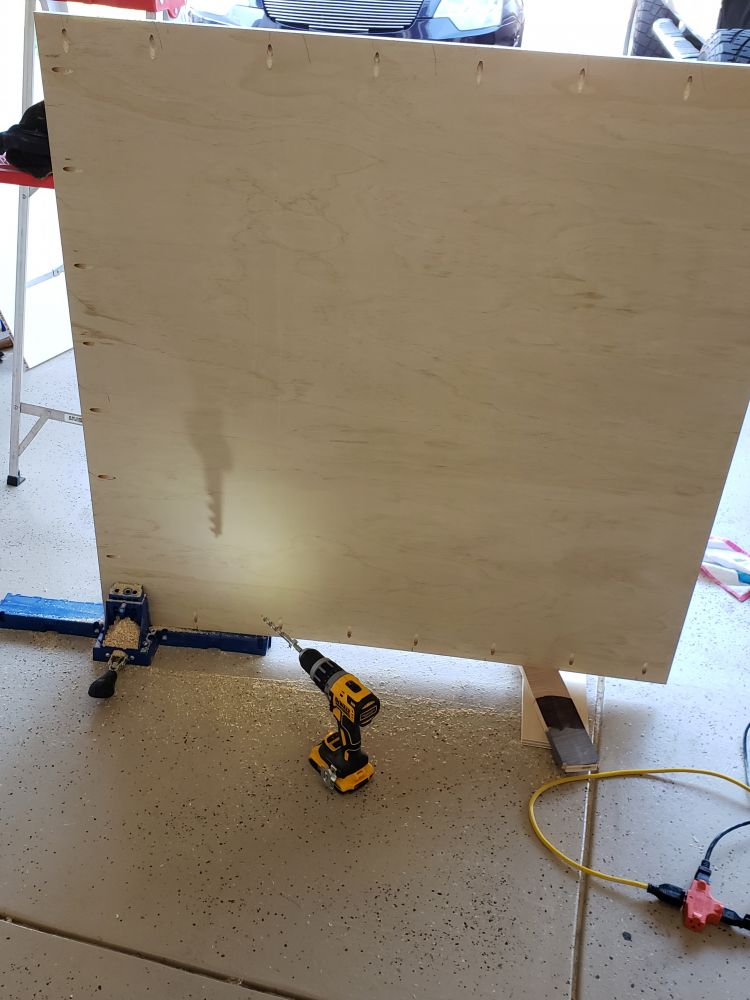
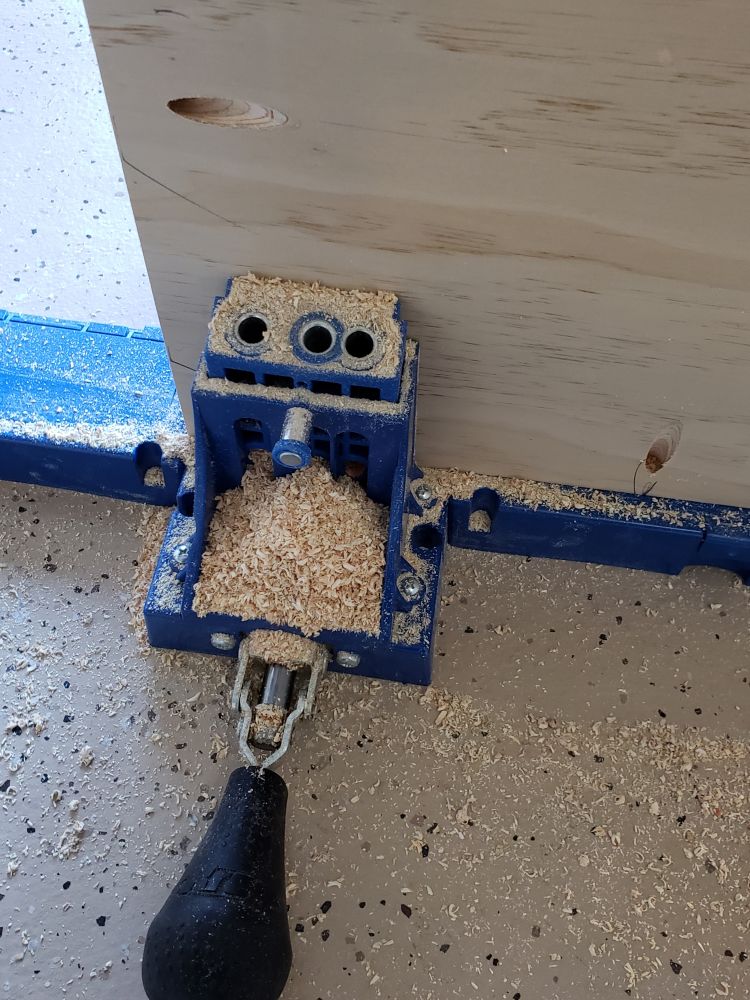
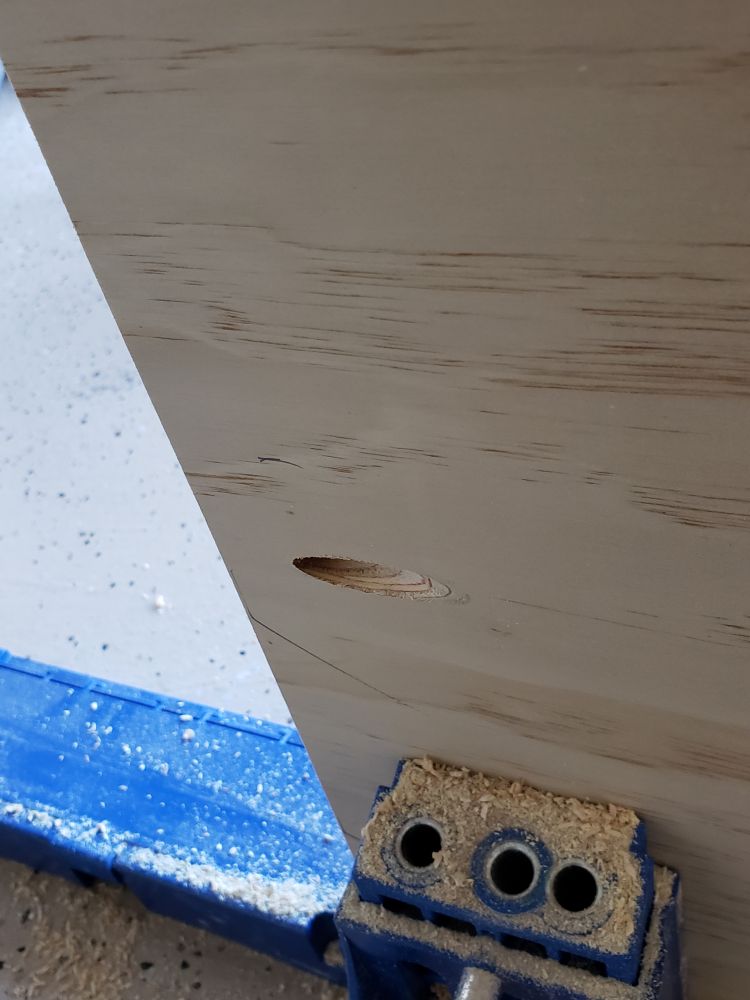
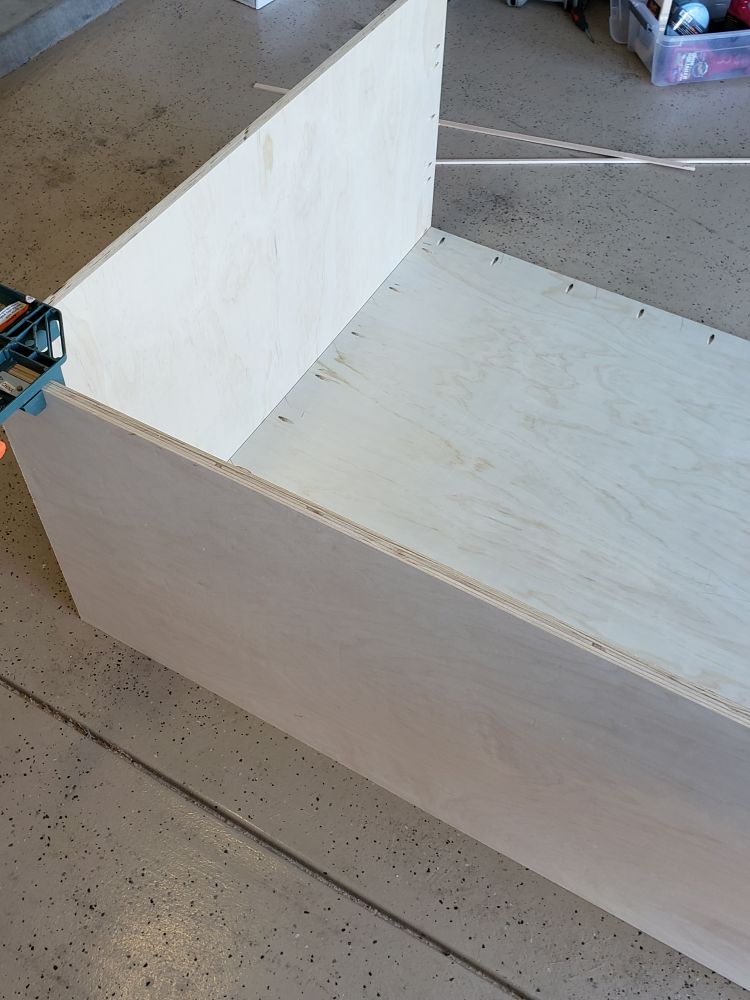
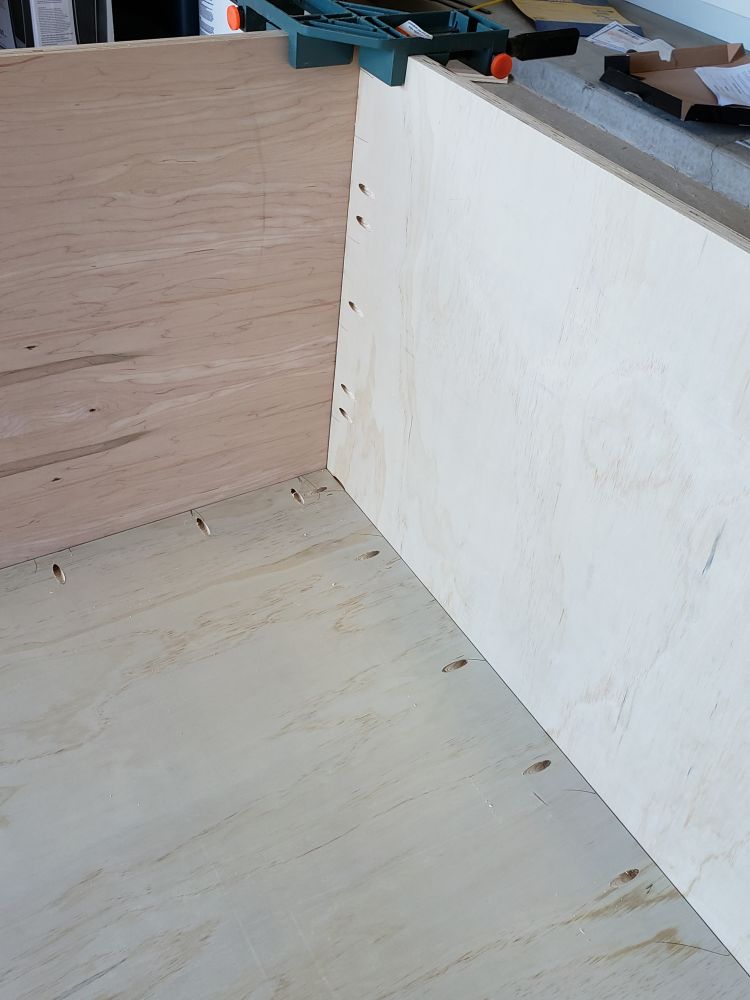
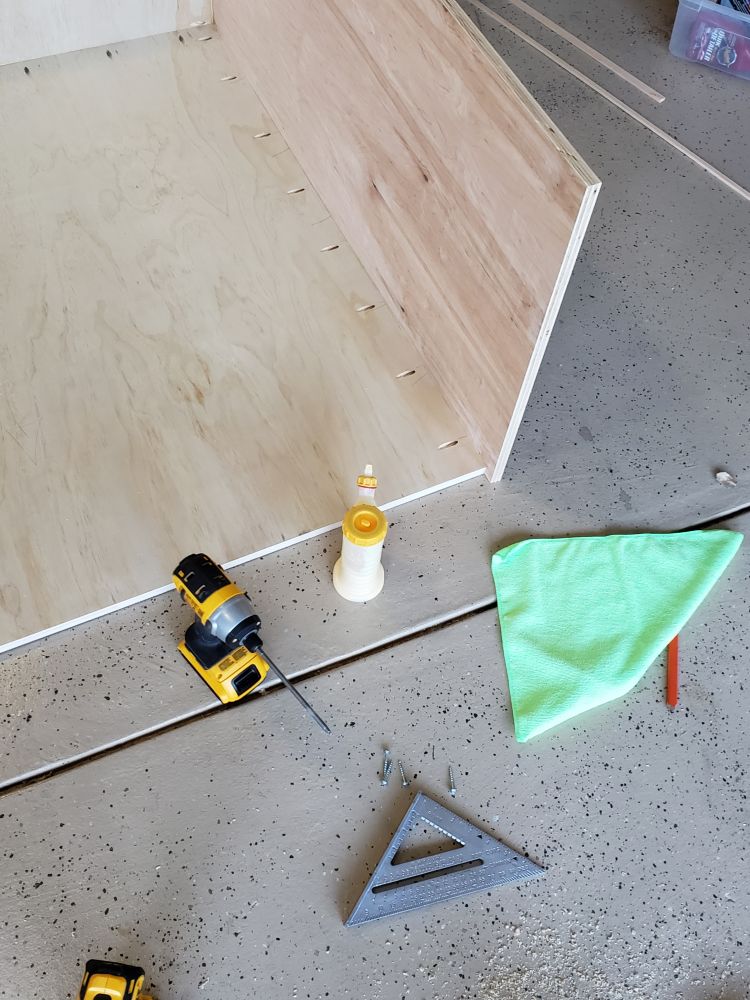
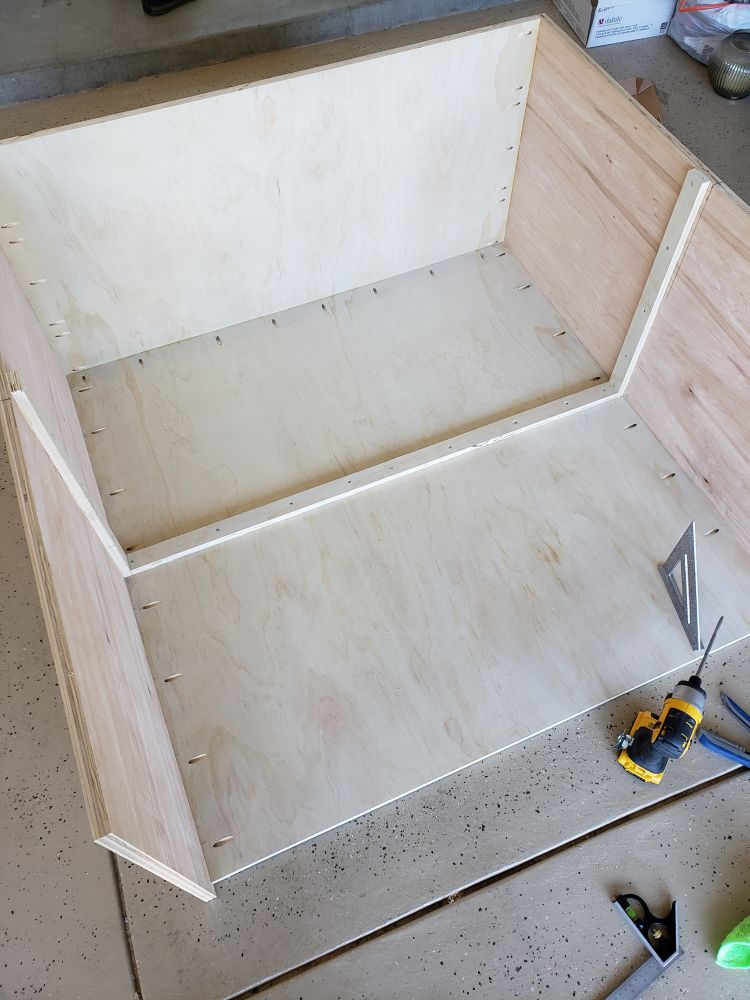
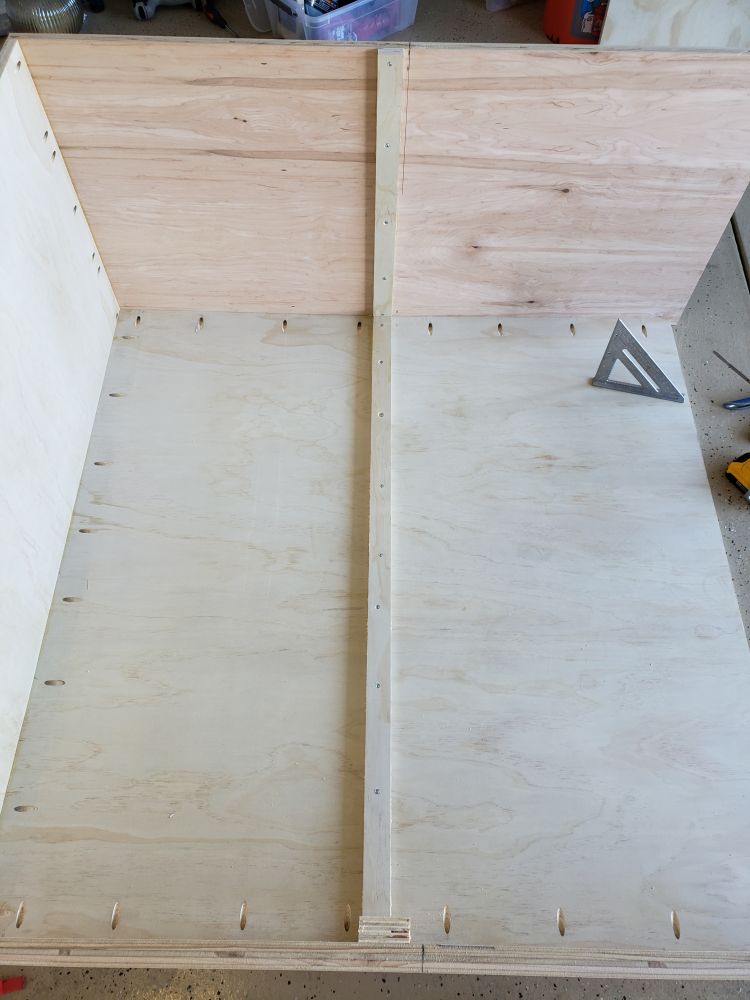
Anyways, all the pieces were cut BEFORE starting assembly. I suggest this also just because IMO it makes everything easier, quicker and smoother. You just HAVE to make sure you've gone over all your measurements in your head first and verified that everything is going to go together how you expected it to.
Once you are sure, cut.
Here is my maple pieces cut
31715-9803846636.jpg
We have the two sides, and the few pieces that will make up the front of the build. I didn't make the top out of maple simply because the build is already going to be 4 feet tall; I plan to build a 3 foot tall stand too, so the whole piece is going to be 7 feet high. I don't think anyone will be seeing the top :mrgreen:
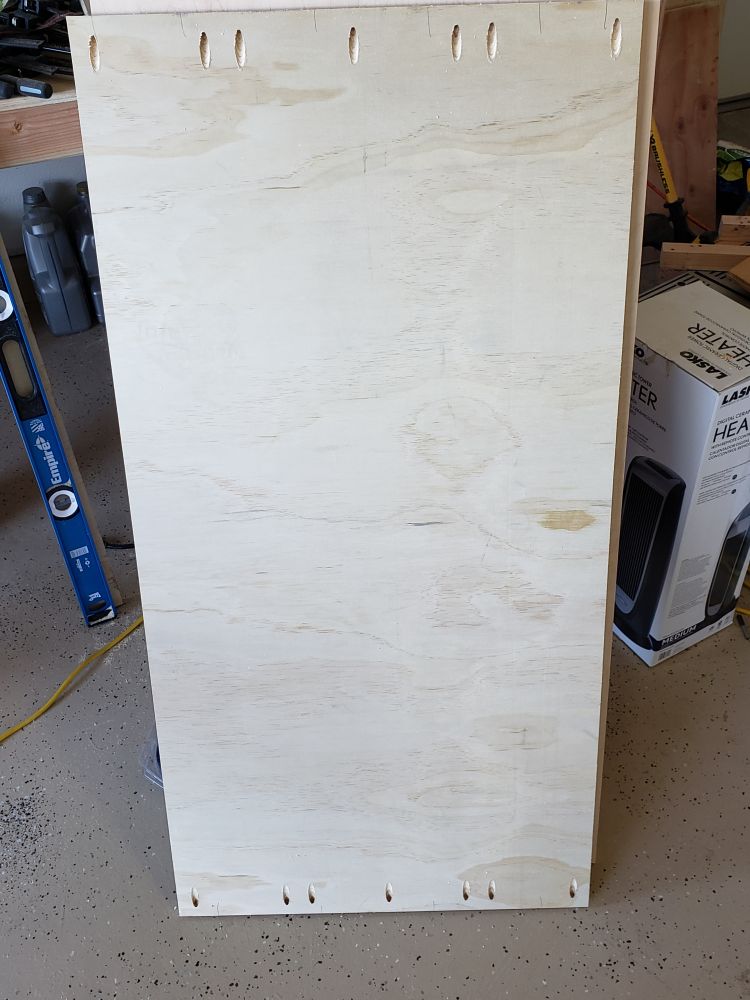
Pine pieces cut
31715-7985841133.jpg
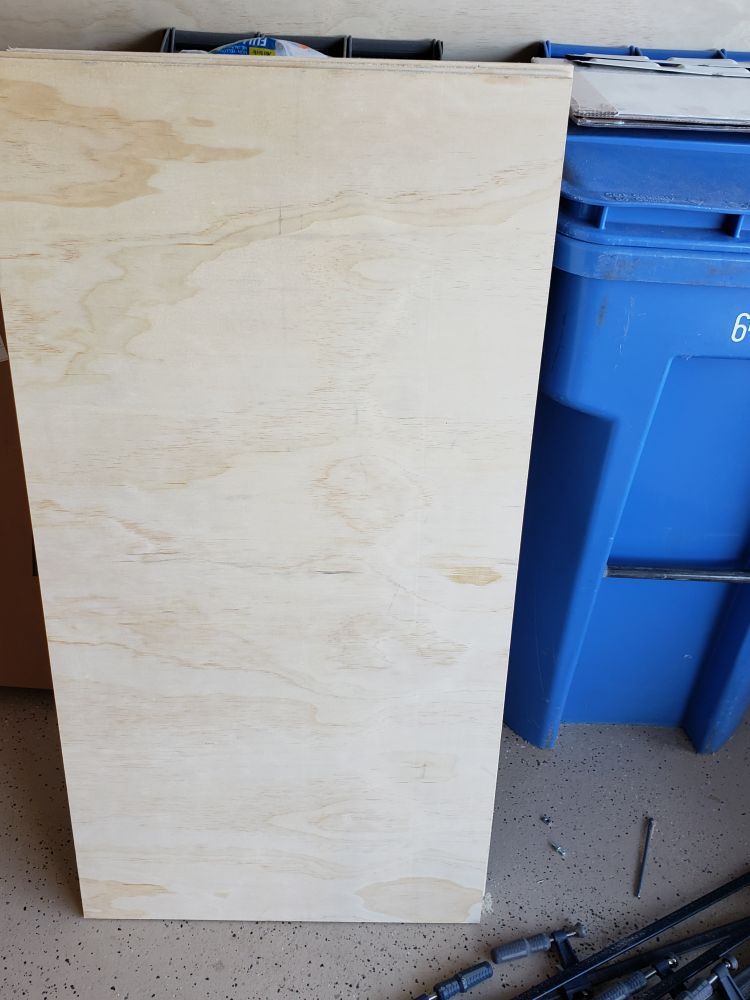
There are 3 pieces there but they are basically the same sizes.

-Brandon
 

Claudiusx

BD.org Sicko
Staff member
Moderator
Original Poster
Now lets talk joinery. A couple points come up on this project. Using maple and wanting to make it more furniture grade, I didn't want to just drive in screws through the sides and have screw heads showing. And I didn't want to countersink screws and have to fill them with wood filler. You can always see that. I wanted something more clean looking.
With my last build I did just countersink screws into the wood and use wood puty to fill them, but this time I decided to go with pocket holes and pocket screws. And of course all joints were glued too prior to screwing together with pocket holes. That's not really necessary but I like to anyways.

First up was the big piece of pine that would be making up the back. This piece was 46 1/2 x 46 1/2
31715-7110515269.jpg
And another tip, it helps to kind of piece things together, and mark where you want the pocket holes to go. This will show you any issues that might arise from placing the holes in certain spots.
I am using the kreg k5, definitely recommend it if you like making things haha.
31715-9576788754.jpg
And a pic of the pocket hole itself, for those who don't know what they are.
31715-3734850278.jpg
Pocket holes allow the screw to go in at an angle, and their is a "shelf" half way down that hole that holds the head of the screw and allows it to create a decently strong joint between the two pieces of wood. At least for plywood. There are much better joints you can use in solid woods.

Here is bottom pine piece drilled out and ready to be attached.
31715-9375700242.jpg
Remember what I said about putting things together to see how they will go before drilling your pocketholes? Well if you look at that last picture the pocket holes on the ends are decently close to the edge, which isn't a problem in and of itself. But, my idea was to lay the large back piece flat, and stand the bottom piece up to connect the two pieces. However, I noticed if I did that I wouldn't be able to use those bottom pocket holes to attach the maple sides because the hole would be partially covered and inaccessible via drill and screw. Luckily for me, the easy fix was to simply attach the maple sides to the bottom first, and then attach that structure to the bottom.

So here is 1 of the sides being attached to the bottom piece.
31715-8732992755.jpg
The large back piece is there just for squaring up purposes, it's not attached to anything yet.
I glued the joint, used my corner clamp to get everything square, drove a screw home, moved the clamp to the bottom to get that lined up, drove a screw home there, and then drove the rest of them home.
TAKE YOUR TIME on this part. Assembly is super important. Try your best to get everything lined up perfectly and don't settle if its not. It will cause major issues later if your not lucky.
31715-2914413163.jpg
Pocket holes in the bottom attach the bottom and side together, with no visible screws or joints from the outside.
Note at this point the sides and bottom still aren't attached to the large back piece.

I repeated the same process for the other maple side piece.

Once that was done I could attach the back piece to the bottom, and then the side pieces to the back pieces. This squares everything up very nicely as long as your cuts were accurate.
31715-9782198304.jpg

The reason the side pieces go up higher than the back pieces is because the top is going to join to the sides of the piece, and sit on top of the back piece. This should add more strength to the top as opposed to just using pocket holes.

-Brandon
 

Claudiusx

BD.org Sicko
Staff member
Moderator
Original Poster
And thats what I've done so far. Will be working more on it today.
I will be getting the center shelf in which turns this into two tanks instead of just 1 massive one lol. Once I get that shelf installed I think I am going to start sealing the inside right now. Only because the fake rock structures I'm planning to build will be large and I don't think I will be able to get them in the tank once I put the front pieces on.

Once I finish the DIY rock structures for the two of them, I will make the front frame piece, and finish the outside. From there all that will be left is mounting the lights, and moving it into the house. It's already darn heavy lol.

And as far as the pocket holes showing on the inside, this isn't an issue to me because the floor will be tiled, which will hide those, and the walls and back are going to be covered by the fake rock structures. So all joinery will be hidden.
This, and a few other pictures I have, are the inspiration for the DIY rock structures I will be building in my tanks.
292J.jpg

They will be different than this, as I want to put my own creativity into it. But this gives a general idea of what i'm going for in the tanks.

-Brandon
 

Claudiusx

BD.org Sicko
Staff member
Moderator
Original Poster
Todays progress:

Well, i've finished what I had planned on doing today. Wish I would have been able to start spraying some sealer inside too but the Mrs. is sick and we have an 8 month old so....

First goal was to get center divider in. I decided I probably wanted to run a support on the sides and the back since it potentially could have a decent amount of weight on it (tile, grout, cement, etc.)
So I added some
31715-8884101198.jpg
31715-9101215200.jpg
Glued and screwed.

Next I could add the divider
31715-4036417292.jpg
Finally starting to look like what it should be.
I glued and screwed it down to the supports on the side. For the back it's just glued down to the support, and pocket holed to the back wall. This was done so that the screws holding it down onto the supports on the sides, keep it held down in place. The pocketholes at the back bring any bow out of the back panel (since it's so large) and squares everything else up nicely.

Lastly, I could put the top on. The top is pocket holed on the sides, and screwed and glued down in the back.
31715-2306205523.jpg

There was a little light showing through at the top so I used some wood putty to fill it.
It goes on pink, dries a natural wood color. It really wasn't necessary since everything is going to be covered by fake rock anyways, it's more so because I had it and why not, i guess.
31715-382254962.jpg
Wet - pink
31715-1915650843.jpg
dry - natural color

That will be sanded so that you don't even see it. But you really won't see it since it will be covered anyways.

Goal for tomorrow will be to do 2 or 3 coats of sealer on the inside so that it's prepped for fake rock work.

-Brandon
 

Claudiusx

BD.org Sicko
Staff member
Moderator
Original Poster
CooperDragon":322sjl9u said:
That looks incredible!
Thanks, you should see it when it's done! :mrgreen:
As long as it ends up looking at least 50% like what i'm imagining lol.

-Brandon
 

Claudiusx

BD.org Sicko
Staff member
Moderator
Original Poster
Sorry things have been moving along I just haven't had many big updates for it. Since the last post I've sealed the interior. I needed to let it cure for a few days before I started working on the fake rock structures inside. It finally was cured enough and I've started on the rock structures. I'll try to get some pics up tonight but there has been some progress at least :)

-Brandon
 

Claudiusx

BD.org Sicko
Staff member
Moderator
Original Poster
I know it's been forever but with a 9 month old I take whatever free time I can get lol.

Anyways, all the foam work is done. Hopefully tomorrow I will start on the grouting.
31715-5803134423.jpg

Doesn't look like much but these things really come to life once the grout starts being applied.

So whats left to do is:
  1. grout
    detail work
    sealer
    attach front pieces to structure
    finish seal the outside maple wood
    cure
    get it in through the window without anything breaking stupid tight hallway...

-Brandon
 

Claudiusx

BD.org Sicko
Staff member
Moderator
Original Poster
Additionally I decided not to tile the floor. I am going to try grout or cement for the floor. We will see how that goes. It might be a mistake, but we will see.

-Brandon
 
claudiusx":3o635aqn said:
I know it's been forever but with a 9 month old I take whatever free time I can get lol.

Anyways, all the foam work is done. Hopefully tomorrow I will start on the grouting.
31715-5803134423.jpg

Doesn't look like much but these things really come to life once the grout starts being applied.

So whats left to do is:
  1. grout
    detail work
    sealer
    attach front pieces to structure
    finish seal the outside maple wood
    cure
    get it in through the window without anything breaking stupid tight hallway...

-Brandon

What did you use for your foam? I wanted to use a spray-in foam for ease of use, but was kinda worried about using something that might be toxic. Although, it would be sealed up, so maybe not a problem. Having a hard time finding larger polystyrene sheets though.
 

chrsschb

Member
NewHerpAddict":1mh79dlh said:
What did you use for your foam? I wanted to use a spray-in foam for ease of use, but was kinda worried about using something that might be toxic. Although, it would be sealed up, so maybe not a problem. Having a hard time finding larger polystyrene sheets though.

Great stuff spray foam is perfect for this. The black stuff (green can I think) is more dense and will less air pockets in it (so depends on what you're looking for).

Home Depot and Lowes both carry the 4x8' Polystyrene boards 1" and 2" thick (maybe other sizes) for around $15-20 a sheet. I recommend Loctite Power Grab or a foam-specific glue as other adhesives tend to eat the foam over time.
 

Claudiusx

BD.org Sicko
Staff member
Moderator
Original Poster
I used a mix of styrofoam sheets and great stuff spray foam. I originally tried the black can and wasn't as happy with it. It seemed that the regular can of foam had better expansion of the foam. It also could've just been a bad can I got, but I went through half a dozen or more of the regular cans for both tanks.
The black can was definitely stickier, but that wasn't of any consequence or benefit to me.

-Brandon
 

Claudiusx

BD.org Sicko
Staff member
Moderator
Original Poster
Progress has been slow, but i'm almost done grouting. I'm lucky if I get to it once a week.

I should only have 1 or two more coats I need to do. I'm thinking one more coat over everything, and then a final application to high trafic areas and areas where I want to build up detail.

I'm using two different colored grouts just because it's what I had available, this isn't how the final product will look. I will be coloring/painting it before I seal it. Then I just have to finish the wooden fronts of the tank, which will take me less than an afternoon.

31715-4698874317.jpg

Looks rough now, but it will come together, trust me. :mrgreen:

-Brandon
 

Deabrua

Juvie Member
Beardie name(s)
Dezzy is 5yo 18" F, Percy is 8yo 19" M
Lookin good! Now I dont feel as bad for taking so long on mine lol - just finished sealing and now going to gather materials for decor/doors.
 
Status
Not open for further replies.

Members online

No members online now.

Still Needs Help

Latest resources

Latest posts

Latest profile posts

I just walked into my room and instead of looking at me, Swordtail's eyes darted directly to the ice cream drumstick I'm holding
Finally replaced Swordtail's substrate
I miss you so much, Amaris 💔
What is a quick way to warm up a cold beardie? His heating element went out overnight and now he's very cold.
Pearl Girl wrote on moorelori1966's profile.
i feel so sad reading your about me 😢

Forum statistics

Threads
156,021
Messages
1,256,890
Members
76,030
Latest member
Yunasmama
Top Bottom