DIY Enclosure

Status
Not open for further replies.

quyllur

Hatchling Member
I thought I would start a thread on building my custom enclosure for a bearded dragon. I have been waiting very impatiently until my new flooring was in for my apartment and now it's done and I get to start.

Several weeks of planning have gone into this design. I want to do a bio active enclosure which means a few things need to be taken into account: substrate depth and moisture and clean up crew containment.

I went back and forth between a sliding front window and hinged front windows, but I ultimately decided on a top opening design since I want to try to keep substrate and substrate denizens inside the viv.

This vivarium will also sit inside my living room so I want it to look as much like furniture as my limited wood working skills can manage. So I went with birch plywood which I will stain onyx.

I need additional height for lighting and substrate depth as mentioned, so my interior height dimension is 31". Length and width are 48"x24".

Moisture: though it will be an arid setup, there will be still be more moisture than a typical bearded dragon set up, so I will be applying polyurethane, several coats, and then siliconing the joints. If I decide that I need more than that for the bottom six inches or so of the interior, I may go with some fibreglass resin. I used it to make a background for a fish tank once and found it easy enough to work with.

image_1.jpeg


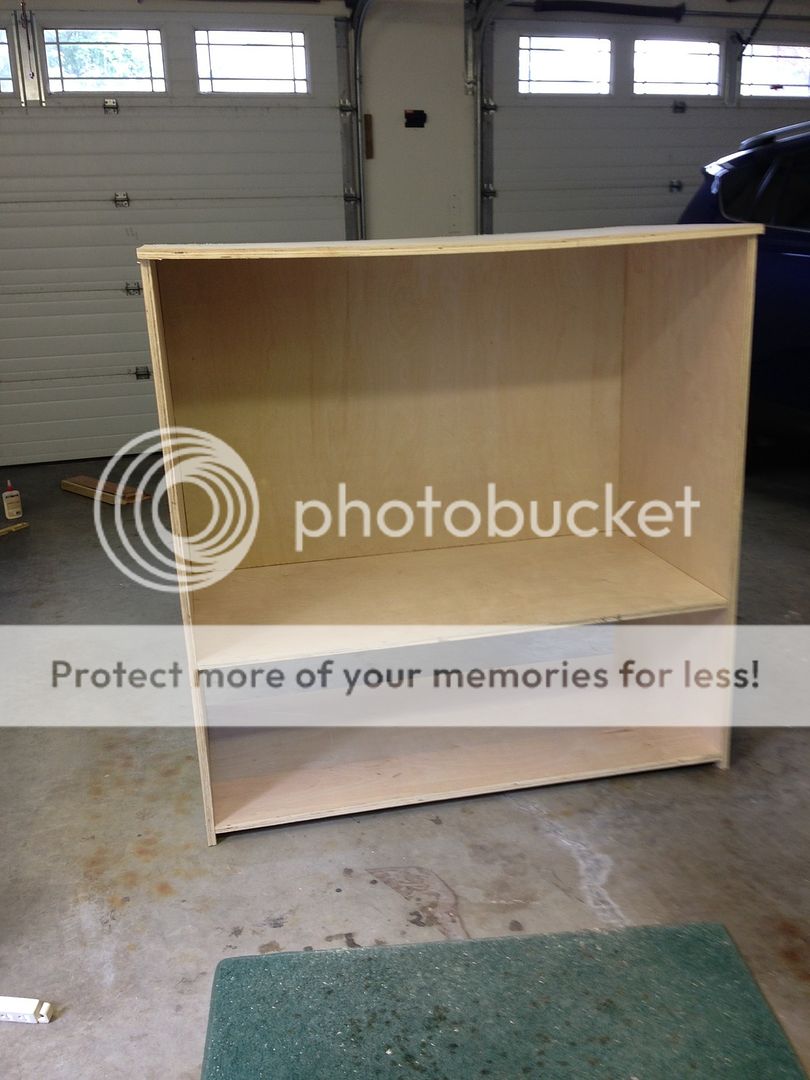
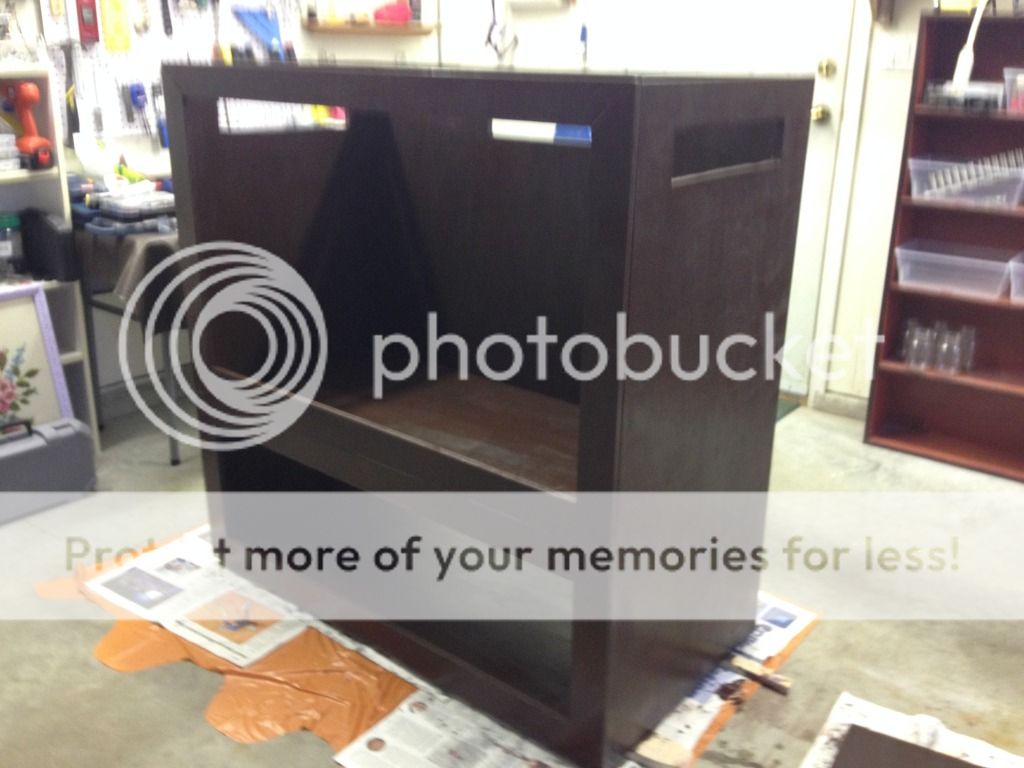
Here is the carcass of the build. The lid is just placed on top right now, it will be added at the end after the staining and such is done, using hinges at the back.

image_2.jpeg


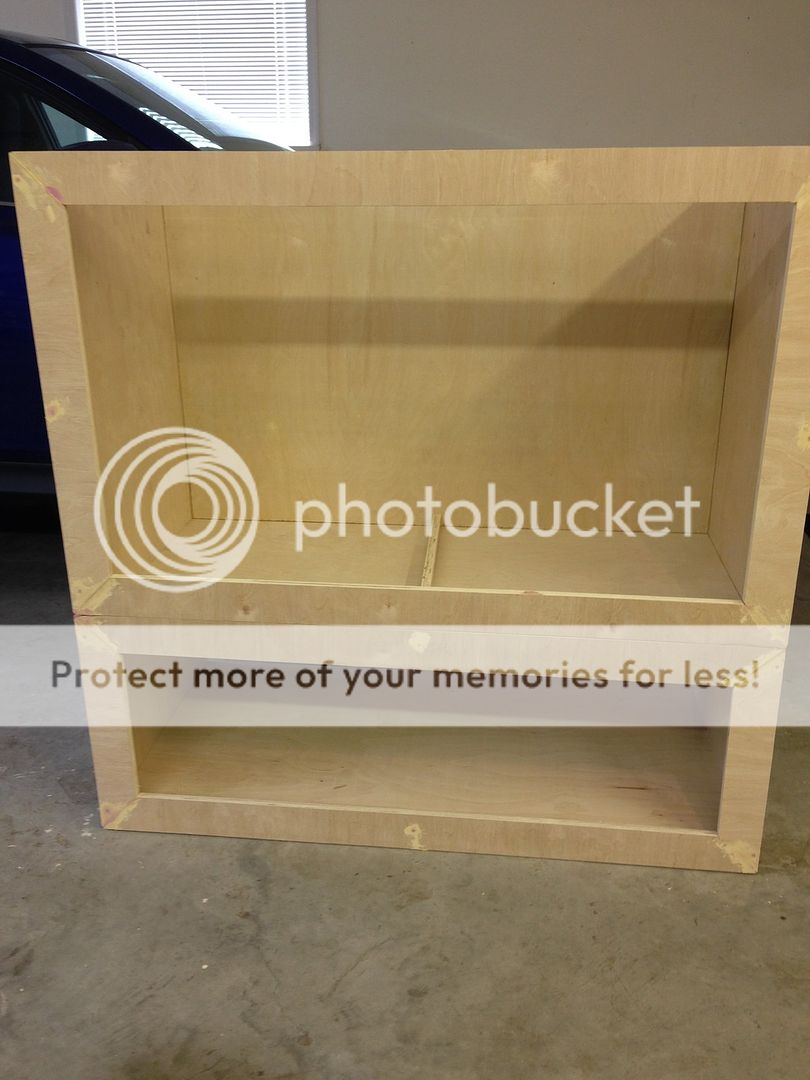
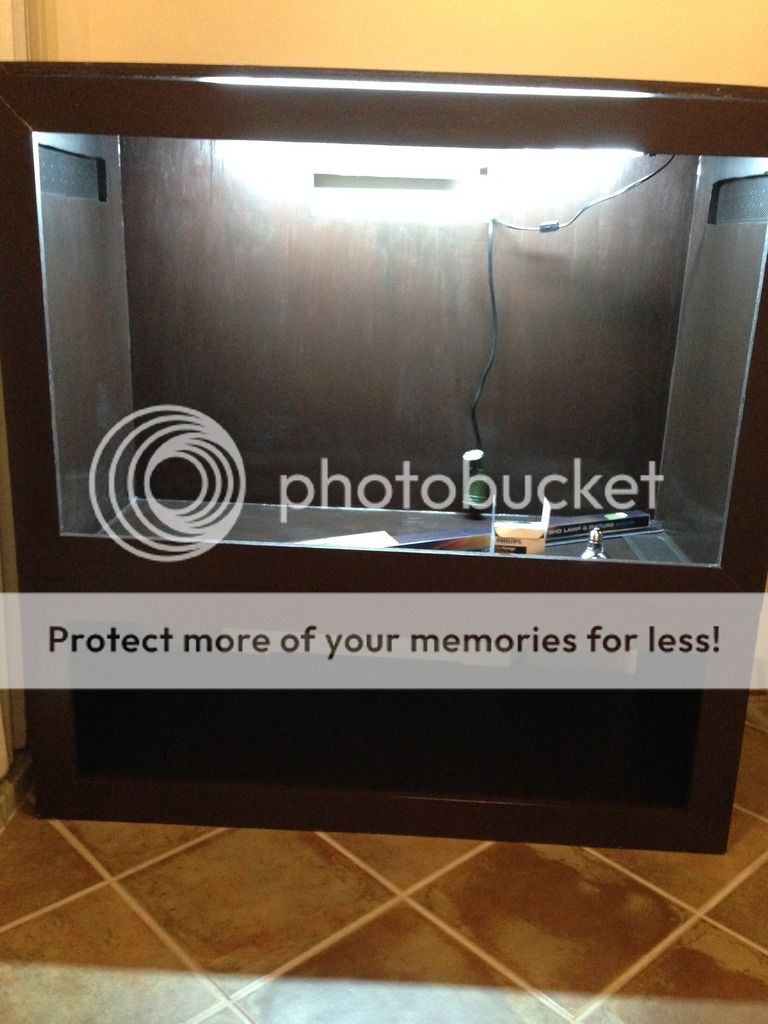
Here it is with the face frame on and some wood filler added. The glass will be attached on the inside of this frame. This is the point I'm at now. Tomorrow I will cut vent holes, sand, and then stain. Time permitting I will apply the first coat of polyurethane as well.

I will update as I go along.

*just realized this probably could've gone in the DIY forum. If a mod could move it for me, it would be appreciated*
 

Taterbug

BD.org Addict
Lovely enclosure so far! I'm happy to see its so big too :) I look forward to seeing your updates.

I'm not sure how much experience with bio active you have, but I would advice to just go ahead seal the bottom with the resin or with a liner of some sort. It's worth the piece of mind in my opinion. Poly is good but it wouldn't take too much to scratch it while messing with the substrate or furnishings and allow moisture to start causing problems. '
 

quyllur

Hatchling Member
Original Poster
Thank you for the kind words and the advice. I think you are right, no point in risking it when it's so simple to do.


Here we have today's work, vent holes cut, sanded and stained. The stain hasn't dried yet in the picture so the final colour may be slightly different.


image_3.jpeg


I started with a stain called onyx which was very dark but had reddish undertones that I liked. Well the sample must've been done on a redder wood, because it did not look like it was supposed to on the birch. So I put on a second layer of stain but went with toffee this time which is quite richly red. I think the combo will give me the colour I was hoping for, or close to.

As I mentioned in the first post, I live in an apartment so I'm working on this project at my parents house in their garage with some of their tools. It's turned into a bit of a mother daughter project as my mom has been getting right into it, sanding, standing on pieces while I saw them, staining. It's been pretty nice. ?
 

quyllur

Hatchling Member
Original Poster
No picture as it doesn't look any different, but I have put two coats of polyurethane on it and installed two out of the three vent covers (I only bought two because I was only planning on putting two vents in, but changed my mind so just need to pick up a third vent cover)

This week I will pick up and install the glass (using mirror clips) and then I get to start putting in substrate and bugs.

I'm going back and forth over doing a styrofoam and grout background. I like the look of them and feel it would be easiest to do now, while it's empty, but I also really want to get a move on with purchasing the final occupant of the vivarium. My other concern is with the clean up crew boring into the background and causing problems down the line. I'm not sure how legitimate of a concern that is.
 

quyllur

Hatchling Member
Original Poster
My update for today is that I brought the enclosure home, siliconed all the internal joins, and hung my Sunblaster T5HO strip light for my UVB. I will wait to hang the basking light until I have some furniture inside so that I know where the best place will be to get the correct temperatures and distances.

image_4.jpeg


I have an appointment tomorrow to go and pick out my new baby and put down a deposit. The glass is ordered as well. Getting excited that everything will be ready very soon.
 

Drache613

BD.org Sicko
Staff member
Moderator
Hello,

It looks like it is going to turn out very nicely for you! :D It is rewarding building them such large tanks.

Tracie
 

kingofnobbys

BD.org Sicko
Only change I'd make is a set of 4 good quality coasters on the bottom, this make it loads easier to move about if you need to rearrange things.

Other than that , looks good.
 

quyllur

Hatchling Member
Original Poster
Thank you!

I won't be putting casters on it, it won't be moving around once it's in it's final resting place. Good suggestion though.

Today's update is that I decided to go with sliding glass doors as I went to reach into the enclosure from the top just to see if I could reach the bottom. I wasn't even close, I couldn't even reach where the substrate will be. So enclosure maintenance, feeding, getting my dragon in and out would be an ordeal. To that end, changed my glass order to two pieces of appropriate measurements and ordered the tracks. Glass is here but I'm waiting for the tracks.

In the meantime, I put a plastic liner in the bottom of the enclosure and today I put in a some of the substrate. So far it is a soil and sand mix, probably close to 60/40. I have some coco fiber soaking now to be added. I will need to add some more soil and sand though, as the big container that I brought home that I thought would be more than enough, didn't even get me to 2 inches in depth. Found a few pieces of wood and some rocks which I have placed for aesthetic appeal. Final positioning has not been decided.

IMG_0863.jpg


I also went to the breeders and picked out my baby and put a deposit on him. Hopefully I can bring him home in the next day or two. (He won't go straight into the enclosure as he will need to be quarantined so I can be sure he is healthy before he goes in.)
 

BCooper

Member
What fixture did you use for your basking light? I am making an enclosure right now and am struggling with finding fixtures for my bulbs

Thanks!! :D
 

quyllur

Hatchling Member
Original Poster
Hmm, must not have worked because I posted from the mobile site as I was on my phone.

Here is a photo, it is a gardening/landscaping spike light. Metal fixture with a porcelain base. Was $12.50 CAD.

spikelight.png


As you can see, the metal spike part had to be removed. If you are crafty though you might be able to rig something up by removing the spike and attaching the light portion using the bolt that holds the two pieces together.

Probably simpler to just find something ready made though.
 
Status
Not open for further replies.

Members online

Latest resources

Latest posts

Latest profile posts

Mirage entered brumation yesterday, I'm gonna miss hanging out with my little guy.
Getting ready for another day. Feeling sleepy. 😴
I just walked into my room and instead of looking at me, Swordtail's eyes darted directly to the ice cream drumstick I'm holding
Finally replaced Swordtail's substrate
I miss you so much, Amaris 💔

Forum statistics

Threads
156,086
Messages
1,257,585
Members
76,069
Latest member
mommatojack
Top Bottom