Direction on stacking enclosures

Status
Not open for further replies.

Yuoso

Member
********SEE POST #6 FOR THE BEGINNING OF THE WALK-THROUGH**********

Hello. I have two beardies, a Sand Boa, and a 10 gallon tropical aquarium. I want a setup similar to these:

This general setup is simple enough, but it seems the lights are mounted externally.
attachment.php


This looks decent as well, but seems like it would end up being too tall.
178fb9b78c769e58ab98ad875fa2921d.jpg

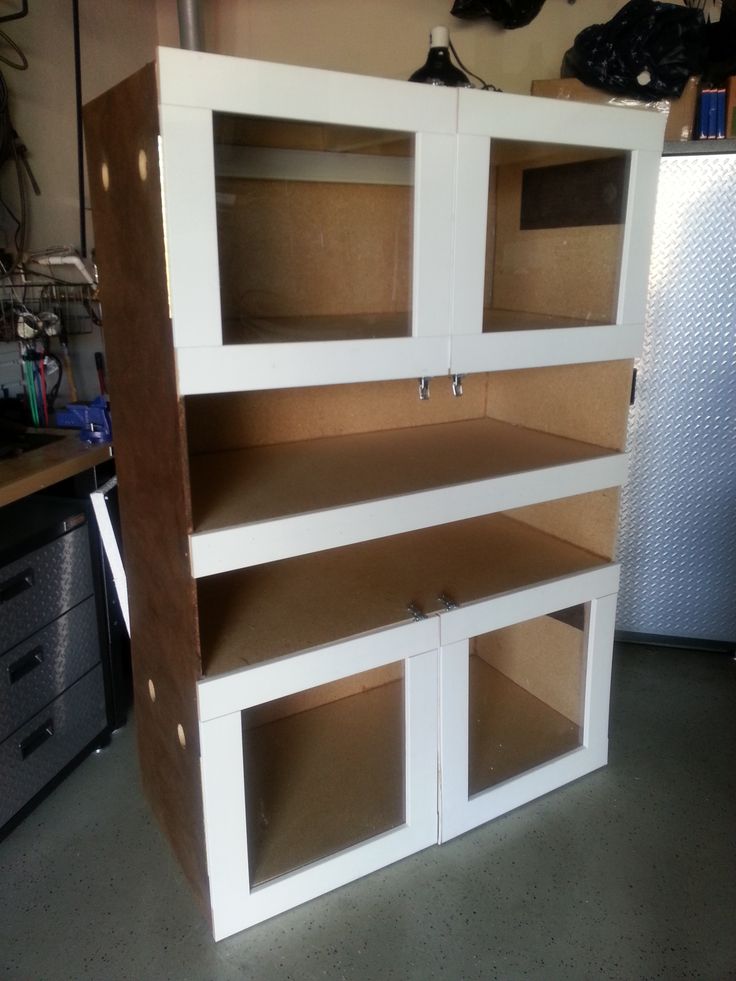
I would like the fronts to be solid glass with hinges that fold the entire front down for easy access from the front.

I have the Sand Boa in a 10 gallon aquarium (As a full grown male at 18" that likes to sit perfectly still under aspen for all eternity, no more is needed). I have a matching 10 gallon aquarium. I want these to sit side by side on top of the double enclosure.

My questions are thus:

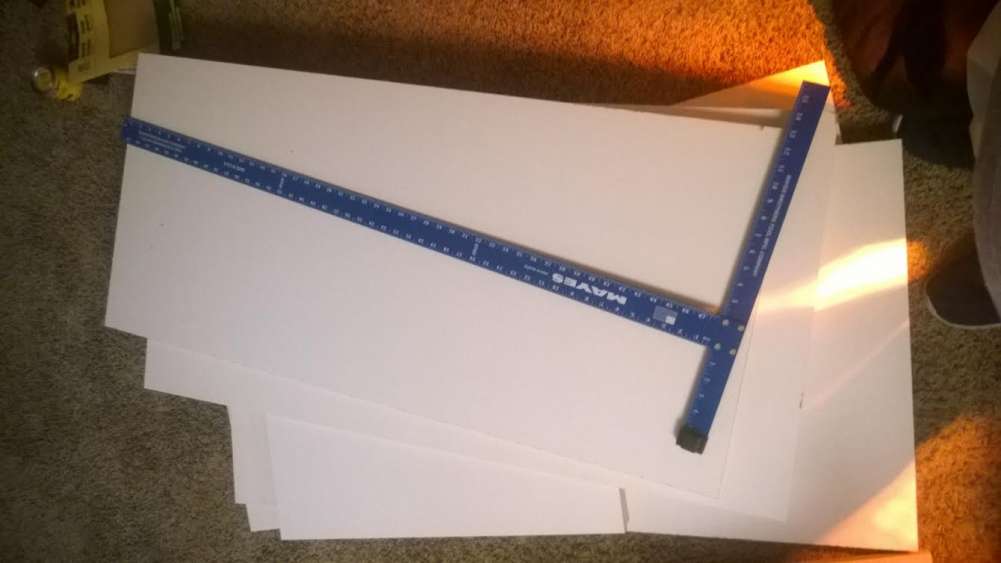
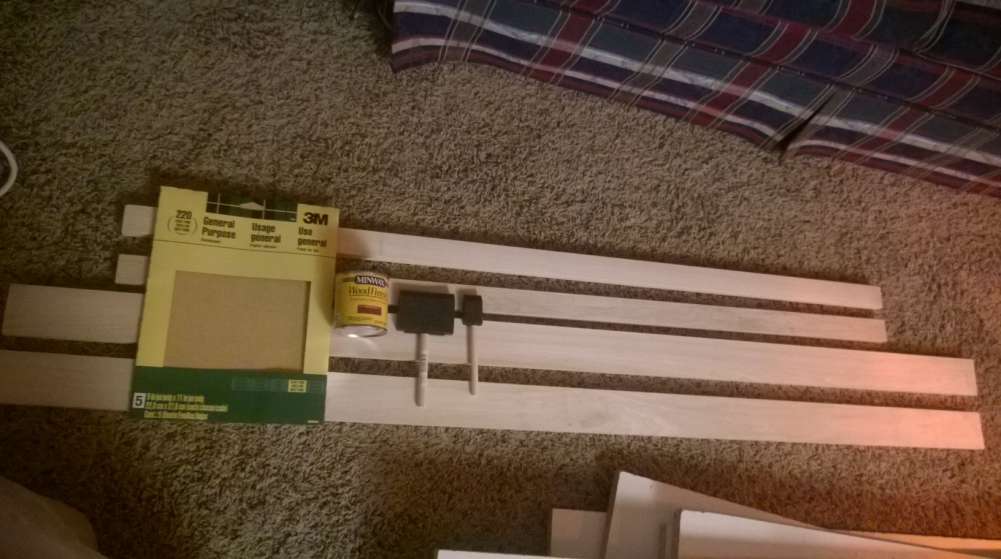
1) Does anybody have any recommended building plans (Including supply / cut lists if possible) I have never built anything out of wood before; Ever. I want it to be pretty simple.

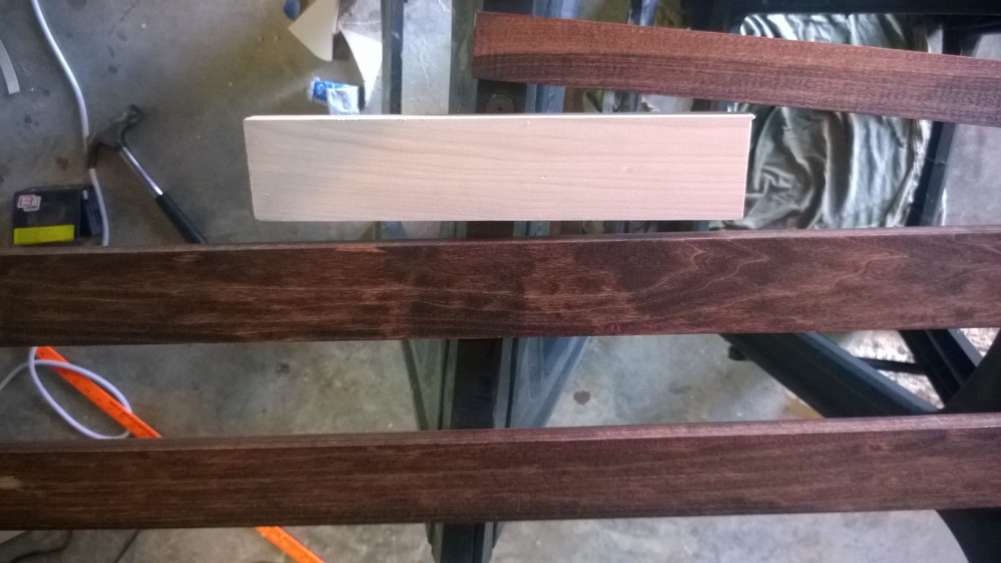
2) What would you recommend as for adding support to handle the weight of the aquarium? It is around 110 pounds, but I would like to build it to support at least 200 pounds on top to be safe.

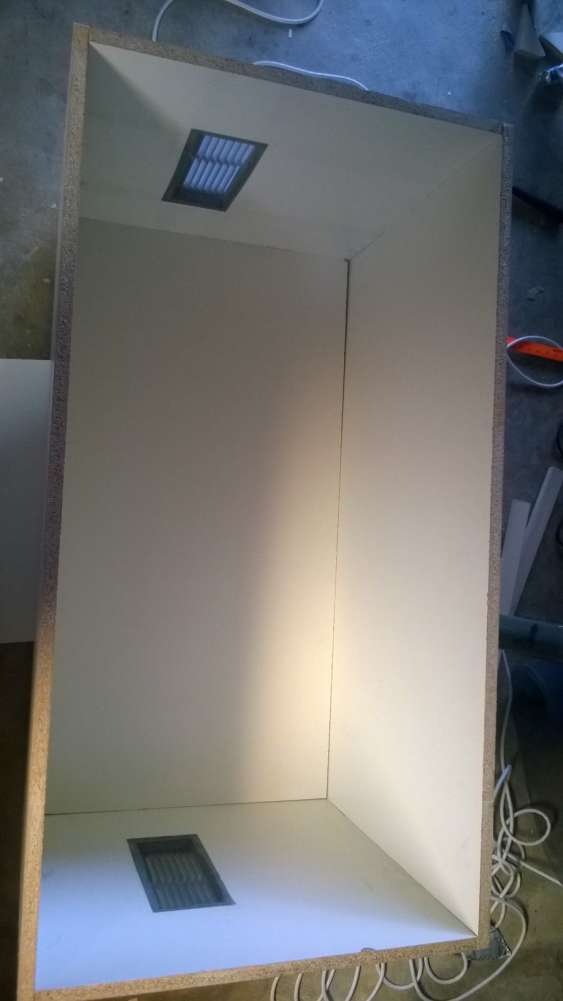
3) Lights. This is my biggest problems I am running into. It really boils down to one concern. If I put my heating lights inside the enclosure, with a proper wattage basking light to accommodate the likely shorter vertical distance, is there a large risk of my dragons climbing on the dome and burning themselves? If so, I have two thoughts running through my head. One is possibly putting a heat shield of sorts on top of it to reduce the surface heat of the top of it (I haven't seen such a thing, so recommendations are always welcome if you have.) The alternative, and my least preferable option, is leaving a gap between the top / bottom of the enclosures for external mounting on metal screen for the tops.

3a) If I have to externally mount the lights, How much gap should I leave between the enclosures to prevent fire risk? I really don't want to do this, as my snake enclosure is top access and I don't want to have to use a step-stool to get to it -_-.

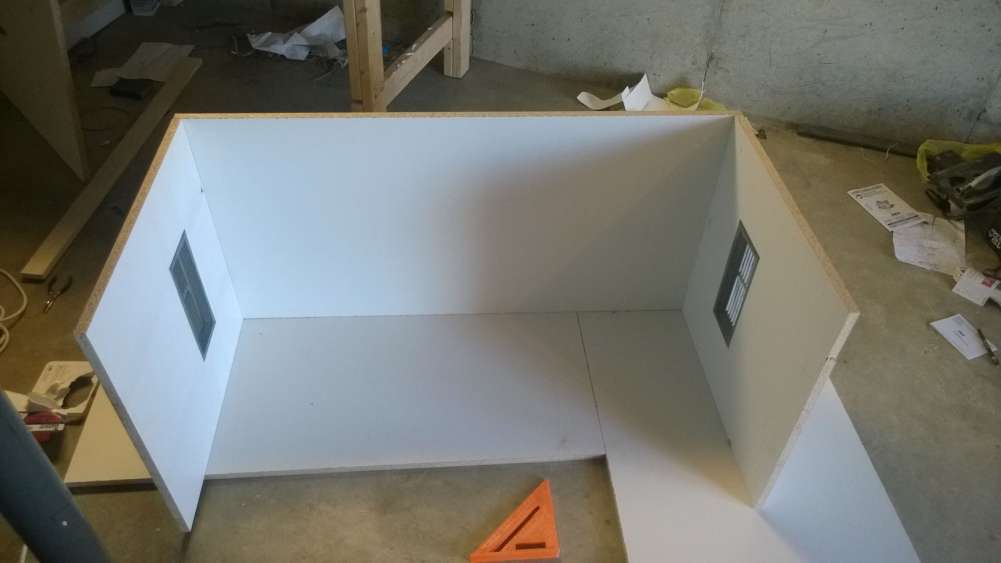
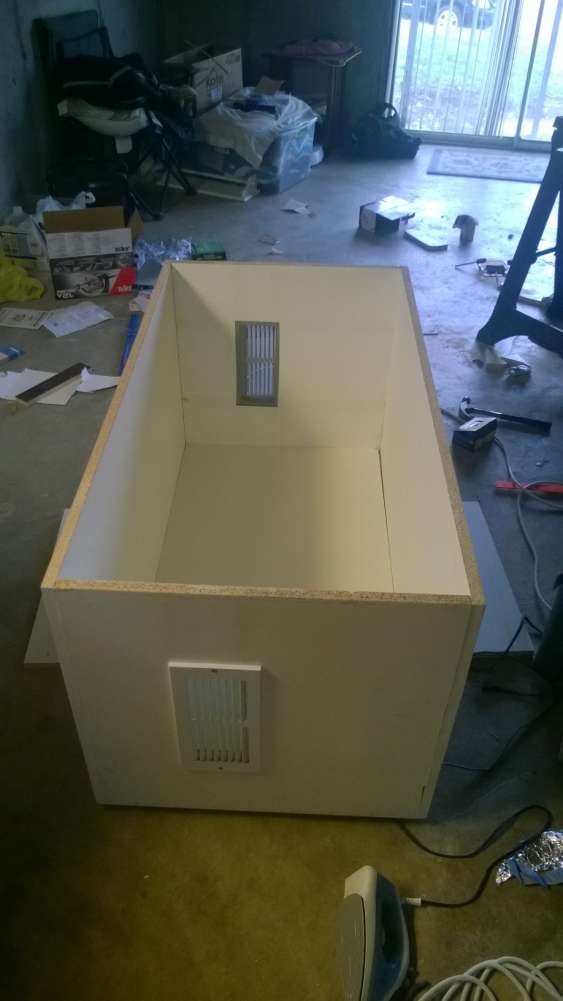
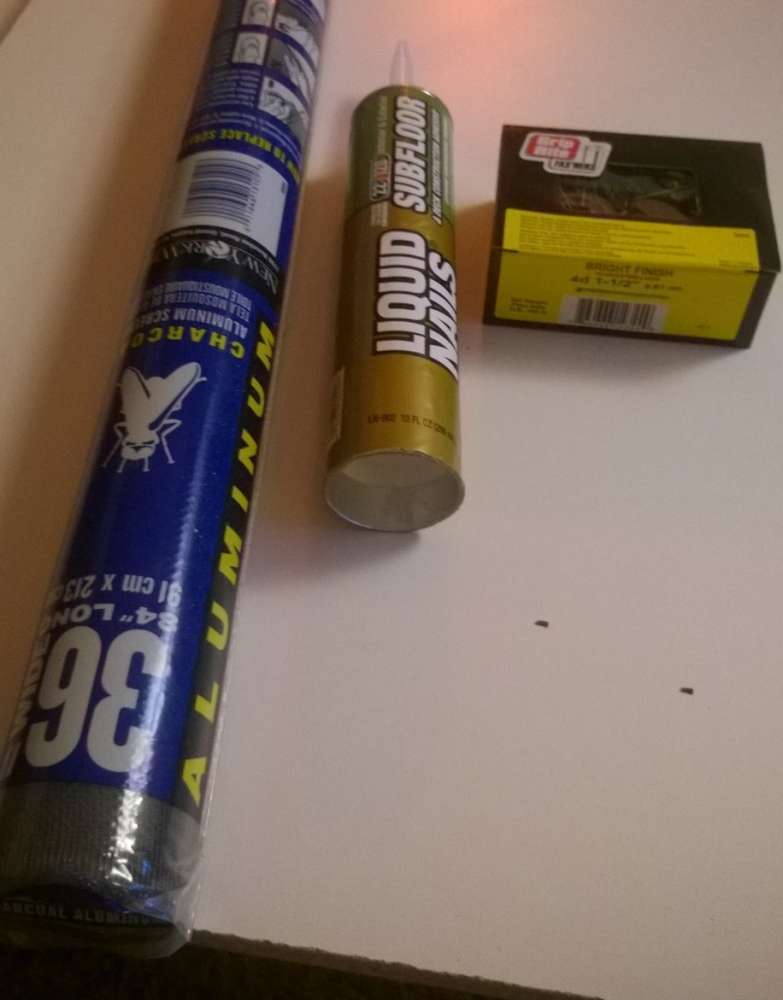
4) I was thinking of making the backs, tops, and floors of the enclosures MDF, Plywood, or Melamine (Probably Melamine, seeing as it is already coated and clean looking). I was considering using a screen for the sides for airflow, but I am concerned about stability. Should I use my board of choice for the sides with windows cut into it or can I create stability in other ways? I would like the front to be acrylic, but I am concerned about my dragons scratching it up. Are their nails tough on Acrylic to the point I should invest in mineral glass?

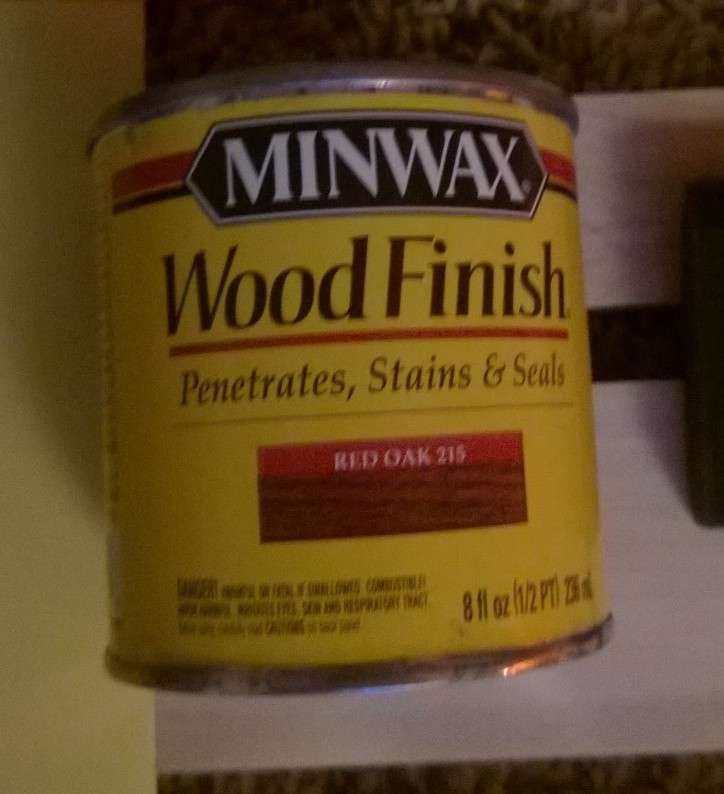
5) I am hoping to end up with a decent looking enclosure set (It is in my living room and appearances are everything, of course 8) ). I would also like some suggestions as to fairly priced stack-able enclosures with enough space for an adult bearded dragon with front door access. After I have decided on a final design, I will compare cost of building vs cost of buying and make a decision from there.

I know this is a lot to answer, but I do hope the experts here can help me achieve my goals :)

Thanks in advance,
Yuoso
 

Taterbug

BD.org Addict
I've built the crossfire plans but didn't like the height for my dragon - the bulbs end up too close for me, I like to give lots of climbing furniture. They might work for you if younuse a low profile bulb. It's simple and if you don't want much height it should work fine.
http://beardies.dreamwidth.org/2145.html

Can't help with the heat/lights much - I haven't tried stacking though I have smaller enclosures on top of the one. my hognose and tarantula enclosures sits on top of my 4x2x2 and the hognose's is a bit heavy though not as much as an aquarium. I have to use a piece of foam insulation board under it as the cage it sits on gets much too warm.

I like plywood, it has a more furniture-grade appearance. Melamine looks more like ikea furniture to me. It's a matter of taste.

Use glass. I've got acrylic in my enclosure temporarily - it's only been in since December and its scratched up really bad where pepper can reach it. Glass isn't that much more than the same thickness of acrylic in my area.

Cages by design offers some really nice (but expencive) enclosures and there are some makers of pvc enclosures of a large enough size. but DIY will be cheaper probably by a couple hundred dollars.

Hope that helps.
 

Yuoso

Member
Original Poster
Wow, that tank looks like EXACTLY what I am looking for, but I would want to modify the height for the same reasons you described. If you have built this, how stable is it? Do you think two stacked on top of each other would support roughly 200 pounds on top? 150 is really enough, but 200 would make me feel safer. If not, do any woodworkers here have tips on modifying the design to increase stability?

Also, with the basking bulb inside, were you ever concerned with pepper burning his/herself?

Any recommendations on a brand of low profile bulbs? I just did a quick search for the phrase "Low profile heat bulb" and didn't really find anything truly low profile. Should I be considering bulbs designed for other purposes for this?


Thanks for your swift reply,
Yuoso
 

Taterbug

BD.org Addict
It is incredibly stable, I can sit/stand in it shove it and it won't budge. It's also very heavy. Here is a pic:


I'd think you could add joists to improve the strength, like a floor would have. My worry would be the plywood warping, I'm not sure the load limit honestly. For my taller enclosure I have it sitting on a 2x4 based frame. But it has about 500lb or so in it if I had to guess.

With short furnishings the bulb wasn't a problem. A flush fixture and a small globe bulb is about 6-8". Some bulbs are just longer than others. I had to use the shortest ones I could find. You could also use several smaller lower wattage lights like the little halogens if you plan them carefully. When I started using deep substrate and climbing furniture that wouldn't have been enough room anymore. I would recomend the T5 lighting or a T8 with a good reflector - that will help keep bulbs away from dragons a little more. I struggled to keep the baskig site close to the T8 and far enough from the basking light.
 

Yuoso

Member
Original Poster
Thanks for all of your input. I'm creating a list of supplies for a double-build to my desires and I will be off to the hardware store before too long. I'll be sure to post pictures as I build this masterpiece :)

Until the magic starts,
Yuoso
 

Yuoso

Member
Original Poster
And so it begins ;)

I went shopping today. By shopping I meant I went and behaved like my frugal self and went to 19286341 stores and wrote down prices and then went back to each one that had the lowest cost version of the needed item. All together, I managed to make this pile happen for $87 and change (Tools included). This should be all the building materials I need to build a single enclosure (Minus UVB at the present moment - will discuss later on). It is interesting to note that, until today, the only tools I owned (or ever even needed) was a hammer and a drill.

81138-5887817512.jpg

Now is a good time to give credit to CrossFireDragons.com for the initial design and to Lexi at http://beardies.dreamwidth.org/2145.html for the tutorial that inspired me. I hope my interpretation of this build will help someone wanting to accomplish a similar goal to mine.

Let's take a look at what was purchased today, and then I will cover what still needs to be obtained.

Building materials and 48" right angle:
81138-5774616986.jpg
I selected 3/4" Melamine coated particle board. Also known as laminate by the guys at the lumber yard. After driving around, I found a local Sutherlands that was trying to get rid of their supply since apparently nobody wants to buy it (Yay for me). The 4x8 sheet cost me $15.00 and they threw in an extra 2x4 foot scrap piece for free.

The right angle was given to me free of charge by the same people when I explained my tool situation (or lack thereof). I don't believe it is completely necessary to have it for this project, but it sure as hell will make things easier.

Aluminum mesh, Liquid Nails, and real nails
81138-579639166.jpg
I decided I wanted to follow in the footsteps of Lexi / CrossFire and include real vents on the enclosure. However, I do live with my girlfriend and if another Dubia ends up in her nose at night, I may come home to no dragons (Of course, she would need to find a new man). Obviously, escaping beetles are good for nobody and the mesh will cover the vents on the outside. I hope to make it look clean and professional, but I am dubious as to how I'm going to this this currently. I bought mine at Lowes and chose Charcoal Aluminum. You may choose whatever you wish, but if you possibly might use it for a screen top down the road (You will have a ton of the roll left after all), pick one that is safe for heat.

Liquid nails will go on the edges of the Melamine walls before being nailed to each other to create extra support. It will also be used for various other "Stay still damn you!" moments during the build process I'm sure. It truly is a great thing to have in any collection. I now have that privilege.

The fasteners I chose for the project are 4d 1.5" bright finish nails. These have a very small head on them that will not stick out awkwardly when the box is finished. Looking at the size of them now though, I am dubious as to if they are thick enough to offer any real support. Meh. I'll add this to my end of the day thoughts. Regardless, 1.5" is the correct length for a project such as this.

Decorative hardwood for the front
81138-1349525298.jpg
I stuck with the provided measurements of 3" top / bottom trim width's and 1.5" side trim widths Conveniently, Home depot had these four pieces of Poplar left over from a previous customer's cut and was willing to sell them at a discount. $6.00 out the door for all four pieces. There are a few dings on them, but that's what the sand paper is for :). When you pick this lumber out, be careful what kind's you choose. Alder, Ash, Aspen, Birch, Cottonwood, Dogwood, Elm, Maple, Oak, Poplar, Sycamore, and Willow are all generally considered safe for bearded dragons. "Whitewood", Pine, and other soft woods are toxic. As these boards would on the outside of the tank, I don't imagine it would be a terribly large concern if you mount the forbidden lumber. As I understand it, proximity isn't harmful. Contact can be devastating. Regardless, get a good sealer and seal the crap out of the board if you must have soft wood.

MinWax
81138-8690370293.jpg
Appearances are everything and I don't like the appearance of the plain poplar. After much research, I came to the conclusion that this brand specifically is (After curing) safe to have around beardies. Obviously don't stain their basking log and feed from it -_-. Either way, mmmmmm red oak without the price tag :).

Electricals
81138-5024138102.jpg
For lighting / heat, I purchased two porcelain bulb fixtures to hold heat bulbs. They mount to the top in a clean looking manner without sticking down very far (Vertical Space is just as important to me as floor space). I want to set up two basking areas, but I might stick with one depending on how pissed off I get at building this thing. After finalizing my heat bulb decision, I will search for a shroud / cover of some sort to put over the bulbs to keep my dragons off of the them. I'd like to think they were smarter than to climb on a scalding hot ball of electrical fire, but they are, alas, known to poop in their water dish. I intend on getting a ReptiSun 10.0 for UVB, but I am having difficult locating a 36" T5 ballast. I'll discuss this more in end of day notes.

I purchased, at full price :banghead:
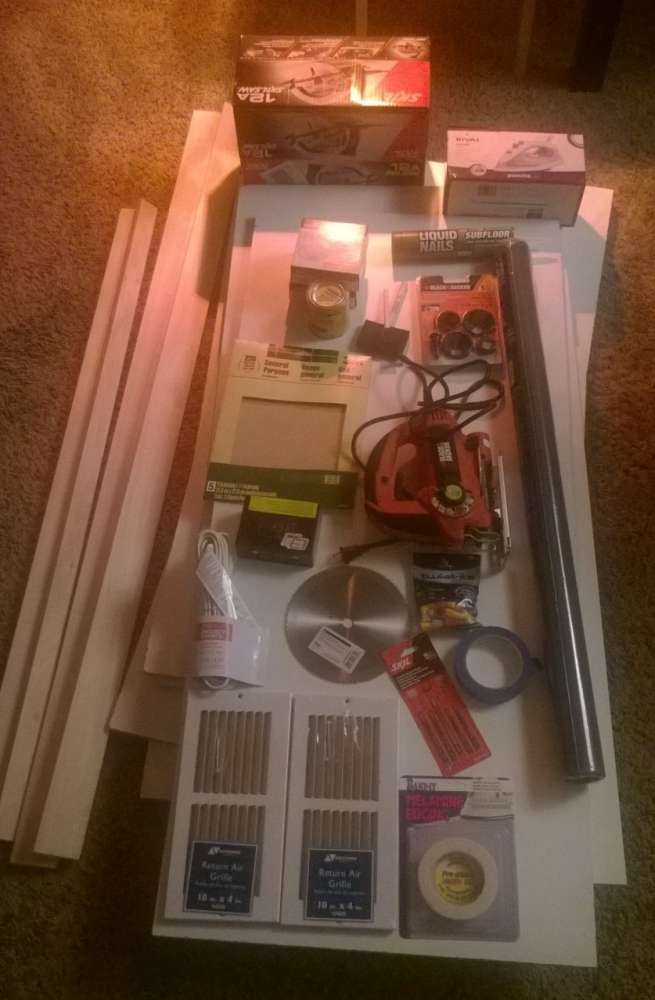
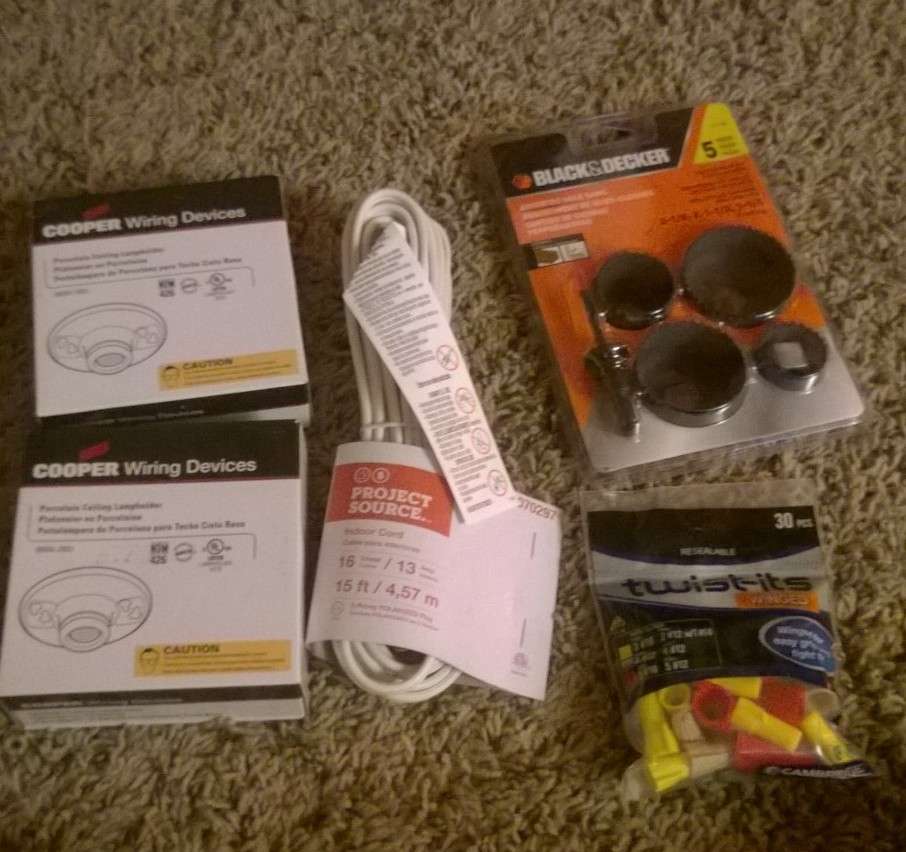
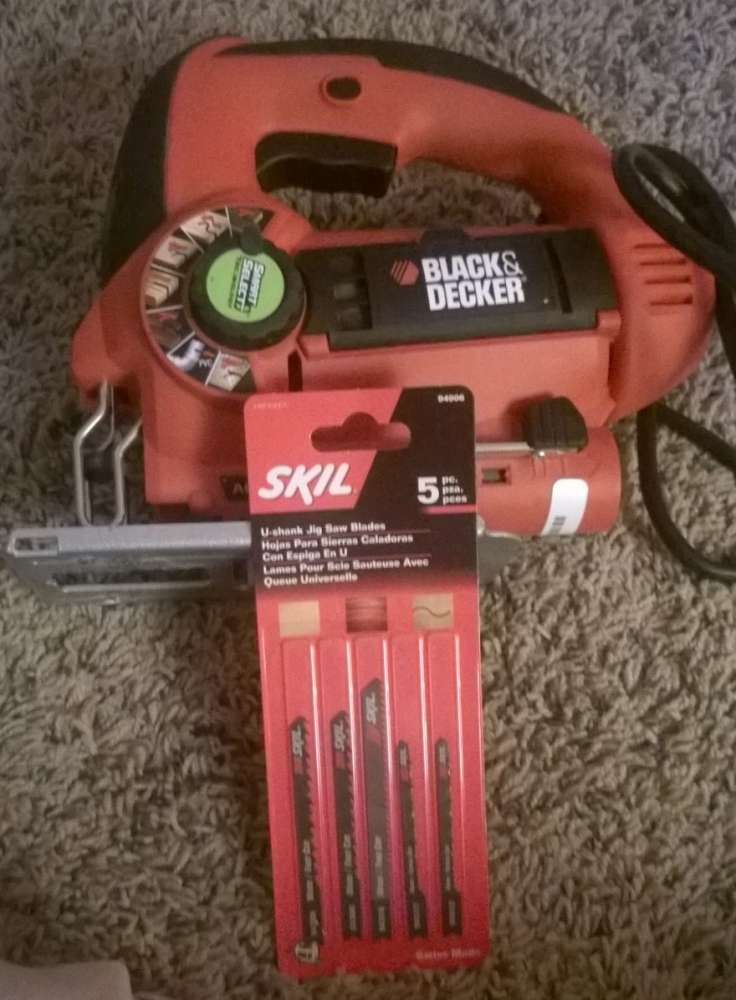
, a basic electrical extension cord to cut the female end off of and wire this bad boy together with. No matter how hard I looked, nobody had extension cords on sale and bare wire with male plug kits were more expensive than a fully assembled one. Are these not a commonly purchased item that deserve regular competitive discounts? Oh well, maybe you will have better luck.

The Black and Decker package full of what looks like medieval torture devices are what modern people call hole saws. How creative right? The set was in the clearance section at Wal-Mart and came with 4 sizes. Most likely, I will only use the 1.25" variety for this project to create an access hole for the wire. Having typed that out, that sounds like a terrible idea. See previous comments about dubias in the nose. Also, see end of day notes for further musings on this.

Tools :blob5:
81138-4800376501.jpg
81138-4552943739.jpg
I own them now. I feel an addiction starting *twitch*.

Ideally, for this project, I wanted to have a table saw to cut really precise amounts off. Alas, when it comes to machinery that has the ability to fly apart and land razer sharp and scalding hot chunks of metal in my forehead, I don't feel comfortable buying the $79.99 table saw Harbor Freight swore had a "Normal" amount of play in the assembly of the parts. I mean it when I say this thing felt shakier than cafeteria jello. Unfortunately, the next model up was almost $300.00 (my entire personal budgeting goal for building two enclosures, including cost of tools).

I settled for a Black and Decker JS660 Jigsaw that I got at the local pawn for $8.00 (It did of course survive a thorough inspection before I grunted in approval and carried it to the counter) and a Skil circular saw still new in box (supposedly; I haven't opened it yet *shudders*) for two dollars more than the jigsaw. At the recommendation of the lumber guys that sold me the Melamine, I purchased a set of jigsaw blades that included several fine toothed wood blades that should help prevent chipping of the Melamine coating. Keep in mind if you are buying jigsaw blades for the first time, there are two (that I was told of) different styles of blades; a "U" type and a "T" type. Some jigsaws can take both while some only take one. Mine takes a "U" blade. I also purchased a 140 tooth "Plywood - Veneer - Plastic - OSB" blade for the circular saw. I was given some tips on making the cuts, see further info in end of day notes.

Brown streak removal
81138-6769778966.jpg
Would you believe my girlfriend doesn't own an iron?! I was genuinely shocked. I'm not sure how my slacks get a perfect crease every day, but I swear she's magic. To install the Melamine Tape, you need an Iron. In all honesty, I haven't researched this one much. There are possibly other ways that I have not come across in my readings that do not require an iron. I saw a small one at Wal-Mart for $6.99 and figured it would do the job I need it to do. Yes, it's purple. So what? Money is green and this Iron is going to make the ugly strips of brown on the edges look sexy and white. Speaking of which, buy Melamine tape that fits the width of your Melamine board. #ProTip

Beardies need oxygen too...
81138-8214149708.jpg
See those awesome vents? Yea, they aren't vents. I could not for the life of me fine ANY vents that had a depth of less than 3/4". I don't want the edges of the vent sticking out the sides of my enclosure I'm putting so much detail into, so I bought what is called a "Return Air Grille". It's about 1/8" thick and will cover the hole I will *with luck* cut perfectly square *twitch*. I will have to think on how to make the outside look good though. Perhaps another set of the same ones, attached to the outside with mesh in between them will look nice....

Task list for tomorrow:
[*]Tape, measure, and draw cut lines on all lumber to reach final desired size.
[*]Drench that ugly poplar in beautiful red oak stain.
[*]With luck, cut all lumber to final desired size.
[*]Find Stanley track. Somebody in Kansas City has to have it in stock :\

:study: END OF DAY THOUGHTS :study:
Size of nails
I wonder if they are thick enough? I am, after supposed to pre-drill the hole in the face of the board I am driving it into. Do I even have a drill bit this small? I will have to look into this more.
81138-8708259868.jpg

UVB Lighting
NOBODY in the Kansas City area sells a T5 ballast in either 2 or 3 foot sized. What is this crap?! I will have to do further research into the benefits of a T5 RS10 vs a T8 RS10. I may end up purchasing the T8 fixture (of which there is a plethora of choices at every retailer) and a matching T8 RS10 tube. Either way, I don't have it yet.

Hole for wiring
Having looked at the extension cable I chose to sacrifice for the future loving home of my little minions, it only needs a 1/4" hole, if that. I will probably seek out a grommet to fit a 3/8" bore, ideally leaving me with just enough inner space for one cable and nothing more.

Untested Melamine cutting tips
I was given two different techniques to help cut Melamine cleanly. The first everyone seems to agree on is to put blue painters tape along the cut line on both sides. Generously lay down tape first, then measure and draw your guide lines on the tape. Apparently this will please the wood gods and they will hold your Melamine coating in place for you through your cut. A second, more suspicious sounding tip I was given (Loki, is that you?) was to install the circular saw blade in reverse. Theoretically, this will still have enough power to cut, but will do it with less of a ripping and tearing style to it resulting in a cleaner cut. I will try both and report back when I have a personal opinion.

Front of enclosure
Glass...... I need to buy it, but I need to finish the build of the enclosure to be sure of the final size. Also, in the posted tutorial, Lexi wasn't kidding about the Stanley track not being available in retail shops. Nobody I talked to all day has any clue what they are. *sigh* I guess I'll have to order them online.
 

Taterbug

BD.org Addict
Looking good so far! Awesome deal on the melamine!!

For the vents I think what you have will work fine. The thin (flat really) ones are soffit vents and would be in the roofing/siding area. The ones I got also had a built in screen.

The T5 fixtures are usually available at grow shops or online (I got mine at Amazon, lightyourreptiles sells kits for Arvada bulbs). Depending on the fixture you get you may need a larger access hole to fit the plug through. This link might help you pick what works best for you. https://sites.google.com/site/thelizardmadness/lighting-guides

The glass track I also got at Amazon, Knape and Vogt brand. You may also be able to get something from the glazier when you order your glass.

The nails looks small, finishing nails might not give you the holding force or bite you need for the main box, and at least for me have a tendency to back out or break. We used screws for the box and nails for the trim boards.

Best luck wort you build I look forward to seeing the progress!
 

Yuoso

Member
Original Poster
Day 2 was a 98% success :p. I got most of the boards cut to size, after learning a few lessons about cutting wood. Here's what I got done so far.

Performing the cuts
81138-4643926625.jpg
Good news is the tape trick worked. It really helped prevent the Melamine from cracking. It was pretty hard to follow the line I drew in pencil against the background when it was covered in sawdust though.
81138-5460110628.jpg
As you can see, I learned the hard way that a jigsaw sucks at making straight cuts. Halfway through this board I noticed it was not cutting straight up and down, but at an angle. I gave in and used the noisy ass circular saw. It did a MUCH better job, but I was unable to save the rest of this cut without making the board too short. Oh well, lesson learned.

Cutting the vents
81138-3934007515.jpg
81138-658603171.jpg
Did I mention that the jigsaw sucks at making perfectly vertical cuts? Well, apparently I suck at cutting in a straight line too. Regardless, these will be covered with grills so....whatever. It works.

Installing the vents and mesh
81138-7811579019.jpg
Pretty straightforward, I just screwed them on after lining them up with the T-square.

81138-5302669737.jpg
81138-7298231711.jpg
After cutting the mesh to slightly larger than hole size (My god it was hard to cut in a straight line), I applied silicon in a thick bead around the hole and pushed the mesh onto it. A few firm trips around with my finger held it well enough for it to cure in place on it's own.

Connecting the top to the sides
81138-889535514.jpg
81138-14159000.jpg
This was a pain in my ass (lightly put). I invested in a speed square to help and a 90 degree clamp. The clamp was a waste of money :banghead: but the square helped immensely. I put Liquid Nails on the cut edge of the board and then put a finishing nail every 1.5 inches. I think it will hold. If not, I'm going to throw it off a roof.

Tomorrow I am going to install the bottom, cut the back, and hopefully install it as well. With any luck, I will be able to cut the front wood panels and get them stained.

As for lighting, I have decided to purchase the ExoTerra lighting controller (http://www.exo-terra.com/en/products/light_cycle_unit.php). Less overall cost and it will control both enclosures. I have also decided on a set of Arcadia 12% T8 24" bulbs with reflectors. After reading the link you posted about the lighting, it seems the right UV Index and habitat would be achieved with this combination in a 24" by 48" enclosure.

Celebration Time
81138-8646142720.jpg
 

Taterbug

BD.org Addict
What I do for making straight cuts is to make a guide with a board that is straight/true or something like a metal level and clamp it to the board to be cut. It takes a little adjustment to line up the offset but then you can use the foot of the saw up against the guide to stay on course.

I've looked at that controller before, I'd be interested to hear what you think about it. The dimming feature is really very appealing.
 

Yuoso

Member
Original Poster
I'd be happy to let you know what I think when I get the light controller. It will be a couple of weeks before I buy the lighting. Here's some pictures of my progress.

Finished Front Trim
81138-4323290722.jpg
81138-2917872346.jpg
Unfinished board is scrap from before for before / after.

Back / Bottom Assembled (Sitting on it's back)
81138-5439728172.jpg
81138-253165714.jpg
Apparently one of my sides wasn't perfectly square and a foot long section along the bottom right rear of the enclosure wont sit flat :banghead: . Oh well. I'll get some white DAP to seal the interior edges with and it won't be noticeable when set against the wall. I'll be more precise on the second enclosure for sure.

Oh....got the Melamine tape on. That was simple enough lol.

I was considering making the front a double door that splits in the middle and opens to the sides with aluminum mesh instead of glass. Glass just blows the cost of my project out of my price range, especially for two enclosures worth of it. After researching it, all I can find is that people don't recommend mesh enclosures because of heat escaping. However, I would think that a mesh front with two side vents (Pictured above) and no back vents would be just fine. Don't most enclosures have a metal mesh top anyways?

Also, alternative ideas not involving glass or involving donating glass to my cause would be welcomed with open arms :)
 

blindside

Member
I don't know if its any cheaper but did you look at the cost of acrylic or plexiglass? I know some people use that instead but i hear it gets scratched easier?
 
Status
Not open for further replies.

Members online

Latest resources

Latest posts

Latest profile posts

Getting ready for another day. Feeling sleepy. 😴
I just walked into my room and instead of looking at me, Swordtail's eyes darted directly to the ice cream drumstick I'm holding
Finally replaced Swordtail's substrate
I miss you so much, Amaris 💔
What is a quick way to warm up a cold beardie? His heating element went out overnight and now he's very cold.

Forum statistics

Threads
156,031
Messages
1,257,009
Members
76,036
Latest member
Abby999
Top Bottom