New Viv Build - Need design assistance

Status
Not open for further replies.

Koch

Member
Hi all,

Let me first start of by saying, Great Site and great Newbie guides.

Having had 3 aquariums and then upgraded to having frogs (still have them!), we (2 adults, 3 kids) are now expanding our horizons and getting into the world of Lizards; Bearded Dragons!

I recently picked up a vanity to transform into a viv; hence this thread. I am needed your advice and experience in this.

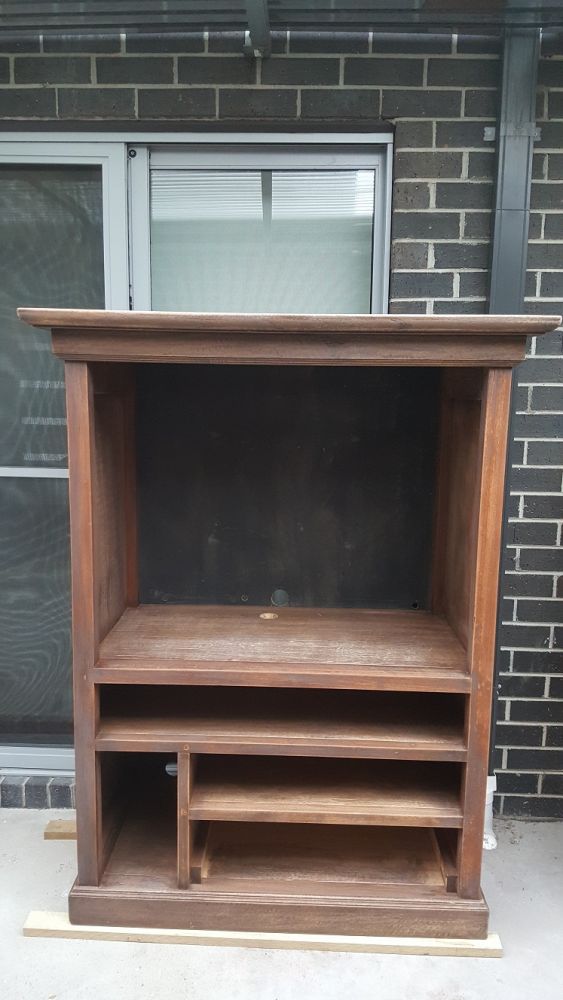
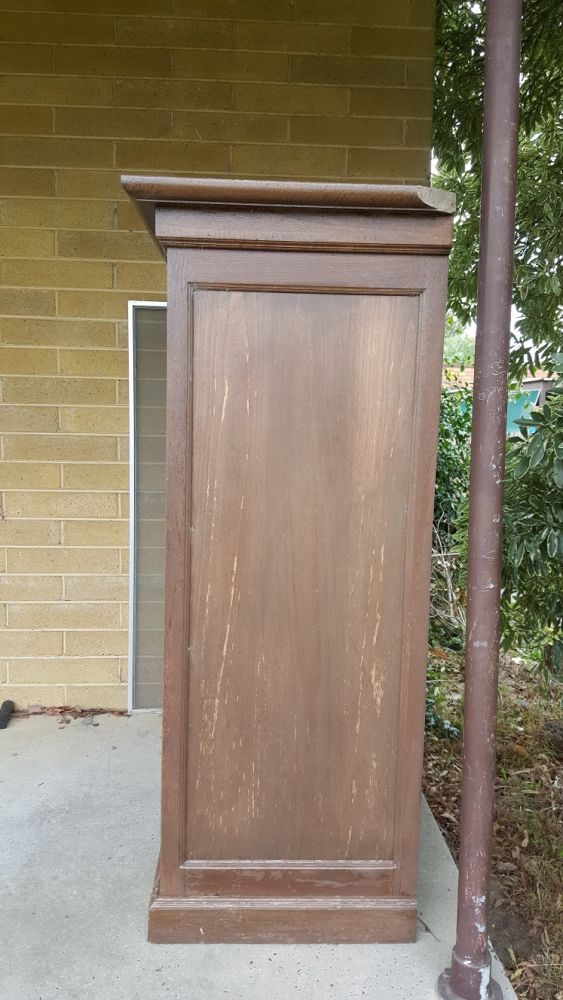
The vanity It is made out of complete hardwood and weighs a ton!

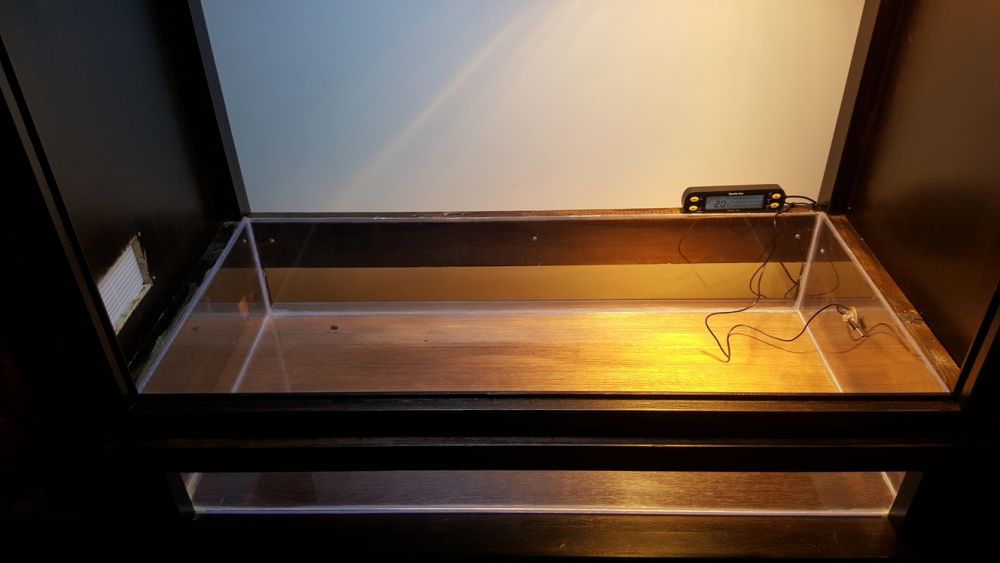
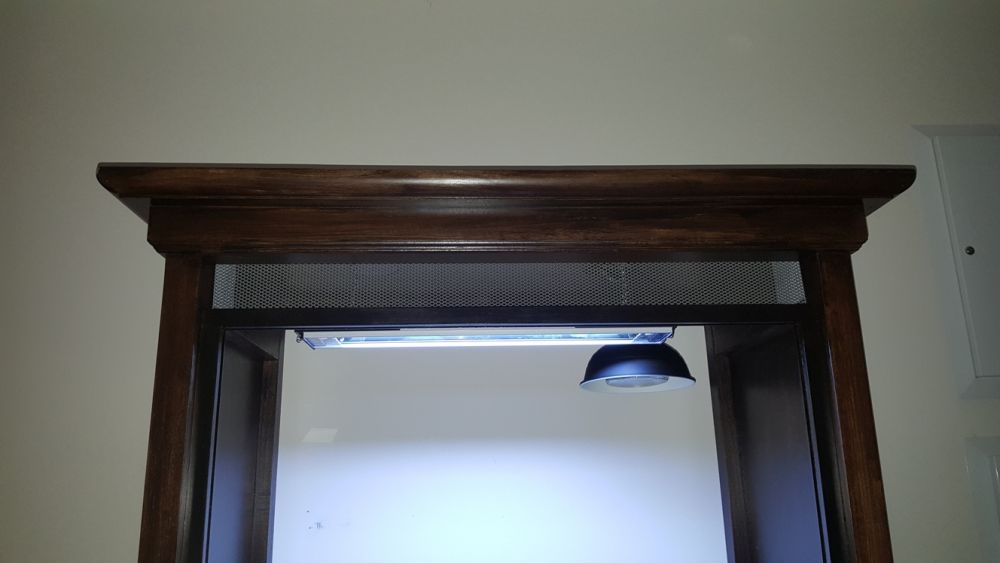
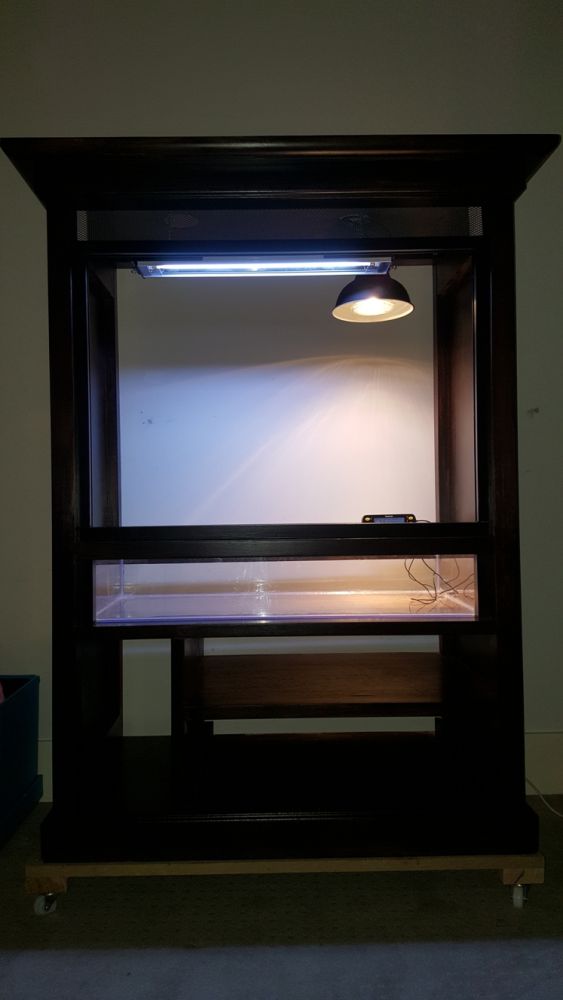
This is the front view of the vanity. Middle opening is roughly 950mmx650mmx550mm, which equates to about 95gallons; ignore the side table in the photo.
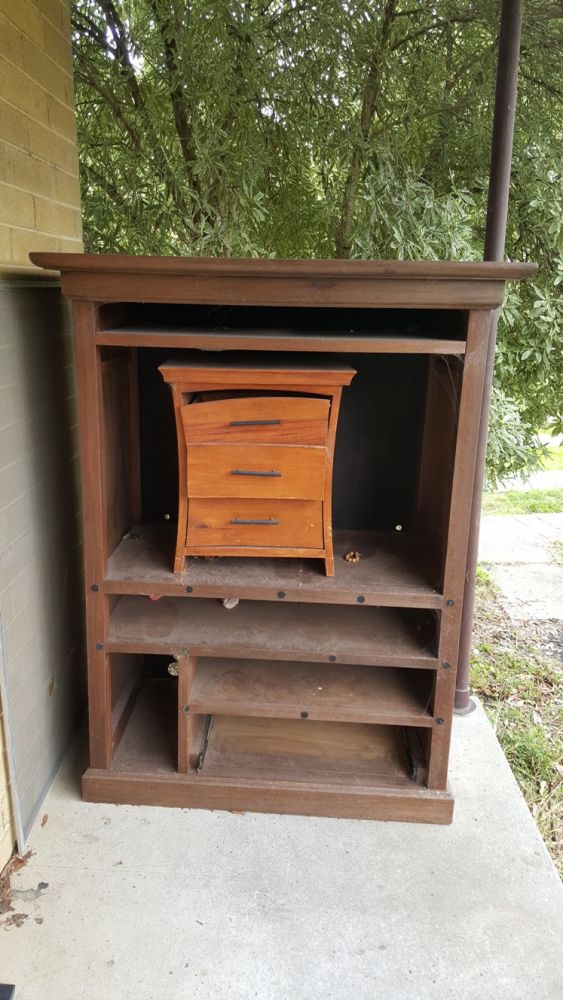
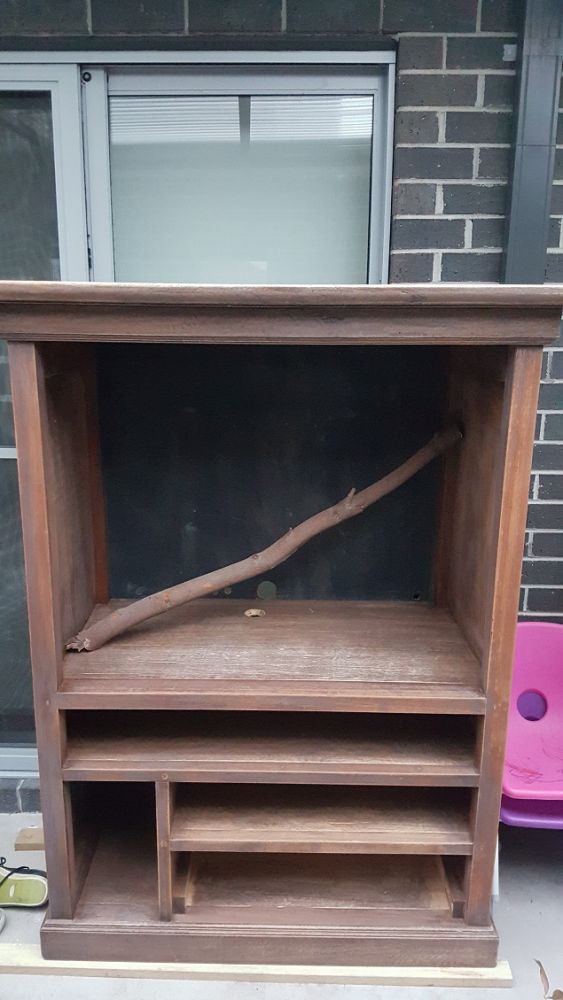
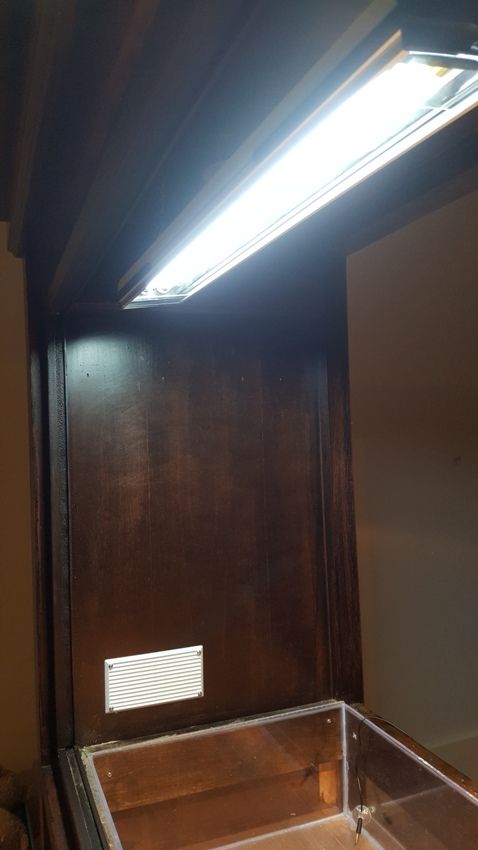
83015-4655298791.jpg

Side view

83015-4912596648.jpg

At first, I thought the middle section would be perfect size, but then it dawned on me that I need to heat this void; 24x7! So, I thought I could build false walls and insulate it, to help with keeping it warmer longer and possibly shrink the internal size to suit. I even contemplated splitting it in the middle and move the frogs to one side and the bd to the other .. but may not be enough room for the bd.

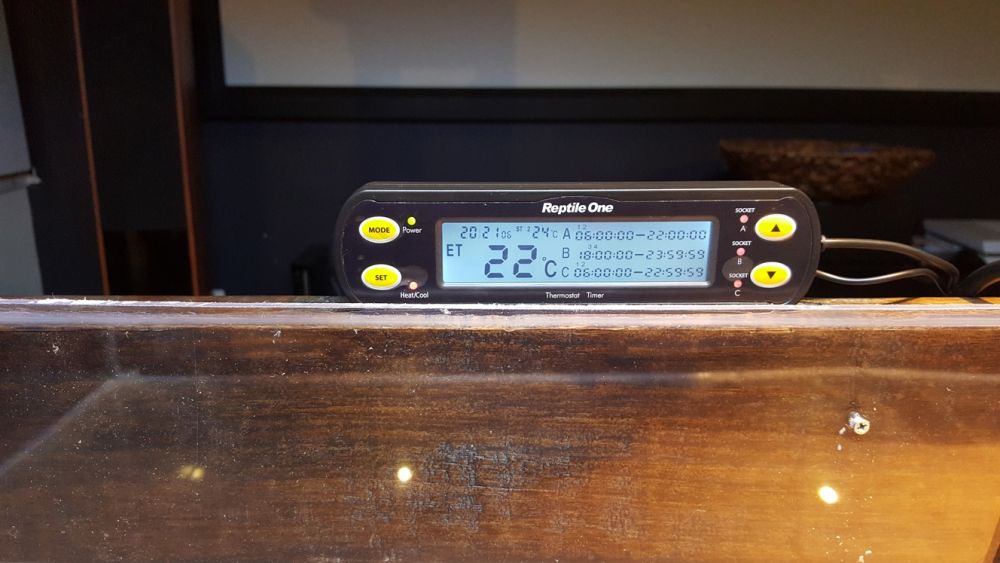
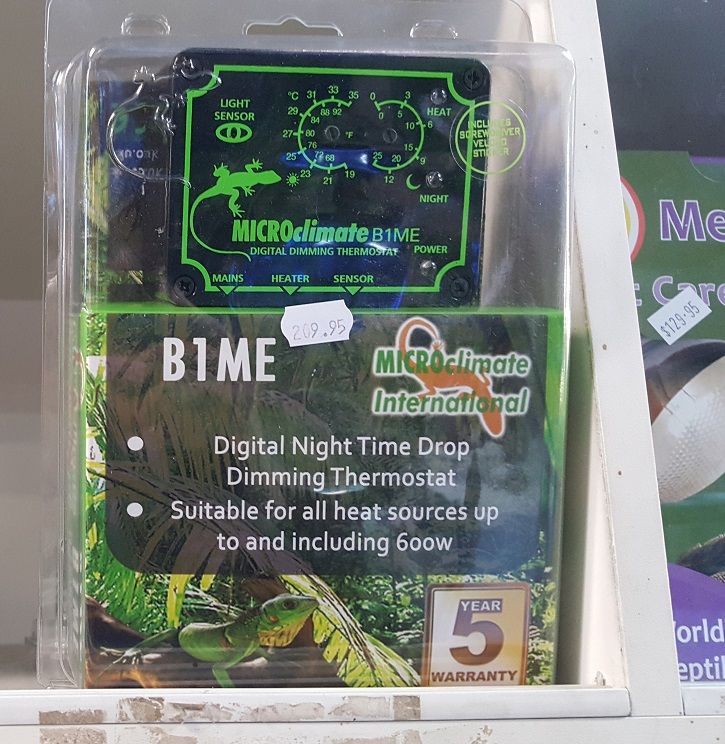
Which brings me to the next image. Been sus'ing out our local pet stores (Melbourne, Australia) and I came across this thermostat with built in inverter, duel night\day modes, with dimmable capabilities. Its def. on the pricey side and infact, the most expensive item of the project!

Has anyone had any experience with these?

83015-8049404625.jpg

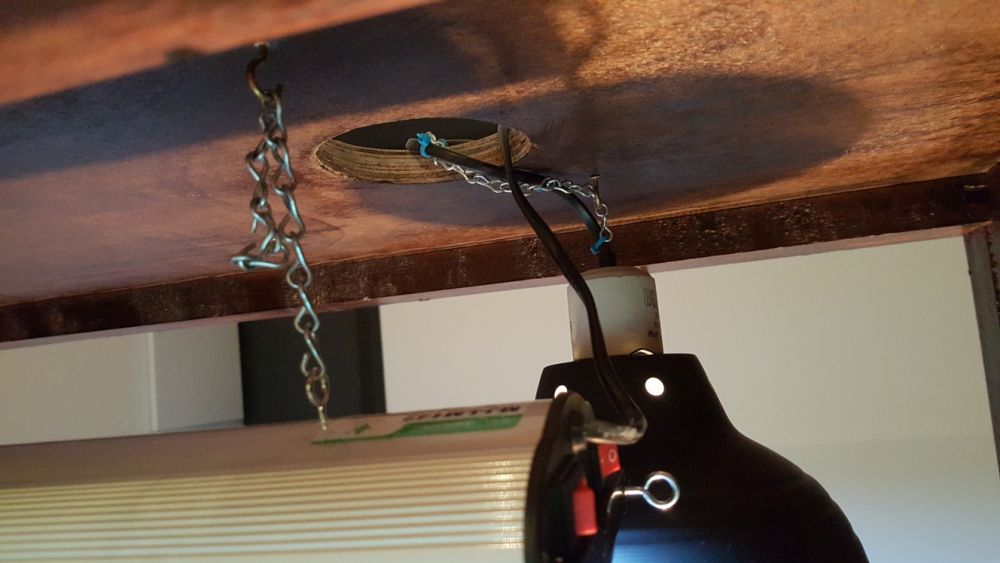
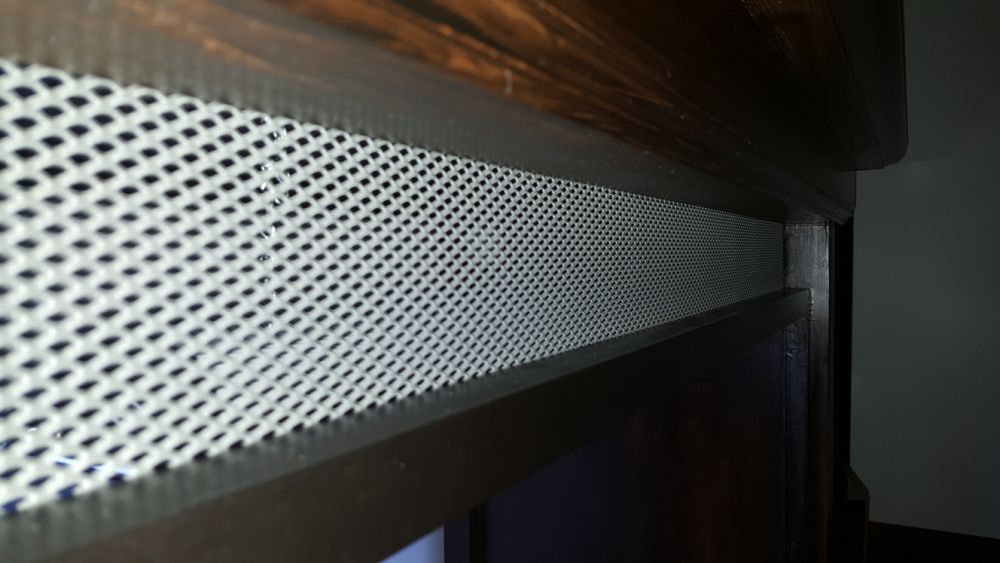
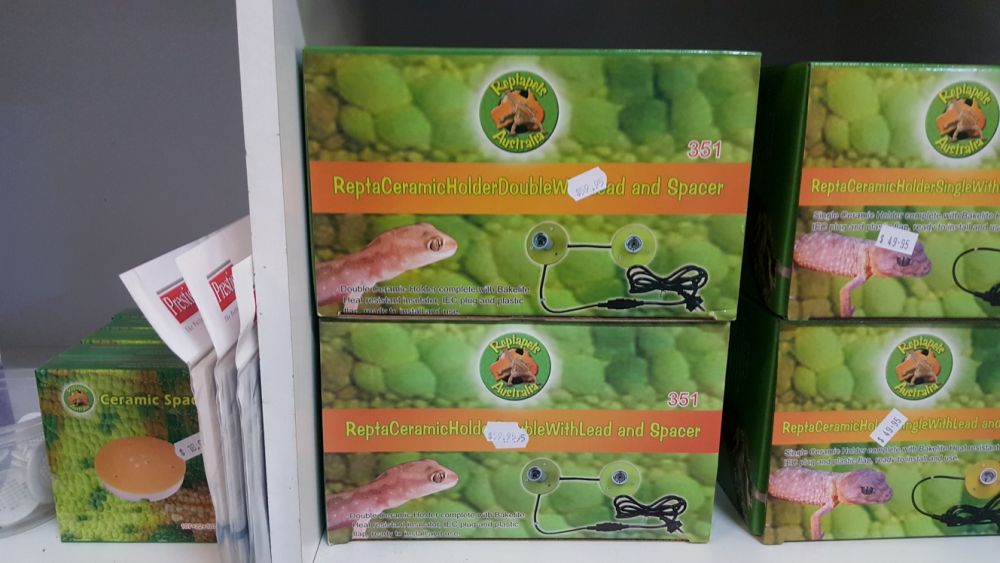
In regards to the light fittings (ceramic), I was looking at this solution, which will go straight into the inverter\thermostat

83015-827451884.jpg
'=
83015-9717236128.jpg

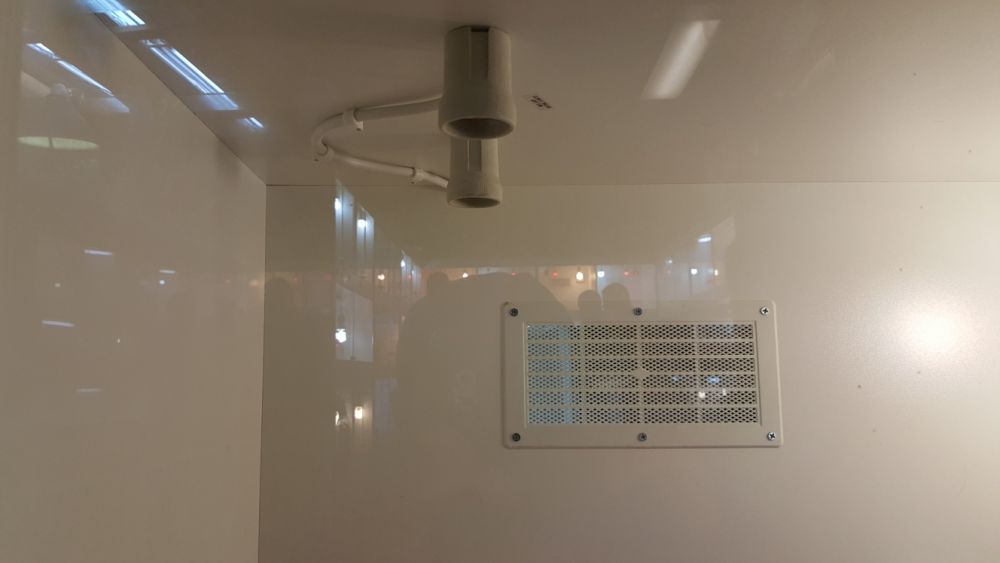
and another light source

83015-7889683931.jpg

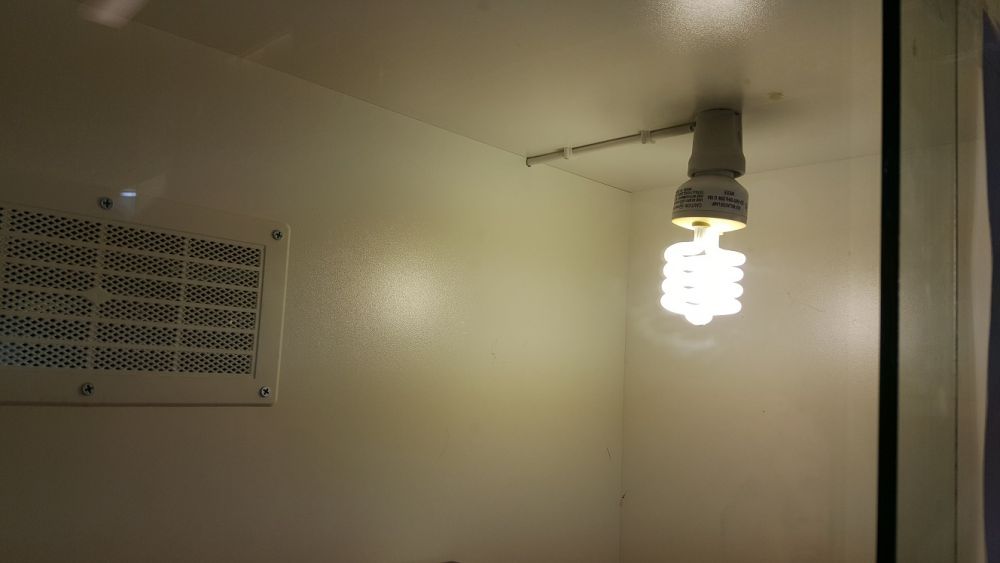
However, the more I think about it, the more I feel that I need to space these light\heat sources apart and be able to have more control over direction and heat\light gradient.

Substrate, I like the idea of using tiles so ill probably stick to that ..

In regards to the face of the middle section, I was originally going to divide it into 4 quarters, have the lowest part a fixed piece of glass and the rest would be have glass on a gas strut or hinge, but the more I look at vivs, I see most people are happy to use a sliding glass setup.

So here it is .. the start of the journey. This is just a place holder to get the conversation started. I am open to your ideas as you guys are the experts and live and breath this stuff!

Koch.
 

AHBD

BD.org Sicko
Hi Koch....I don't have an engineering kind of mind so I won't be much help but I thought I'd bump your post up for those posters that have more nimble minds than myself. You might post this in the DIY section as well if you haven't already. Or see if you could p.m Taterbug or Cooperdragon....they seem to be helpful with these types of projects. Taterbug has her dragon in a nice big/tall home made enclosure. Hopefully you'll get some helpful ideas. :)
 

CooperDragon

BD.org Sicko
Staff member
Moderator
It would be great to have that kind of space available! I agree that imitating the big setup that Taterbug has (perhaps even getting into the bioactive substrate) would be worth it if you have this kind of space available (although that would make it even heavier so tiles might not be a bad way to go either). You can set up the lighting to create several zones using platforms on the sides/corners and using big sticks to connect the areas. You could set a high temperature high UVB zone in one area, a low temperature, low UVB zone in another, and zones in between. This will allow for self regulation of both heat and UVB exposure. I'd put either glass swing doors on the front or the sliding doors in tracks which are also popular as you mentioned.

For lighting, the goal is to try and mimic sunlight as much as you can. You could have a set of lights come on at dawn and then slowly increase output using dimmers or additional lights as the day goes on with peak basking temperature and UVB reached at mid day and then slowly decreasing again. There are a LOT of options as far as that goes.

This is the setup Taterbug has. It's one of the best I've seen. Hopefully she can chime in and give you some good ideas about how to build out and light your new enclosure. https://sites.google.com/site/thelizardmadness/photogradient
 

Taterbug

BD.org Addict
Thanks for the complements guys :)

I have an enclosure of similar size that one of my snakes lives in. Its more spacious than the typical 40g breeder size, but it's not really big enough to subdivide and still give an adult dragon room.

Anyway, It looks like a fun project! There are lots of other ideas in the DIY area and even on other forums (for other reptiles too) to inspire! I have a few thoughts, just to kick around some ideas.

Size, I love big enclosures. I'd be inclined to gut the thing and use as much space as you can get out of it, if you can. It looks like it may effectively double your height. Pepper likes to climb, and other owners I've talked to with taller enclosures find their like to climb as well. So height is worth using if you have it. If you don't want to reduce the size, it should still be fine but won't really require anything extravagant light or heat wise. (For reference my dragon enclosure is 1220x610x1220mm and has 3 heat lamps. I have a 914x610x610 as well that only needs on heat lamp) It might also be a good size for a smaller species like a Rankins/Lawsons dragon but I'm not sure what all goes into licencing for you.

Lights, in particular basking lights, take up a fair bit of space. The bulbs can be about 6-8" tall, with a bit more for the socket/fixture and another 8-14" distance for safe basking. When you mount lights in the inside you start to loose space surprisingly quickly, which is OK just limits the amount of vertical space you can use. I'm not sure what options for UV lights you have in Australia but there are a few different technologies now and you should have options regardless of the other layout decisions.

How thick is the wood? 3/4" plywood seems to do a fine job insulating, and instead of false walls if the back wall or something is thin you could put a sheet of polystyrene insulation board behind it (where its hidden). Or put it on the inside and make a fake rock wall.

I have heard good things about Microclimates but they aren't available here. I do have an Ecozone controller, I like it a lot and it gives me some excellent control of my setup. However, its a bit of a luxury item, and not required. A basic programmable dimming thermostat would be good to prevent overheating, and are generally less expensive than the fancy electronic controllers (but of course less fun). Whenever possible I recommend use of dimming thermostats as a safety device, but they are not very common in use (at least in the US) from what I have seen. I would consider this the last on the list sort of thing, in case you end up spending more on construction or lighting than you expect.

The light sockets look good. You could also use outdoor floodlight fixtures with articulating arms. These take even more space than other sockets though. My solution is really basic (and I make no claims for its safety), I use ceramic sockets (like from a brooder dome) suspended by eye hooks screwed into the lid. I can easily add more hooks to adjust where the lights hang and I zip tie them firmly in place. I use florescent tubes for UVB and for ambient light.


For doors, its preference. I like the sleek clean look of sliding doors. I love the fact that I can remove the doors from the tracks and set them aside to work inside the enclosure. Its nice to have a big opening when hoisting logs and rocks in. I'm pretty sure I would have smashed swinging doors long ago. Think about what sort of reaching in and lifting and such you'll end up doing and make doors that you'll be happy with later, rather than resentful.
 

Koch

Member
Original Poster
Taterbug and Co,

Sorry for the late reply. Been in the middle of a bathroom renovation; upgrading the bathing area for the humans (x5) enclosure! :lol:

Thank you for the replies; very *usefull information.

We have this Sunday scheduled in at this moment to work on the viv. Going by your recommendations TaterBug, I will try to strip out some of the shelves and increase the vertical room. Been watching a couple vids on how to mount the sliding windows and will go with using aluminum c-channel as the groves\track for the window; Plan to use 3-5mm Perspex as well as its more resilient to knocks and, well, kids being kids! I can only assume that the thermal properties would be similar to glass, with the added benefit of durability and easier to work with.

Still deciding if I should go with handles, or simply, drill holes on the ends to allow for ventilation and also allow to use your finger to slide open\close the panel. Pretty much like this enclosure.

https://www.youtube.com/watch?v=nhelAeKaulY

The sides of the enclosure is roughly 3/4" thick hardwood. I will need to replace the rear as its thin material, just as backing purposes. I might go with marine ply; similar thickness. However, I would love to apply a rockwall design ... need to look into how folks come up with those designs, maybe a can of expandable foam and some different shades of brown paint. Not sure if the BG will attempt to bite at it.

TaterBug, how come you have 2 florescent lights? what is the ratio of use between the florescent lights and the basking lights, as I noticed in the photo, only the basking lights were on. I am assuming the basking light as well generates the main source of heat?

I am still new to the heat\light aspect of keeping BD's, so any additional info would be great. I have read the newbie guide, but it seems different types of setups are utilized.

We are still waiting for our license and should arrive within this week; yet to pick out a particular breed of BD. Below is a link to the types we have available in AU with the "Basic License" - PAGE9

http://www.depi.vic.gov.au/__data/assets/pdf_file/0017/306143/Application-for-a-Private-Wildlife-Licence-15_1.pdf

Hopefully we can have a good go this weekend and will keep you guys posted with photos and updates!

Thanks again!
 

Taterbug

BD.org Addict
For the rock walls most popular is polystyrene sheet foam and expanding foam insulation. There are some really cool things people do, including imbed branches and things in the foam. It's usually covered with grout and sealed with clear coat, or silicon with coconut husk pressed into it. The coco husk ones are harder to clean.

I have two fluorescent light, the shorter one is for UV and the longer for brightness. The all wood cage is surprisingly dark. Anyway, my schedule I try to match local sunrise/sunset. The basking lights dim on over about 70-90mins and an hour later the UV light and long daylight come on (they share a plug). At night it's the opposite. The fluorescents go off first, an hour later the heat lights start dimming. This is what my controller is for, you can also have them all come on at once if you like.

For some more inform lighting https://sites.google.com/site/thelizardmadness/lighting-guides I also have a heating page on there as well, it may answer some qurestions. If not, I'll be happy to help. For the most part you want to get the temps and uv exposure right for your cage, it's a process and no one setup works for every situation. You have the advantage on us of living in Australia so it might be easier for you to get some ideas and compact what your setup is like vs being out in their wild habitat.

Of the reptiles availables on the schedule for the basic license central bearded dragons are the ones available to us in the U.S. they are (I believe) the smaller and more docile of the two (the tyother is P.Barbata)

The Downs Bearded Dragon (P. Henrylawsoni) is also known as the Rankin's or Lawson's dragon are much smaller but on the schedule for "advanced" licensing.
 

Koch

Member
Original Poster
Hi all,

Project Update!

We finally had couple hours to work on the enclosure. We ended up sanding down the unit and then wiped it down with a rag and metho spirits.

83015-1188024972.jpg

Possibly next weekend we can get the wooden rails in to house the 2 pieces of window\Perspex. We will hopefully have a backing by then as well; already found the same type of wood\finish, we want from our local home depot store (Bunnings)

TaterBug, thank you for the photo of the Perspex window and I can see what you mean about scratching; looks very cloudy in places.

I have ditched the idea of having a separated section as the front section is too small for one.

I was going to remove the bottom shelf as well (removed the top one already) but its really tied in properly, and to remove it, will require me to start hacking at it as there are no visible nails\screws.

If I find later on down the track, I am running out of vertical remove, we can go down the path of removing that lower shelf.

At this stage, we are looking at getting a medium sized BG. My boys have a particular species in mind, a leather back; the yellow one looks awesome!

https://www.amazingamazon.com.au/leatherback-bearded-dragon.html

Currently, the middle sections dimensions are 740mm High, 940 Wide, 540 deep; 376 liters (96 gallons)

Over the past week, I have been doing heaps of research on equipment and position of items for the viv; concept finally coming together.

My biggest issue is that these items are not readily available here in AU, and need to pay top dollar for.

A ZooMed T5 10.0 hood with T5 Lamp is about $48 US (plus delivery) but about $130 US here in STORE! (almost $200 AU, which is almost 3 times the price!)

AU being on a 240v setup, I cant simply just order a US one and use an adaptor! Grrrrr! :x

Below is a list of items I have been eyeing out,

Microclimate B1 ME Dimming Thermostat (locally sourced)
https://www.amazingamazon.com.au/microclimate-b1-me-thermostat.html

Zoo Med Reptisun T5 HO Terrarium Hood High Output 24" (24W) (locally sourced)
https://www.amazingamazon.com.au/zoo-med-t5-reflector.html

ZooMed ReptiSun 10.0 T5 UVB Lamp 22"(24w)
https://www.amazingamazon.com.au/zoo-med-t5-reptile-globe.html (locally sourced)

TaterBug, the 22" is going off your photo of the Uvi thread https://sites.google.com/site/thelizardmadness/photogradient

Zoo Med ReptiCare Ceramic Infrared Heat Emitter (Need to confirm if this will support 240v, if not I will have to source locally)
http://www.petmountain.com/product/reptile-incandescent-bulbs/11442-105644/zoo-med-zoo-med-repticare-ceramic-infrared-heat-emitter.html

Zoo Med Deep Dome Lamp Fixture (x3, might need to downsize a couple as it might get tight in the ceiling space) (should be compatible)
http://www.petmountain.com/product/bird-lighting/11442-513264/zoo-med-zoo-med-deep-dome-lamp-fixture.html

I am also looking around locally for lamps I could use as retro fit option for the lights (not heat as it will require ceramic), like you mentioned TaterBug, something with arms that gives me the ability to reposition to light beam (especially come time to set up out temp\UV gradients)

Still yet to work out what type of substrate to use; running with the option of title and bio (need to do more research on Bio)

Sourced a couple branches for options inside the viv.

83015-6147955181.jpg

83015-770506007.jpg

TaterBug, in one of your posts, you mentioned you sealed your base with Polyurethane paint, would you recommend this application on this unit? Did you have a drain point aswell?

As you can see, still early stages of the project, and nothing really to show for, but steep learning curve and alot of ground work!

Thanks, Koch
 

Taterbug

BD.org Addict
Koch":17w905uo said:
Hi all,

Project Update!

We finally had couple hours to work on the enclosure. We ended up sanding down the unit and then wiped it down with a rag and metho spirits.

83015-1188024972.jpg

Possibly next weekend we can get the wooden rails in to house the 2 pieces of window\Perspex. We will hopefully have a backing by then as well; already found the same type of wood\finish, we want from our local home depot store (Bunnings)

TaterBug, thank you for the photo of the Perspex window and I can see what you mean about scratching; looks very cloudy in places.

I have ditched the idea of having a separated section as the front section is too small for one.

I was going to remove the bottom shelf as well (removed the top one already) but its really tied in properly, and to remove it, will require me to start hacking at it as there are no visible nails\screws.
A thought:
You could cut a hole or two into the bottom and use the shelf as a underground hide/cave. Could put a window or make a removable panel.
If I find later on down the track, I am running out of vertical remove, we can go down the path of removing that lower shelf.

At this stage, we are looking at getting a medium sized BG. My boys have a particular species in mind, a leather back; the yellow one looks awesome!

https://www.amazingamazon.com.au/leatherback-bearded-dragon.html
how cute!
Currently, the middle sections dimensions are 740mm High, 940 Wide, 540 deep; 376 liters (96 gallons)

Over the past week, I have been doing heaps of research on equipment and position of items for the viv; concept finally coming together.

My biggest issue is that these items are not readily available here in AU, and need to pay top dollar for.

A ZooMed T5 10.0 hood with T5 Lamp is about $48 US (plus delivery) but about $130 US here in STORE! (almost $200 AU, which is almost 3 times the price!)

AU being on a 240v setup, I cant simply just order a US one and use an adaptor! Grrrrr! :x

You may be able to find an alternative UVB. I'm not sure if Arcadia are available there but they are a good brand as well. You may be able to get a recommendation from the folks at the UV Meter Owners group (https://groups.yahoo.com/neo/groups/UVB_Meter_Owners/info) or the Reptile Lighting Facebook group. (https://www.facebook.com/groups/384134861721116/) about what is the best bulb sold in Australia, there may be other brands available that we would be un-familiar with.
Below is a list of items I have been eyeing out,

Microclimate B1 ME Dimming Thermostat (locally sourced)
https://www.amazingamazon.com.au/microclimate-b1-me-thermostat.html

Zoo Med Reptisun T5 HO Terrarium Hood High Output 24" (24W) (locally sourced)
https://www.amazingamazon.com.au/zoo-med-t5-reflector.html
If there are hydroponic/indoor plant grower/garden centers in your area they may sell T5 Fixtures.
I use the brand sunblaster, but again there may be a regional brands that's just as good. You do not need a reptile specific fixture.
ZooMed ReptiSun 10.0 T5 UVB Lamp 22"(24w)
https://www.amazingamazon.com.au/zoo-med-t5-reptile-globe.html (locally sourced)

TaterBug, the 22" is going off your photo of the Uvi thread https://sites.google.com/site/thelizardmadness/photogradient
22" is a good choice. Make sure you over areas of cover/shade.
Zoo Med ReptiCare Ceramic Infrared Heat Emitter (Need to confirm if this will support 240v, if not I will have to source locally)
http://www.petmountain.com/product/reptile-incandescent-bulbs/11442-105644/zoo-med-zoo-med-repticare-ceramic-infrared-heat-emitter.html
Again, maybe a local option. Also a night drop down to 15 or 18C (I think that converted right) is fine.
Zoo Med Deep Dome Lamp Fixture (x3, might need to downsize a couple as it might get tight in the ceiling space) (should be compatible)
http://www.petmountain.com/product/bird-lighting/11442-513264/zoo-med-zoo-med-deep-dome-lamp-fixture.html
Home improvement stores sell reflector domes, they tend to cost less but are not nearly as sturdy. I would recommend starting with one basking light. You can plan the layout to accommodate another though, but in my experience one light was enough for my 1220x610x610. You could also look at getting a deep dome and have the ceramic in one socket and the basking light in the other. Putting the dome outside the enclosure will free up space vertically.
I am also looking around locally for lamps I could use as retro fit option for the lights (not heat as it will require ceramic), like you mentioned TaterBug, something with arms that gives me the ability to reposition to light beam (especially come time to set up out temp\UV gradients)
Look for fixtures for outdoor security lighting. If you use halogen flood light bulbs there is no need for a dome as the bulbs already have a reflector built in.
Still yet to work out what type of substrate to use; running with the option of title and bio (need to do more research on Bio)
this is a good primer for bioactive (http://www.beardeddragonforum.com/threads/bioactive-soil-as-a-substrate-choice.11152/)
You will want the interior of the cage waterproof.
Sourced a couple branches for options inside the viv.

83015-6147955181.jpg

83015-770506007.jpg
nice!
TaterBug, in one of your posts, you mentioned you sealed your base with Polyurethane paint, would you recommend this application on this unit? Did you have a drain point aswell?
I have used solvent based polyurethane and water based. The water-based is not as nasty but in not water proof. The solvent based should be allowed to cure for several weeks to a month because the fumes it puts off are toxic. It is my understanding that cured polyurethane is inert and non-toxic. Other sealants include paint on pond liner, epoxy resin and marine/yacht varnish. I'm hesitant to recommend things because I don't know 100% what is or is not the safest.
As you can see, still early stages of the project, and nothing really to show for, but steep learning curve and alot of ground work!

Thanks, Koch
 

Koch

Member
Original Poster
Thank you for the suggestion and advice TaterBug.

Also can I make a note that anyone can jump and make a suggestion; the more the merrier.

Okay, I have been giving the enclosure some more thought .. I think a bit too much whilst at work; scribbling on notepads and staring outside in a trance-like state!

These little critters got me hook!

Having read over the Bio Active soil thread, it was made clear what I needed to do; allocate the bottom shelf for the substrate.
The gap is almost perfect for the substrate and should be enough for any type of burrowing and various layers of substrate required.

I am planning on boxing up that section with perspex and making it water tight; silicon edges. This should also allow me to see the drainage layer front the outside.

That way, I save on vertical space and is should be nicely concealed.

Next time I am at Bunnings (Home Depot), I will have a look at T5 fixtures and different types of domes.

My next question will be on ventilation. My main concern is the escape of heat. I realise that there needs to be airflow\ventilation to avoid extreme amounts of humidity, but also on the same note, don't want the temp drop to be
dramatic or not even reach optimal temps.

Any advice on position\size of vents or airflow paths?

Thanks again!

Koch
 

Taterbug

BD.org Addict
The Perspex bottom sounds great, being able to see your substrate helps immensely in knowing how moist it is or not, and sometimes you get to see worms and roots and stuff.

Having a outlet vent at the top, on the warm side and a inlet on the lower cool side will give the best cross flow/ventilation. You shouldn't have an issue with heat, many films use screen lids and do fine, and you have the advantage of a solid lid.
 

Koch

Member
Original Poster
Project Update

Been a while since last posted but its like watching paint dry; literally.

We prep'ed and painted the enclosure using polyurethane based paint (stain and clear). We are now waiting for the fumes to dissipate which as mentioned, going to take a few weeks.

While we wait for this, we picked up the 4.5mm perspex and will be placing it on the walls and floor of the lower shelf, making it watertight in readiness for the substrate.

Next on the list is to finally take the plunge and purchase the hardware; lighting and controller.

Still trying to find a T5 solution that's not going to break the bank but may end up biting the bullet and getting the ZooMed ones as we do not have many options here.

Oh, to create the sliding cavity for the window, I went out a bought a Makita router (early Fathers day present :D ) and then built a routing table purely for forming the channels into the hardwood.

Will post up some pics once the perspex is in.
 

Koch

Member
Original Poster
Project Update - 31st of August

Have done a few things for the build but looking back at the photos, doesn't look like much.

I think I spend too much time running many ideas thru my head which makes it seem so long and nothing to really show for!

Perspex is in.

Water tight and left a bit of a lip to hold the future sculptured foam background in place. Turned out well, but as TaterBug mentioned, VERY prone to scratching. Advice for any guys working with perspex, LEAVE the cover untill the very last minute; when the BD is finally placed into the viv, then remove it, as wiping the surface can even cause a scratch.

Front View (i am hoping the soil with darken up the window, if not, i will end up putting some window tint on it)

83015-1427764185.jpg

Top View

83015-7440505964.jpg

New vent installed to bring in cold air from the bottom, LEFT hand-side of the VIV. Note the missing vent as its currently been sprayed a darker colour so it doesn't stick out. Idea is we will form the foam around the vent to hide it aswell, possibly like a cave setup, also help with tunnelling the air coming in. Hope 1 vent is enough.

83015-4376845956.jpg

Controller

Ended up going with this ReptileOne Controller. I was speaking to the one of the reptile handlers and he highly recommend this unit over the MicroClimate. I like this as it has 3 sources to control. 2 HEAT (1 basking light and 1 ceramic night heat light) and 1 Timer (T5 UVB setup). Time will tell how well it performs.

Ignore the current settings as i was making sure everything was turning off and on when required

83015-3031126494.jpg

Lighting

I ended up getting a T5 holder with dual tubes. 1 of them is a standard T5 light and the other is a RepiSun 10.0 T5 Light.

83015-445838562.jpg

If it is overkill, i will remove the standard T5 light. I also screwed in closed eyelets to hep position and angle the light using chains connected to the Viv. The top c cup screw allow me to simply hook in a chain to a desired length. The other end of the chain is locked into the eyelet. You will notice i have used 4 on the T5 light, 2 to suspend it, and the other 2 on each end to angle the light if required.

Basking Light (Large)

EcoTerra dome with ceramic holder.

I might do the same, use Eyelets and chain or might use the adaptor that came with the dome to position the light, however, i will need to make a mounting point inside the viv for the attachment to clip onto; currently has a Phillips 150w outdoor floodligt

GotGrill

After many days of searching for mesh type material for the top ventilation section, i came across some gutter guard that would work perfect. Strong enough to stop kids from poking and still thin enough to not make it stand out. Originally i was going to spray it black, but i liked the current colour so i left it like this.

83015-4273126954.jpg

83015-9397286060.jpg

If i find little insects are crawling out, i will add some finer mesh to the rear of it.

Props

If you got to my previous posts, you will see the branches i had sourced. Now to add to the collection, i came across some tree stomps\roots some had dug out. After a quick hose down, i will select a couple and start to prep it (remove all the lose bits and then bake it in the oven to kill off any bacteria\fungus)

83015-8550728568.jpg

I like the cave looking one which will assist with cover

83015-7138697905.jpg

I am planning on running a smaller and lower basking light; still working thru where what will go where.

The Viv as it currently stands. All i need now is to cut the Perspex for the window template and see if i can get away with putting it into the tracks. I made the rookie mistake of making both the top and bottom tracks the same depth. Thankfully its perspex and it can bend for now and work out another solution for when the window goes in. Might have to add some alloy to the sides and somehow extend the top track .. PITA!

Then there is the soil substrate; currently sourcing the ingredients\components posted in the link TaterBug provided. TBH, the jury is still out with the soil substrate and might go with another solution; very concerned that if we cant maintain the ecosystem, it will cause issues for the BD!
I need to get myself a heat gun so i can work out temps and position of logs\lights

83015-518769958.jpg

Freddie has been purchased and waiting at the reptile store. Its a couple month all Central Red Phase :D

Thanks for the read, I am hoping you guys have some feedback and suggestions!
 

Taterbug

BD.org Addict
Wow! That's lookin great! You'll have a lovely show price when you are done and I bet Freddie will like it too.

You can give yourself a frame of reference for your lighting by going outside on a sunny day, then coming back in and popping your head in the viv. ;)

The soil actually looks pretty cool when you can see the cross section like you have it, and helps with the maintainence. I like watching the little soil critters mucking around. But, it's not for everyone. I find its not too hard to maintain, I have trouble keeping potted plants alive but my enclosure ecosystems seem to do fine.
 
Status
Not open for further replies.

Members online

Still Needs Help

Latest resources

Latest profile posts

Getting ready for another day. Feeling sleepy. 😴
I just walked into my room and instead of looking at me, Swordtail's eyes darted directly to the ice cream drumstick I'm holding
Finally replaced Swordtail's substrate
I miss you so much, Amaris 💔
What is a quick way to warm up a cold beardie? His heating element went out overnight and now he's very cold.

Forum statistics

Threads
156,032
Messages
1,257,018
Members
76,037
Latest member
Zypted
Top Bottom