sharisafari
New member
I will post the photos in stages with a little explanation on each ")
What I used:
Styrofoam
Liquid nails
Tooth picks
Can of non toxic expandable foam(this stuff is fun!)
3kg unsanded Terracotta grout
Terracotta cement colour (makes the grout a much richer red colour!)
Acrylic paints.... (Black, browns, reds, grey...)
Non toxic PVA Mixed with water
Well Rinsed Sand
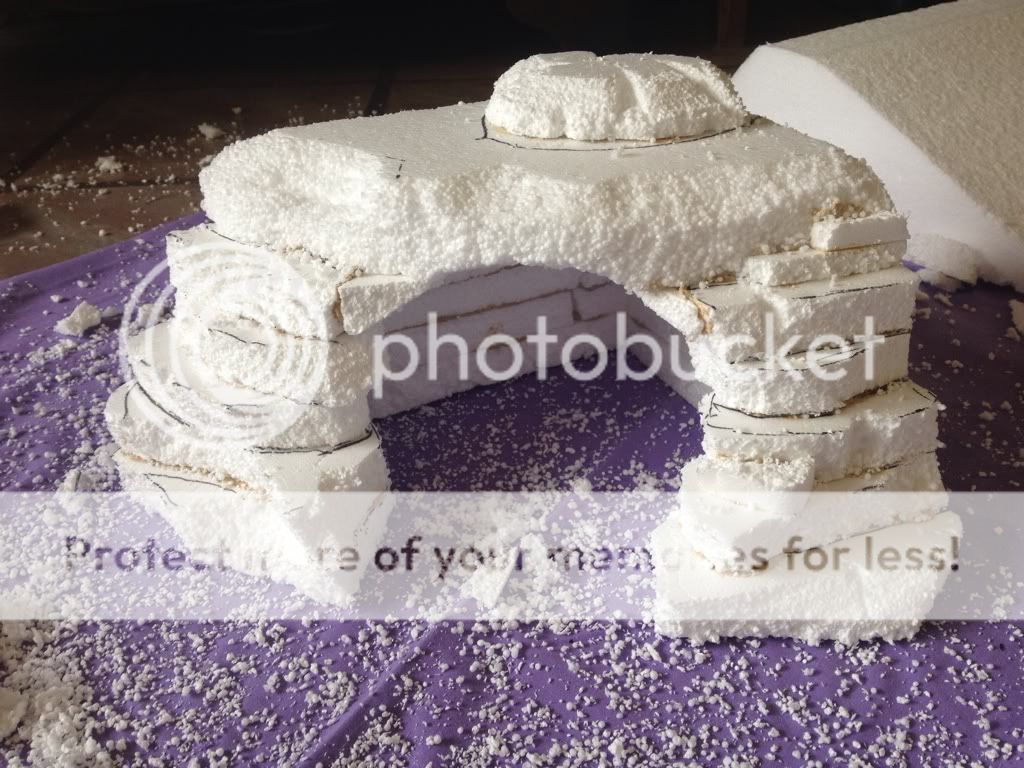
So basically this is what it looked like to begin with... After this I also filled all of the gaps with expandable foam. (I don't have a picture of this. I later broke off the pieces of expandable foam that I didn't need on the rock. Expandable foam can give your rock more curvy lumps and bumps but that was not the image I wanted for this rock)
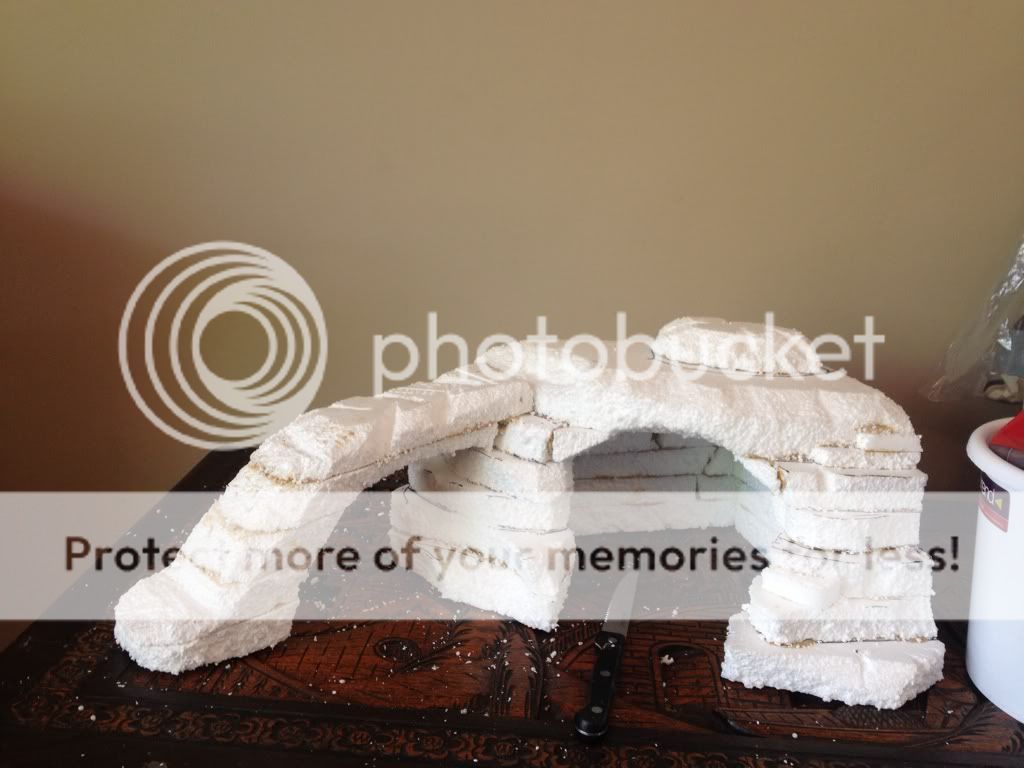
After it was put together I let the glue set... I also used my fingers to add detailing to the foam. I also held it together with 20 or so toothpicks.
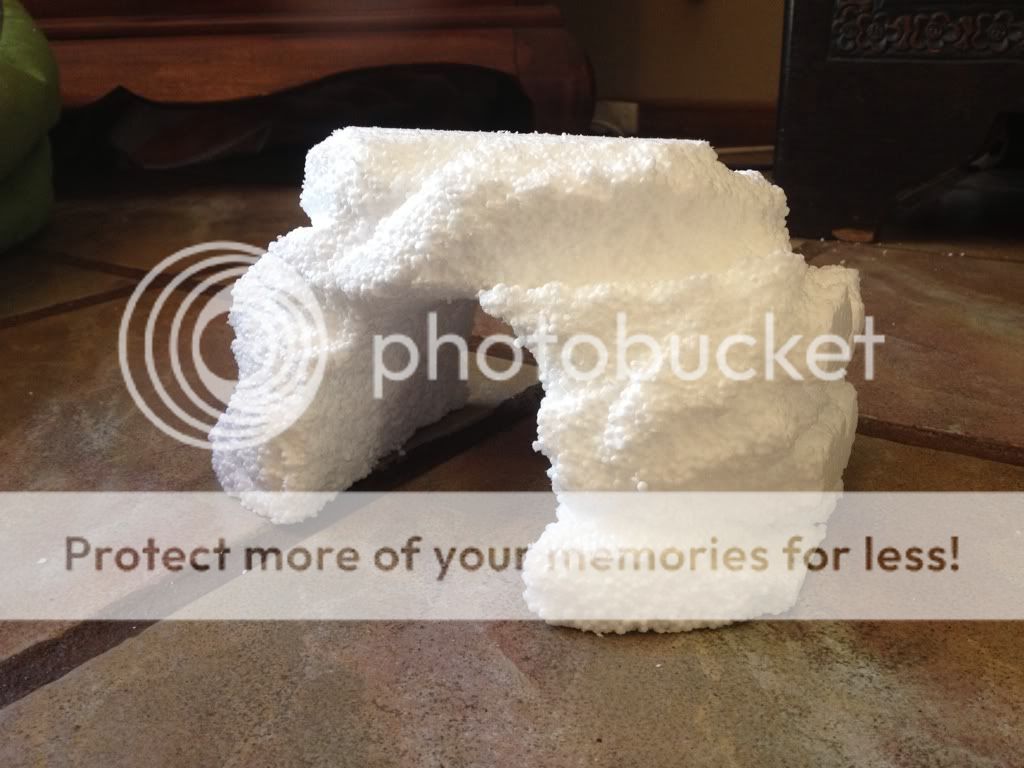
My seperstely rock ... I decided to make it a hide and carved a hole down the center
This is after a few coats of grout. I mixed the grout and the cement colour together for every layer to avoid blotchy dark and light spots... Getting thicker each time!
So after that stage was when I used my acrylic paints to add a few shadows and highlights to the rocks. I wanted it to look a bit more real and not all "red" colour. I used dark brown and grey tones on the crevices mainly just to give it a bit extra oomph
This is when I sealed the rocks... I have lost count how many times but about 4-6 times... This was with 50/50 PVA and water mix. Just before the last coat I sprinkled a little sand over the rocks. The last coat I used 100% PVA.
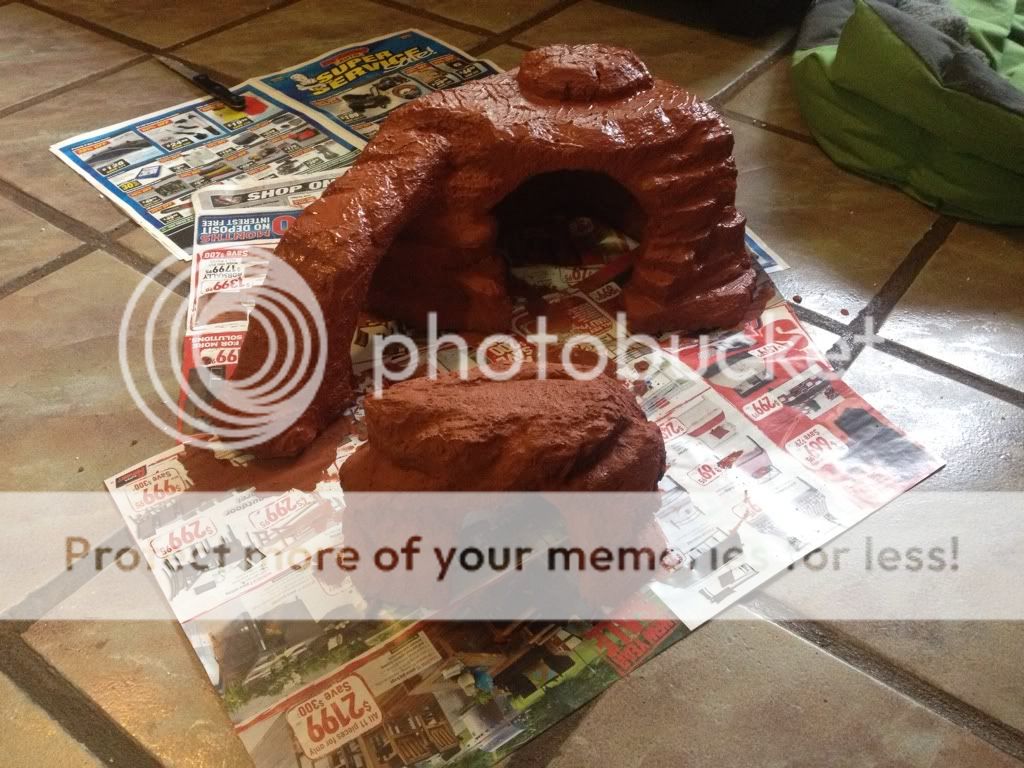
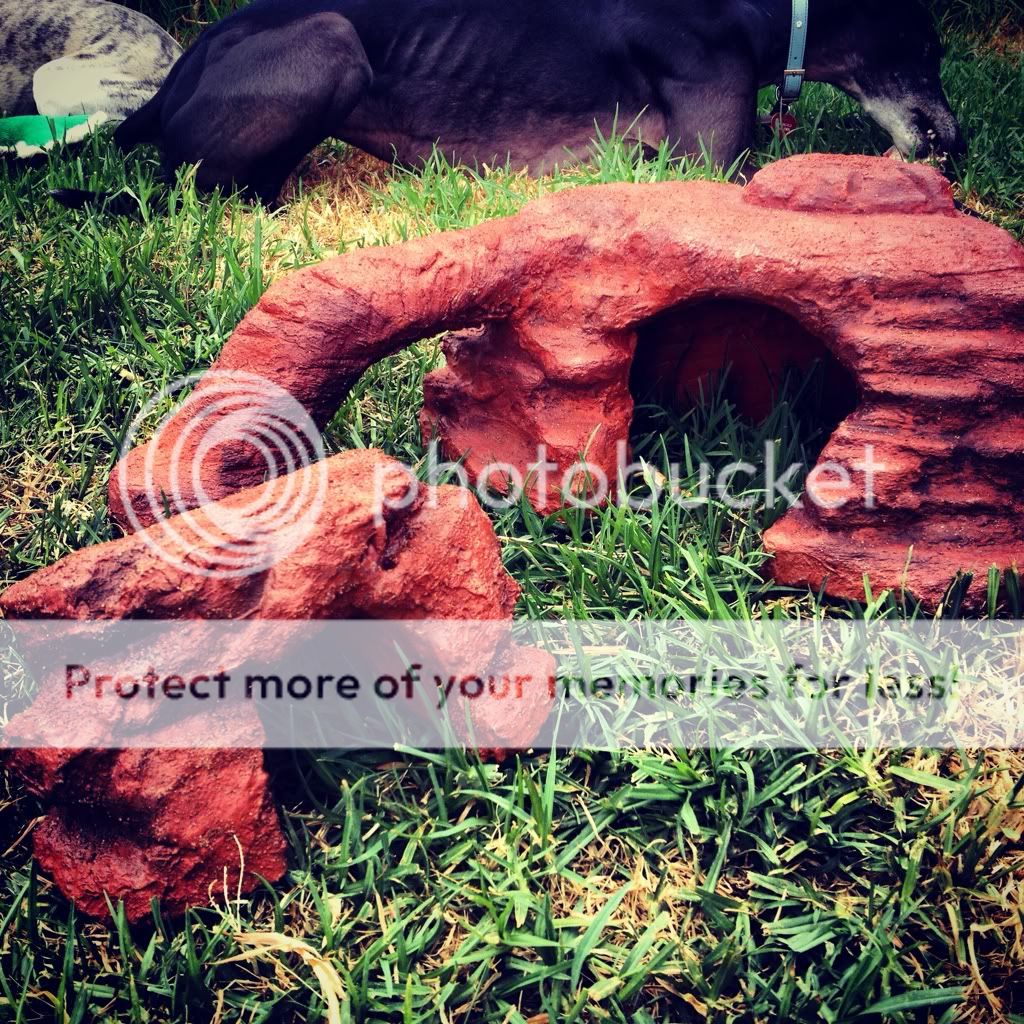
This is the finished product!!!!!
How did I do??? I am very happy with it!! My bearded dragon is still at least 3 or 4 months away...
What I used:
Styrofoam
Liquid nails
Tooth picks
Can of non toxic expandable foam(this stuff is fun!)
3kg unsanded Terracotta grout
Terracotta cement colour (makes the grout a much richer red colour!)
Acrylic paints.... (Black, browns, reds, grey...)
Non toxic PVA Mixed with water
Well Rinsed Sand
So basically this is what it looked like to begin with... After this I also filled all of the gaps with expandable foam. (I don't have a picture of this. I later broke off the pieces of expandable foam that I didn't need on the rock. Expandable foam can give your rock more curvy lumps and bumps but that was not the image I wanted for this rock)
After it was put together I let the glue set... I also used my fingers to add detailing to the foam. I also held it together with 20 or so toothpicks.
My seperstely rock ... I decided to make it a hide and carved a hole down the center
This is after a few coats of grout. I mixed the grout and the cement colour together for every layer to avoid blotchy dark and light spots... Getting thicker each time!
So after that stage was when I used my acrylic paints to add a few shadows and highlights to the rocks. I wanted it to look a bit more real and not all "red" colour. I used dark brown and grey tones on the crevices mainly just to give it a bit extra oomph
This is when I sealed the rocks... I have lost count how many times but about 4-6 times... This was with 50/50 PVA and water mix. Just before the last coat I sprinkled a little sand over the rocks. The last coat I used 100% PVA.
This is the finished product!!!!!
How did I do??? I am very happy with it!!
My bearded dragon is still at least 3 or 4 months away...
