ncmomof2
Member
Materials
¾” foam like this http://www.lowes.com/pd_42729-236-2...pl=1¤tURL=/pl__0__s?Ntt=foam&facetInfo=: I liked this foam better than polystyrene becaue it wasn't made of little balls and so was easier to carve and made some less mess :?
re-used packaging foam (looked like expandable foam)
premixed sanded grout
gorilla wood glue
hot glue & gun
Rust-oleum American Accents Stone paint (sienna) (I saw this kind of paint at Home Depot, Lowes, and Walmart)
I mostly followed the instructions here (http://www.beautifuldragons.com/Furniture.html) but used Slave2Scarlett’s idea for using diluted gorilla glue as a sealant (http://www.beardeddragon.org/forums/viewtopic.php?f=75&t=145169) and some other substitutions for materials due to changes in availabilty.
I had a rough idea of what I wanted: something that looked like a pile of rocks that was climbable to provide a high basking spot, had a couple of layers of caves to hide in, and a low basking spot. I also knew it was going in a 36”x18”x24” viv.
Step 1: Measuring. First I needed to know just how big this thing should be, especially the caves, since I wanted it to work for an adult as well as a baby beardie. So I measured a friend’s adult beardie and worked out how big caves would need to be for her to go in and (hopefully) turn around, and then designed my rock pile to be just a little bigger. Time will tell whether Kunja still fits in the caves when he’s all grown up! :?
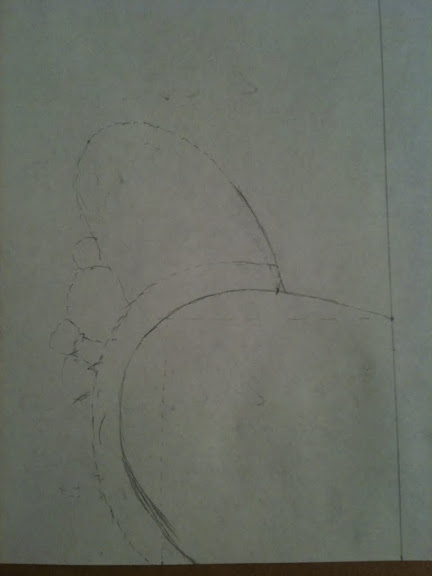
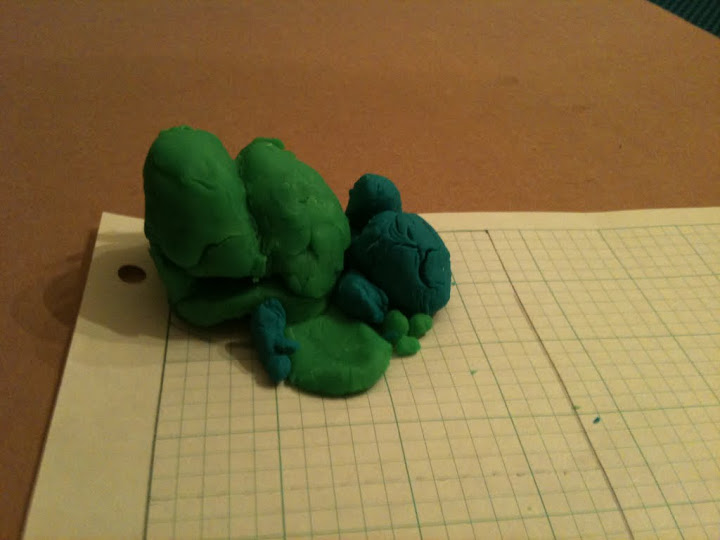
Step 2: Design. On graph paper, I worked out a footprint of the rocks that would allow the caves and lower basking areas to be as big as I’d calculated in step 1. I then tried to draw side and front views of how I wanted it to look, but my brain doesn’t do 3D curves very well. So instead, I made a scale model out of play-doh.
2D footprint
3D play-doh model (built on graph paper so it's to scale)
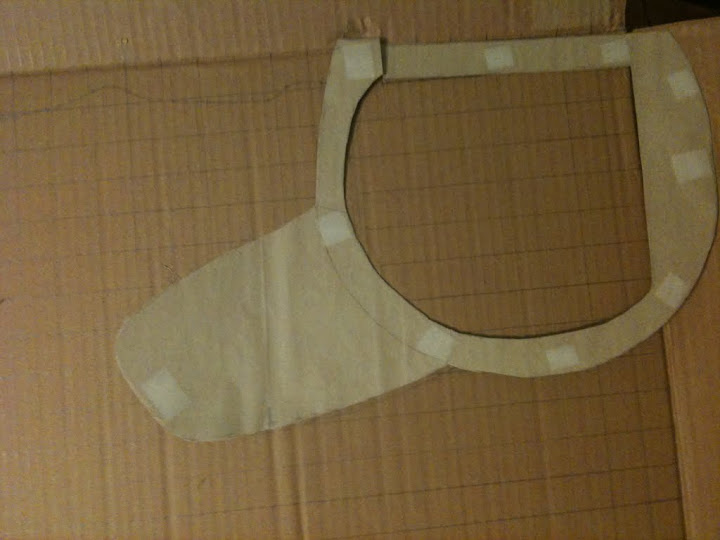
Step 3: Template and cutting. From the footprint design, I drew a template for the layers of foam that I traced onto the foam. After tracing 2 pieces with the extension for the lower basking area, I cut that part off the template for tracing the rest of the layers. For layers that weren’t going to be parts of the caves, I used the same template but didn’t cut out the middle. For layers that were going to have cave openings, I cut out the middle for the cave and the strip between the lower basking extension and the upper left corner for the cave entrance. It was 14 layers in all, but I used the cut out interiors of the caves for the top 4 layers, since they were going to be carved down to small rock tops anyway.
My layer template (on a grid representing the floor of the viv, the part to the right of the fold on the cardboard was supposed to be a 3D peek-a-boo door, but that didn't work, so I made a 2D door instead -- see below).
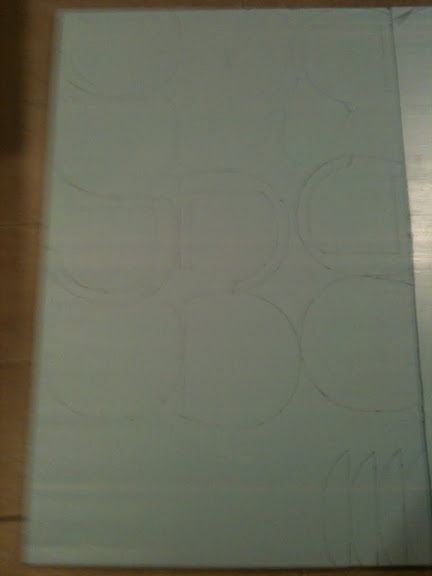
Foam with the templates for all the layers drawn on (this is only about 1/3 of the 4'x8' piece)
All 14 layers stacked up before carving
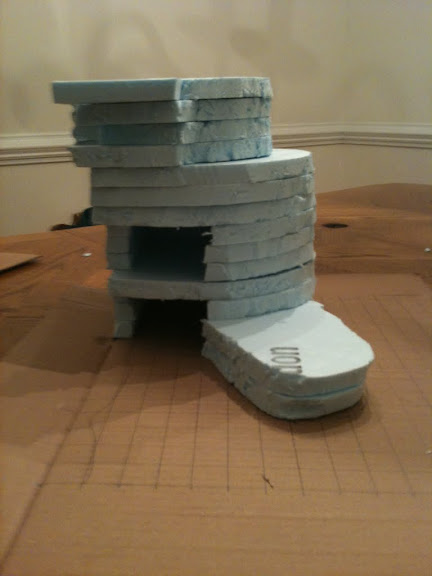
Step 4: Carving and gluing. I found paring and filleting knives to work best for carving the foam. And because I didn’t want to get glue on my knives and I thought it would be easier to replace a layer I destroyed, I carved and then glued. I started with the top layer and worked down, gluing each layer to the one above it as soon as it was carved. This made making the slopes relatively smooth and continuous easier. I used a combination of hot glue and gorilla wood glue to glue the layers together, with some toothpicks for stabilization.
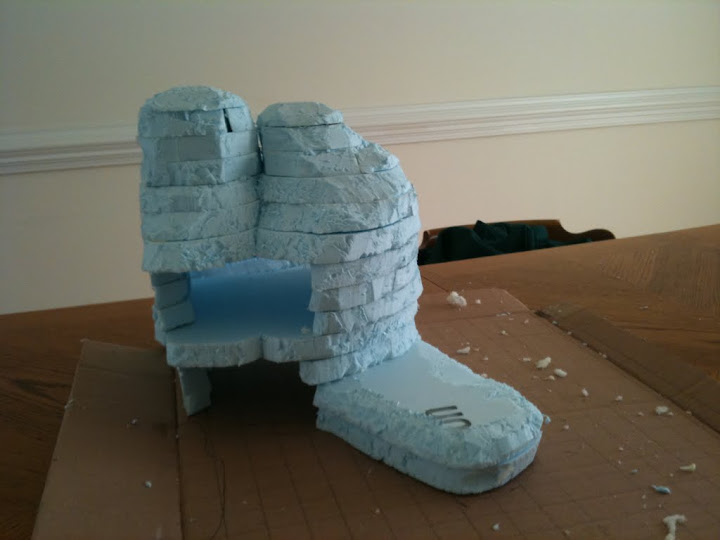
After carving and gluing was complete (looking a lot like a blue igloo here! :shock: )
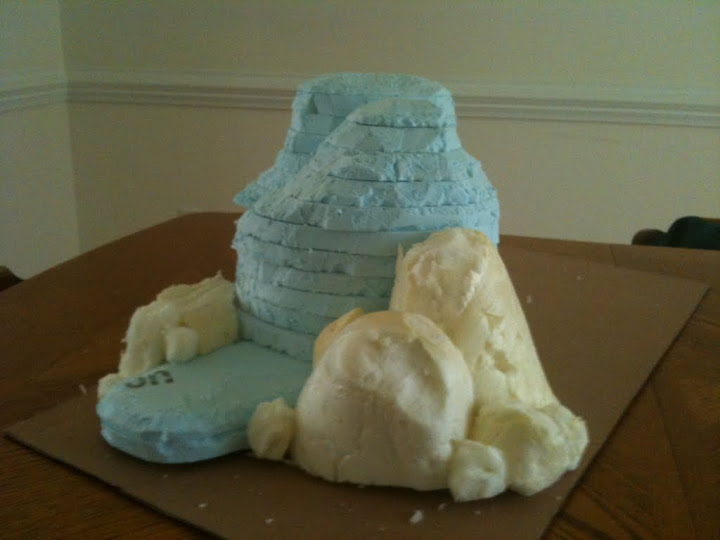
Step 5: Smaller rocks. I carved smaller rocks (for climbing up to the basking spot and upper cave, as well as aesthetics) out of re-used packing foam that I picked up at a free-cycle sort of place. It appeared to be a type of expandable foam. I found that cutting it with scissors was usually the best way to carve it and that it didn’t want to stick with gorilla glue, so these pieces were held in place with hot glue and toothpicks (the grout served to further cement them together).
Extra rocks added
Step 6: Grout. I slathered the grout on with a plastic knife. I think I used 3 applications. I didn't put grout places that didn't need to be more rock-like than the textured paint would make them (like the interior of the caves).
After grouting (really looks like an igloo now!! )

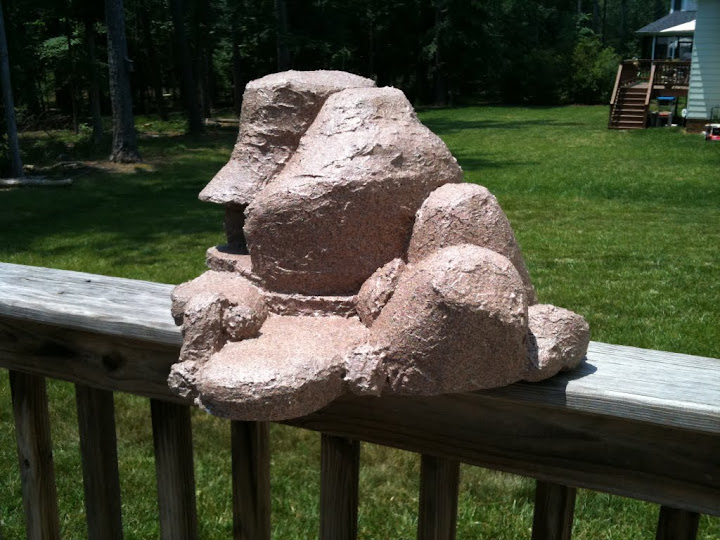
Step 7: Paint and sealer. I put on 2-3 coats of paint depending on how long it took to get complete coverage. I sprayed on a diluted solution of gorilla glue with a spray bottle (about 2/3 glue and 1/3 water worked well for me) and spread it around with a paintbrush to even it out and get all the crevices. I used 4-5 coats of sealer, but I should have stopped after 2-3, because the sealer got so thick that it smoothed out the texture of the paint and got too slick. I had to go back and sand it to roughen it up enough to be climbable.
After paint and sealer (you can kinda see that it looks too shiny and slick... )
Step 8: Curing/drying. I left it outside for most of the day everyday for a week to make sure it was completely dry and had released any fumes it was going to. And I had the lights in the viv shining on it for several days before we put Kunja in as I established the temps. It was completed more than a month before we got our dragon, so it sat in the garage and then in the viv airing for that time as well.
Step 9: Peek-a-boo door. The rocks are designed to sit in the corner of the viv so the side of the rocks is flat to fit against the side of the viv. The caves are open on this side as well as inside the viv where the beardie goes in and out. I made an outside door for this side of the rocks so that mostly it is dark and private in there, but we can peek at Kunja to check on him. To make this door, I traced this side of the rocks onto a cereal box, cut it out, painted it with the textured paint (I didn't bother to seal it, since it would be outside the viv), and attached it to the side of the viv with magnets.
The peek-a-boo door
If I were to do it over, I might try to make the caves with sloping ceilings, so the beardie could wedge himself in if he so desired.
Here is the completed project in the viv
Kunja sleeping mostly in the lower cave his first night with us

Kunja basking up top
¾” foam like this http://www.lowes.com/pd_42729-236-2...pl=1¤tURL=/pl__0__s?Ntt=foam&facetInfo=: I liked this foam better than polystyrene becaue it wasn't made of little balls and so was easier to carve and made some less mess :?
re-used packaging foam (looked like expandable foam)
premixed sanded grout
gorilla wood glue
hot glue & gun
Rust-oleum American Accents Stone paint (sienna) (I saw this kind of paint at Home Depot, Lowes, and Walmart)
I mostly followed the instructions here (http://www.beautifuldragons.com/Furniture.html) but used Slave2Scarlett’s idea for using diluted gorilla glue as a sealant (http://www.beardeddragon.org/forums/viewtopic.php?f=75&t=145169)
and some other substitutions for materials due to changes in availabilty.I had a rough idea of what I wanted: something that looked like a pile of rocks that was climbable to provide a high basking spot, had a couple of layers of caves to hide in, and a low basking spot. I also knew it was going in a 36”x18”x24” viv.
Step 1: Measuring. First I needed to know just how big this thing should be, especially the caves, since I wanted it to work for an adult as well as a baby beardie. So I measured a friend’s adult beardie and worked out how big caves would need to be for her to go in and (hopefully) turn around, and then designed my rock pile to be just a little bigger. Time will tell whether Kunja still fits in the caves when he’s all grown up! :?
Step 2: Design. On graph paper, I worked out a footprint of the rocks that would allow the caves and lower basking areas to be as big as I’d calculated in step 1. I then tried to draw side and front views of how I wanted it to look, but my brain doesn’t do 3D curves very well.
So instead, I made a scale model out of play-doh.2D footprint
3D play-doh model (built on graph paper so it's to scale)
Step 3: Template and cutting. From the footprint design, I drew a template for the layers of foam that I traced onto the foam. After tracing 2 pieces with the extension for the lower basking area, I cut that part off the template for tracing the rest of the layers. For layers that weren’t going to be parts of the caves, I used the same template but didn’t cut out the middle. For layers that were going to have cave openings, I cut out the middle for the cave and the strip between the lower basking extension and the upper left corner for the cave entrance. It was 14 layers in all, but I used the cut out interiors of the caves for the top 4 layers, since they were going to be carved down to small rock tops anyway.
My layer template (on a grid representing the floor of the viv, the part to the right of the fold on the cardboard was supposed to be a 3D peek-a-boo door, but that didn't work, so I made a 2D door instead -- see below).
Foam with the templates for all the layers drawn on (this is only about 1/3 of the 4'x8' piece)
All 14 layers stacked up before carving
Step 4: Carving and gluing. I found paring and filleting knives to work best for carving the foam. And because I didn’t want to get glue on my knives and I thought it would be easier to replace a layer I destroyed, I carved and then glued. I started with the top layer and worked down, gluing each layer to the one above it as soon as it was carved. This made making the slopes relatively smooth and continuous easier. I used a combination of hot glue and gorilla wood glue to glue the layers together, with some toothpicks for stabilization.
After carving and gluing was complete (looking a lot like a blue igloo here! :shock: )
Step 5: Smaller rocks. I carved smaller rocks (for climbing up to the basking spot and upper cave, as well as aesthetics) out of re-used packing foam that I picked up at a free-cycle sort of place. It appeared to be a type of expandable foam. I found that cutting it with scissors was usually the best way to carve it and that it didn’t want to stick with gorilla glue, so these pieces were held in place with hot glue and toothpicks (the grout served to further cement them together).
Extra rocks added
Step 6: Grout. I slathered the grout on with a plastic knife. I think I used 3 applications. I didn't put grout places that didn't need to be more rock-like than the textured paint would make them (like the interior of the caves).
After grouting (really looks like an igloo now!!
)
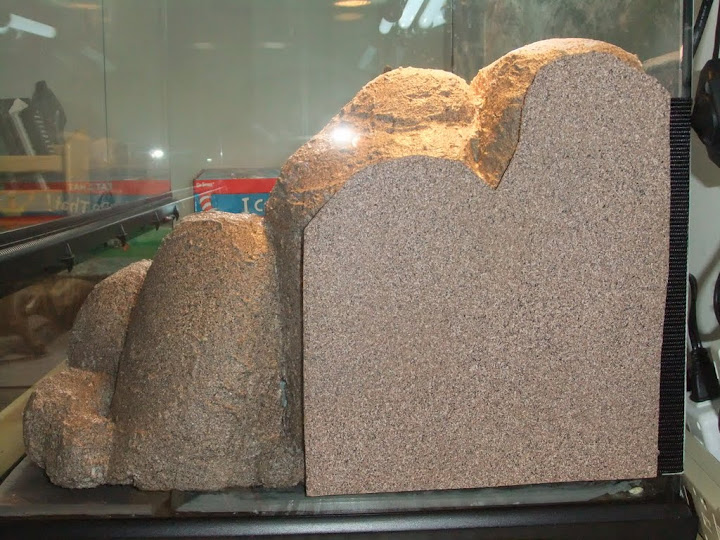
Step 7: Paint and sealer. I put on 2-3 coats of paint depending on how long it took to get complete coverage. I sprayed on a diluted solution of gorilla glue with a spray bottle (about 2/3 glue and 1/3 water worked well for me) and spread it around with a paintbrush to even it out and get all the crevices. I used 4-5 coats of sealer, but I should have stopped after 2-3, because the sealer got so thick that it smoothed out the texture of the paint and got too slick. I had to go back and sand it to roughen it up enough to be climbable.
After paint and sealer (you can kinda see that it looks too shiny and slick...
)
Step 8: Curing/drying. I left it outside for most of the day everyday for a week to make sure it was completely dry and had released any fumes it was going to. And I had the lights in the viv shining on it for several days before we put Kunja in as I established the temps. It was completed more than a month before we got our dragon, so it sat in the garage and then in the viv airing for that time as well.
Step 9: Peek-a-boo door. The rocks are designed to sit in the corner of the viv so the side of the rocks is flat to fit against the side of the viv. The caves are open on this side as well as inside the viv where the beardie goes in and out. I made an outside door for this side of the rocks so that mostly it is dark and private in there, but we can peek at Kunja to check on him. To make this door, I traced this side of the rocks onto a cereal box, cut it out, painted it with the textured paint (I didn't bother to seal it, since it would be outside the viv), and attached it to the side of the viv with magnets.
The peek-a-boo door
If I were to do it over, I might try to make the caves with sloping ceilings, so the beardie could wedge himself in if he so desired.
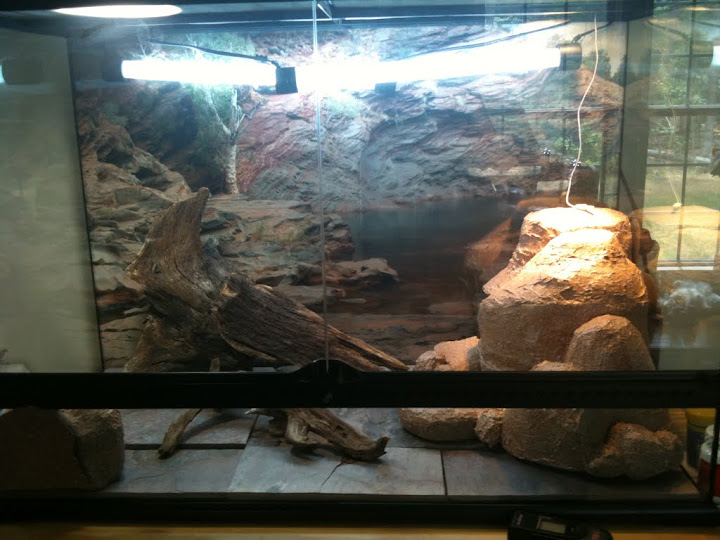
Here is the completed project in the viv
Kunja sleeping mostly in the lower cave his first night with us
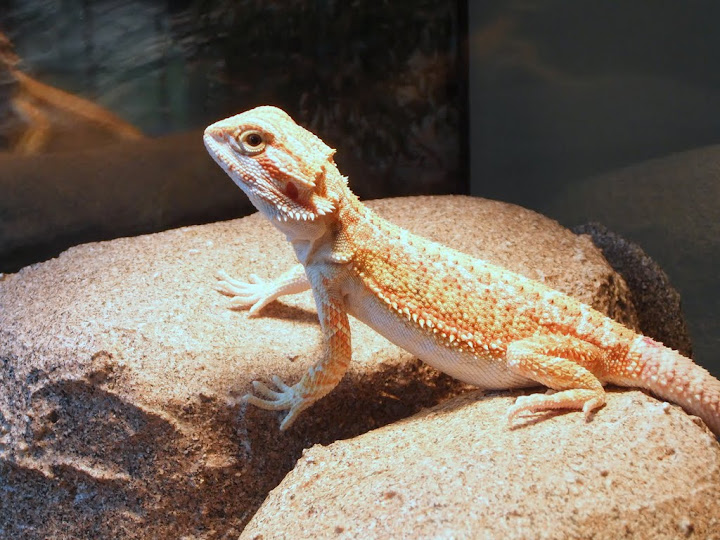
Kunja basking up top

